Friday, December 31, 2010

Gooey Prune Cake

Happy Birthday To Me!

Yep. I'm the big 3-2 today. An unremarkable birthday indeed, but still worthy of a cake, right? Maybe even an ooey-gooey subtly-spiced melt-in-your-mouth Americanized (and dare I say improved) version of sticky toffee pudding, every anglophile sweet-tooth's nirvana? Well, fortunately I get to answer my own questions here (it's my birthday after all) and my answer in oversized capital letters is: YES.

This is basically an adaptation of The Pioneer Women's Prune Cake recipe from a couple of Christmases ago. For a handful of reasons which I am about to describe, I was reluctant to share this recipe (and in fact documented the endeavor photographically only just in case, well aware the whole time that I was perhaps being overly ambitious). For the same about-to-be-described reasons, I encourage you to go ahead and just make The Pioneer Women's version without even consulting my recipe, since you probably aren't as super keen on buying and experimenting with alternative sweeteners as I am. And I'm sure the original recipe is perfect as is. I knew that when I read the recipe, and that's why I knew it would hold up against the experimentation I was contemplating when I made it. The experimentation involved using brown rice syrup instead of sugar to sweeten the cake. And being the skilled and dedicated researcher that I am, I learned that brown rice syrup is only about half as sweet as sugar, which means you need to use a good deal more of it to get a cake that will actually satisfy an anglophile sweet-tooth. I also read that the substitution of brown rice syrup for sugar requires an adjustment in leavening agents and a reduced amount of wet ingredients, and it might make the edges of your cake crispier than you'd like. I also used whole wheat pastry flour instead of regular flour. Needless to say, when I tasted the batter I was apprehensive - it tasted earthy and not especially sweet. And yet I plowed on, committed to an exploration of the world without sugar. Until I ran out of brown rice syrup, right before I made the caramel glaze (that soaks through the entire thing and makes it the amazing ooey-gooey cake that it is). The result: a perfectly not-too-sweet cake drenched in perfectly sweet caramel. Yes. I'm going to go ahead and call this cake perfect. I'm sure the Pioneer Woman's is awesome, but I might just find it too sweet after tasting this more subtle, subdued, gloriously gooey version. And that's why I'm posting about it, despite the fact that the recipe is totally weird. Sometimes weird makes for perfect. And anyway there are loads of weird recipes out there that pique my interest on a daily basis. I'm just joining the club by posting one myself.

Also it's my birthday.

prune cake ingredients
caramel
"glazed"
piece of gooey deliciousness

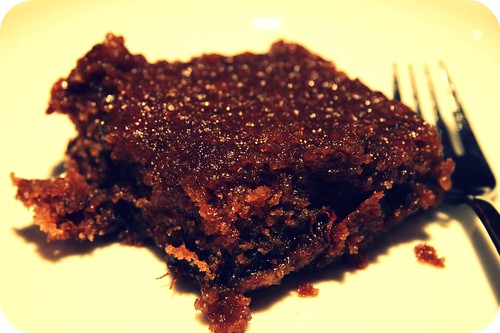
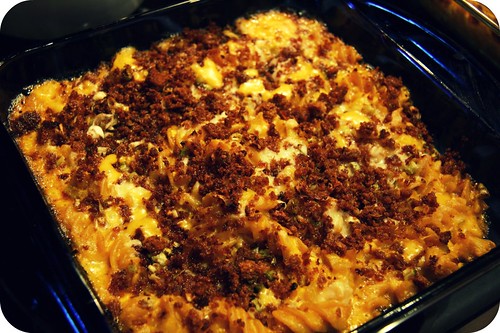
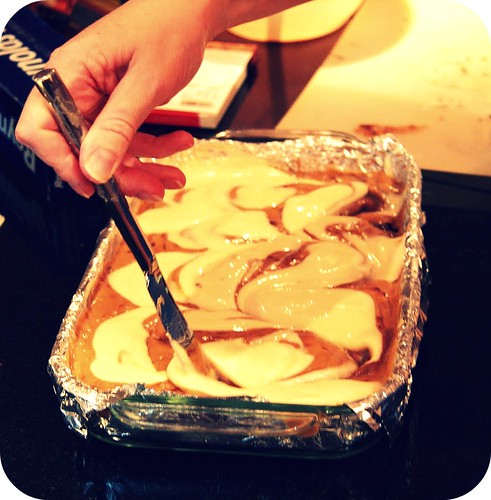
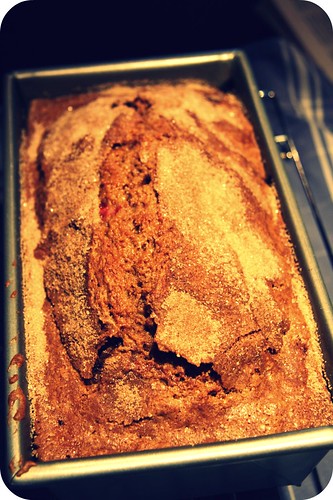
Do you see all that shiny magical gooeyness? It's PERFECT. Irresistible really. So freaking delicious. You should seriously make this. Brown rice syrup and all.

Gooey Prune Cake
Adapted from The Pioneer Woman
Yield: a 13X9" pan's worth - 12-20 servings?

For the cake
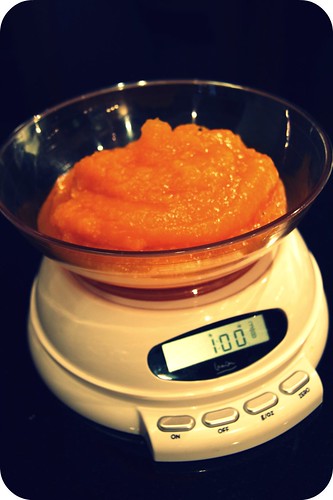
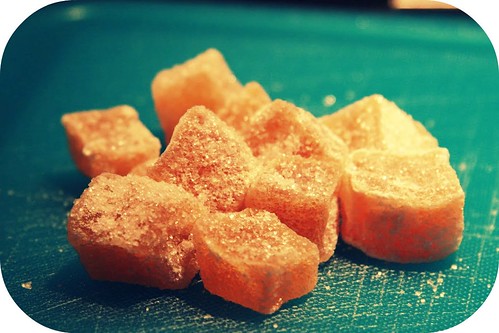
1 cup prunes (I'm sure dates would work fine too)
1 1/4 cups brown rice syrup
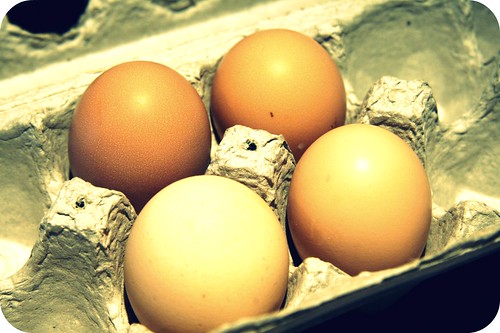
3 eggs
3/4 cup grapeseed oil
1 1/2 cups whole wheat pastry flour
1 1/2 teaspoons baking soda
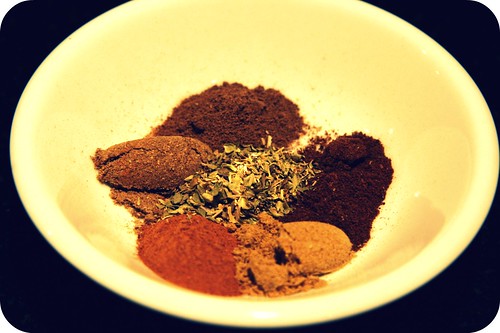
1 1/2 teaspoons cinnamon
1 teaspoon allspice
1/2 teaspoon nutmeg
2/3 cup buttermilk
1 teaspoon vanilla

For the caramel
1 cup sugar
1/2 cup buttermilk
½ teaspoon baking soda
1 tablespoon brown rice syrup
1/4 cup butter
1 teaspoon vanilla

Preheat oven to 300 degrees. Grease a 9 X 13" baking dish.

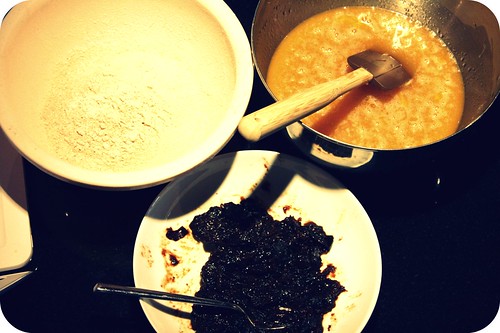
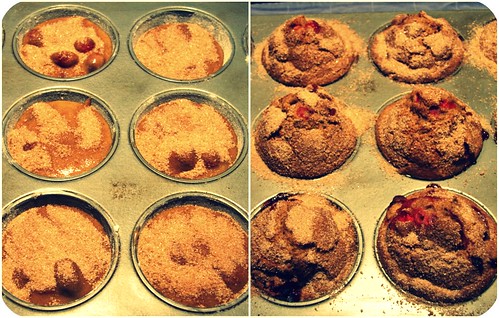
Place the prunes in a small saucepan and cover with water. Bring to a boil over medium heat and cook until soft and mashable, about ten minutes. Remove from heat, drain water, mash the prunes and set aside.

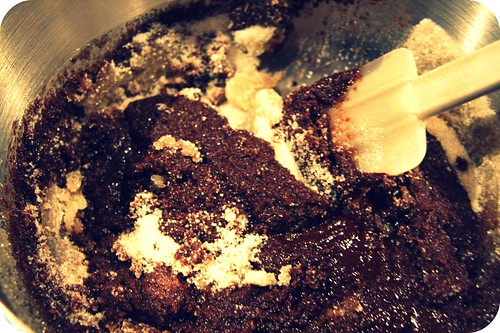
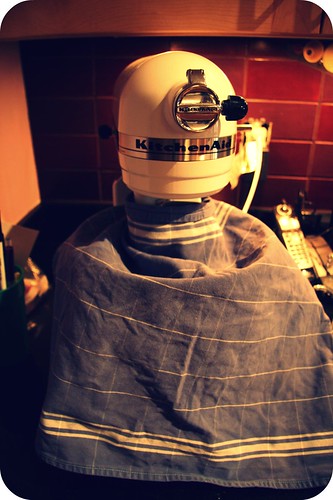
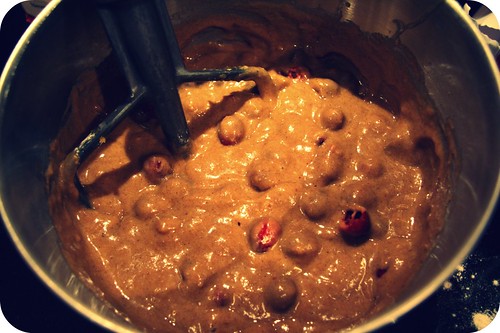
In a large mixing bowl, combine the oil, brown rice syrup, and eggs. In a separate bowl, whisk together the dry ingredients. Pour the dry ingredients into the wet ingredients and stir a bit, until most of the flour is incorporated. Add buttermilk and vanilla and stir gently until just combined. Add the mashed prunes and stir gently to combine.

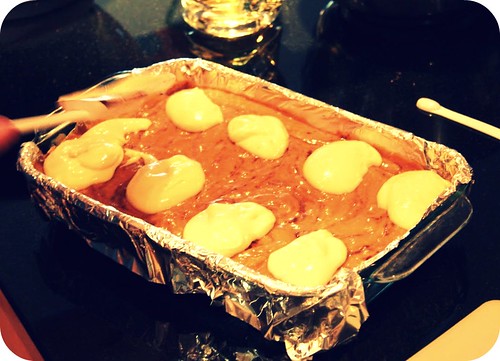
Pour batter into buttered baking dish and bake for about 40 minutes.

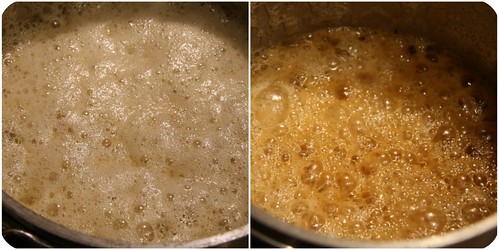
After the cake has been baking for about 30 minutes, combine all the caramel ingredients in a medium saucepan placed over medium heat and bring to a slow boil. Boil without stirring for 5 to 7 minutes - this is scary but it will be fine, just keep an eye on it and don't let it boil over - or until caramel starts to darken. As soon as the caramel gets to be a golden brown and thickens a bit but is still v. pourable, remove from heat. You ideally will have timed this to happen right when the cake is done.

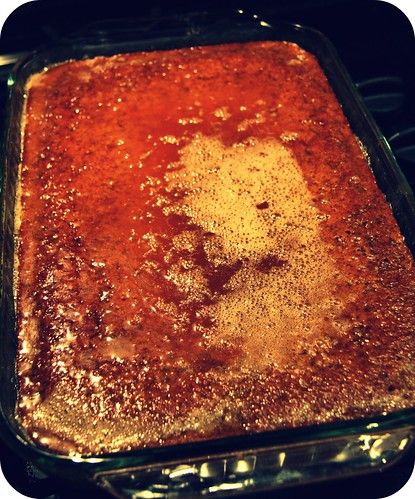
Remove cake from oven and drizzle the caramel on top immediately. (Even though the cake didn't look particularly "sunken", my caramel pooled in the middle at first, but it soaked into the cake so promptly that I just put on my oven mits, grabbed both handles on the pan, and tilted it every which way until the caramel was evenly distributed.) Allow cake to cool and caramel to soak in for about a half hour before cutting it. Nice warm but no less nice cold. We are still enjoying it on day 4, unrefrigerated. I'll probably put what's left in the freezer tomorrow.

Tuesday, December 28, 2010

Damn Good Chili

Not much of a preface today. Just some chili. Some damn good chili, that is. Which doesn't need much of an intro, you know? There is nothing terribly unique or special about this chili except that it is exactly what you want chili to taste like and/or hope chili will taste like any time you order it on a menu or go to a chili cook-off (these do exist, although I've never been to one). Super traditional. Of the thick, sticks-to-yer-ribs variety. Moderately spicy (but easy to adjust in either direction on the spice-o-meter). Delicious on day 1 but improves (and gets spicier) with age. Great for a crowd: easily doubled or tripled (if you have a pot big enough). Perfect in snowy winters. Good over white rice, which is how I always ate chili growing up but I've since learned that this is not really the normal way to have chili. My mom is Colombian though, and Colombians like rice. Colombians are also v. good-looking.

chili spices
chili brewing
accoutrements
bowl o chili

The trick to damn good chili: a lot of damn good spices.

Damn Good Chili
Serves 4-5
From yours truly, heavily influenced by mi madre

1 tablespoon olive oil
About 2 cups finely chopped white or yellow onion (1 large or 2 small onions)
3-4 garlic cloves, finely chopped
2 heaping tablespoons chili powder
1 heaping tablespoon ground cumin (or more)
1 teaspoon ground coriander
1 teaspoon dried oregano
3/4 teaspoon salt
1/2 teaspoon red pepper flakes (more or less to alter spice profile)
1/4 teaspoon cayenne pepper (more or less to alter spice profile)
1 pound ground beef (or turkey or bison or whatever)
2 cups cooked, drained beans (kidney would be traditional option (2 cans); I like pinto beans and some hominy)
1 28-ounce can diced tomatoes with juice
2 tablespoons tomato paste
1 12-ounce bottle of beer (I've used EPA lately, but any beer will do)
Juice from one lime (2-3 tablespoons)

To serve: quartered limes, grated cheddar or jack cheese or queso fresco, avocado, Saltines, sour cream, fresh cilantro, minced red onion or shallot or scallion, plain cooked rice, corn bread, etc.

Whisk together all your spices in a mini prep bowl. Heat oil in a large Dutch oven over medium heat until shimmering. Add the onions, garlic, spices and salt, and cook, stirring occasionally, until the onions are softened and beginning to brown, about 5-7 minutes.

Increase the heat to medium-high and add the ground beef. (If you are doubling or tripling the recipe, just brown one pound at a time - that will make it go more quickly and smoothly and will prevent any burning of the spices.) Cook, breaking up the pieces with a heat-proof spatula or wooden spoon, until there is no pink left and the meat is browning nicely (about 3 minutes).

Add the beans, tomatoes with juice, tomato paste, and beer. Bring to a boil, then reduce the heat to low and simmer, covered, stirring occasionally, for an hour. Remove the lid and simmer for an hour more. If the chili seems to dry out at all during the two hours of simmering, add a little water. Remove from heat and stir in the lime juice. Taste and season with salt and pepper if necessary. Serve with any of the above-mentioned condiments.

Notes: Freezes well. Stays good in refrigerator for at least five days. Reheat thawed chili in microwave or on stove. Add a little water or beer to thin it out if necessary - the flavor will withstand this and it won't taste watered down at all. Promise.

Thursday, December 23, 2010

Peppermint Chocolate Crinkles

I'd be a horrible food blogger if I didn't squeeze in a Christmas cookie, wouldn't I? I mean, we foodies pride ourselves on the myriad things we can accomplish with some flour, sugar, and butter (or oil, on occasion - the occasion described herein, for instance), and what better time to do that than Christmas? Baby Jesus wouldn't have it any way. Right?

And with that food for thought...

(oh the puns I would try to make right about now if I were punny!) ...

I will just jump right into the description and adaptation of one of my favorite (definitely top three anyway) Christmas cookies. A cookie my mom made just about every holiday season and sometimes off-season as well, because she had five children and a mom has to choose her battles.

Allow me to introduce you to THE CHOCOLATE CRINKLE.

crinklicious

Or perhaps you've already met. She's cute, eh? Chocolatey. Cakey. Festive. Gooey if you do it right. An American favorite, really. From Betty Crocker's kitchen to yours. With love.

cooky book

(Btw, that there Cooky Book is just about the best cookbook ever if you're up for a cookie-baking frenzy. Some others might be more popular or more contemporary, they might not use eggs in their bar cookies that require chilling rather than baking, they might not glorify the shortcut called "boxed cake mix", but they're also not what you and me and everyone we know grew up on. And I prefer a cookie that brings me back a bit. Especially around the holidays.)

So what could I add to these little morsels of nostalgia?

What could make them more decidedly festive and delicious than real chocolate, two cups of sugar, four eggs, and a final coat of powdered sugar?

crinkles batter
eggs

Well, not much, I assure you. But my in-laws have a thing for all things mint + chocolate, and I've kind of jumped on the bandwagon over the years. Plus I was out of all-purpose flour. So what I have to contribute to Betty Crocker's legacy today are the following: (a) whole wheat pastry flour; and (b) peppermint extract. They both worked out quite nicely.

peppermint extract

The result is something akin to the hypothetical offspring of your mom's chocolate crinkles and some After Eights. And now I am spending my Christmas Eve Eve sorting through years of intercontinental reminiscence.

crinkles prebaked
baked crinkles

With the help of my little bite-sized enablers, of course.

Anyway. I think you'll really like these. Happy Christmas, darlings.

Peppermint Chocolate Crinkles
Yield: 5 dozen (if you actually make them bite-sized, per directions below)

1/2 cup grapeseed oil, or other mild-flavored vegetable oil
4 ounces unsweetened chocolate, melted
2 cups sugar
4 eggs
3/4 teaspoon peppermint extract
2 cups all-purpose or whole wheat pastry flour
2 teaspoons baking powder
1/2 teaspoon salt
1 cup powdered sugar

In a large mixing bowl, stir together the oil, unsweetened chocolate, and sugar. Add in the eggs one at a time, stirring well after each. Stir in the peppermint extract. Add the flour, baking powder, and salt. Stir until everything is well-mixed. Chill in the refrigerator for several hours or overnight. When ready to bake, preheat oven to 350 degrees. Lightly grease a baking sheet, or line it with parchment paper or a silpat. Using one teaspoon of dough at a time (this is small - like a walnut), form balls with your hands and roll in the powdered sugar until thoroughly coated. Place on prepared baking sheet and bake for 8-10 minutes. Allow to cool as long as you can and then devour, remembering all your Christmases past with a little happy tear in your eye.

Thursday, December 16, 2010

Savory Carrot Pie

Well, hello! And sorry for the gap. I don't even have a good excuse. I was snowed in for 24 hours and still didn't manage to share any of my recent foodie updates with you. I have a kind of lame excuse though, in lieu of a good one: I was waiting to make and document something sweet to be the topic of this post, as I thought we were due for a treat after two savories, a breakfast item, and a recycled post. (I am methodical, you see. I have a vision. I am quite inclined to be organized when there's an occasion for it.) To that end, I actually did make two sweet things. But here's the deal: the first one was a pineapple upside-down cake for a bridal shower that I had to leave early, so I never got to try it and felt accordingly ill-equipped to write about how awesome it was (even though it did look and smell quite nice). The second one was absolutely, indescribably, addictively wonderful, but it's already appeared several places on the internet - here and here, for instance - and I didn't feel I had anything to add to the movement, though joining was extremely edifying. (I encourage you all to make it. But heed what was said at the Smitten Kitchen site: it is like crack. Knowing my own weakness for a well-done sweet + salty treat, I made a quarter batch and am so glad I had such foresight. It came in handy where self-restraint eluded me.)

carrot prep
carrot pie slice

So here we are. I'm the one talking about savory carrot pie and you're the one wishing I'd had a slice of the pineapple upside-down cake.

The good news is this: this dish is so great! It's really quite hearty, definitely suitable for a dinner main, probably with a side salad or cup of soup, like you'd get with quiche at a restaurant. It's fairly easy to make, particularly if you have a food processor. (I love my food processors. And yes, I mean "processors", plural, because I have two: a small and a huge one. The small one was used here.) The pie crust involved my first foray into the world of yeast (I had to start easy because I have a phobia) and it went v. well! In fact, I made pizza last night with a different crust recipe (a comparably easy one) and, while that one will do for thin-crust pizzas in the future, the one described herein is much fluffier, and I am going to use it for pizza crust the next time I make pizza, because I sometimes really like a thicker crust and because it was really great in the carrot pie and I'm eager to see how it would hold up elsewhere. Other positives: it's healthy (lots of nutrients, a decent amount of protein for a vegetarian meal, and less than 600 calories in a serving equivalent to a quarter of the pie - which would be a big slice; we ate sixths); it's unique (kind of sweet, yet just savory enough to be aforementioned "dinner main"); it's seemingly adaptable (I suspect broccoli, cauliflower, sweet potatoes, or winter squash could easily replace the carrots); it's attractive (in a rustic kind of way); and babies like it (at least mine did).

rolled crust
unbaked carrot pie
baked carrot pie

One quick tip before I get to the recipe, for those of you with a food processor: grate your parmesan in the food processor!

cuisinarted cheese

I shred vegetables and potatoes and fruit all the time using the grater blade, but was always afraid of trying cheese... until recently I was complaining about the length of time it took me to shred mozzarella for FOUR lasagnas I was making for a bridal shower (I know a lot of brides) and the victim of my rant, after listening patiently and nodding in empathy, suggested that I use a food processor. I took her advice and IT TOOK FIVE SECONDS. Literally. And then I just put the bowl and blade on the top rack of the dishwasher, so I can't even argue that the cleaning time cut against any saved grating time. (Go ahead and judge me. The blade hasn't dulled noticeably in 6.5 years.) I would suggest, however, if grating a softer cheese (like, say, mozzarella), placing it in the freezer for 10-15 minutes before putting it in the food processor.

And now to the recipe!

Savory Carrot Pie
Adapted from Almost Vegetarian, an odd little cookbook gifted to me by my mother when I left for college, at which time I was, fittingly, almost vegetarian
Yield: 4-6 servings

Pie Crust
1 teaspoon active dry yeast
1/3 cup lukewarm water
1/2 teaspoon sugar
3/4 cup all-purpose flour
3/4 cup whole wheat pastry flour
1 teaspoon salt
1 egg, lightly beaten
3 tablespoons buttermilk (or sour cream or plain yogurt)

Filling
3/4 pound carrots, scrubbed clean and sliced into 1/2" chunks
2 bay leaves
2 teaspoons grated fresh ginger (or jarred)
1 teaspoon salt
1 teaspoon lemon zest (I used this dried kind) (optional)
1 cup freshly squeezed orange juice (about 3 oranges for me)
2 cups water (approximately)
1/2 teaspoon cinnamon
1/2 teaspoon dried marjoram
Pinch freshly grated nutmeg
1 egg, lightly beaten
1 cup ricotta cheese
2/3 cup grated Parmesan (about 2.5 ounces)

In a small mixing bowl, stir together the yeast and water. In a larger bowl, combine the sugar, flours, and salt. Make a well in the center and add the egg, buttermilk, and yeast-water mixture. Stir with a wooden spoon to make a soft dough. Turn out onto a lightly floured surface and knead until smooth (just about a minute or two). Return the dough to the mixing bowl, cover with a light towel, and place in the warmest spot in your kitchen until it doubles in size, about 45 minutes.

While the dough is rising, start making the filling. First, juice your oranges. In a large saucepan, combine the carrots, bay leaves, ginger, lemon zest, orange juice, and salt. Add enough water so that the carrots are fully submerged. Bring the mixture to a boil over medium-high heat, cover, turn the heat down and simmer until the carrots are almost mushy, but not quite, about 20 minutes.

Now would be a good time to preheat your oven to 400 degrees.

Pick out the bay leaves, strain the carrots, and place them in the work bowl of your food processor. Puree in pulses so it doesn't become watery (you don't want the consistency of baby food, you want some chunks). Transfer carrots to a large mixing bowl and stir in the cinnamon, marjoram, nutmeg, egg, ricotta, and Parmesan. Stir until thoroughly combined. Set mixture aside, covered if the dough or your oven needs some time.

Once the pie dough has risen, roll out the dough until it is about 11-12" in diameter. It will be quite thin. Gently center the dough over a lightly greased pie dish (mine is 9" in diameter) and pile the filling inside. Fold the edges of the crust over and crimp them with your fingers (like in the above pictures). Place the pie in the oven and bake until the crust is deep golden and the filling is set, about 40 minutes. If the crust browns before the filling has set (as mine did), cover loosely with foil, lower the heat to 300 degrees, and continue to bake, checking on it every 5-10 minutes or so.

Allow to cool for about 10 minutes before slicing. Garnish with parsley or a little more freshly grated nutmeg.

Tuesday, December 7, 2010

Ten Posts of Pumpkin: (10) Pumpkin Mac + Cheese

I wanted to make this post the last of my ten pumpkin posts because there is something momentous and meaningful about being last, something that suggests "you've been waiting for this" and screams, "this is the best!" And, well, in a word, the recipe herein is... (drum roll)... the... (escalating drum roll)... BEST. (And that's saying a lot, right? The others weren't half bad.)

plated Pumpkin Mac n Cheese

This recipe is wonderful. Absolutely wonderful. So wonderful that is has been really really really hard for me to hold out on your guys while we worked our way through the nine other posts of pumpkin. Seriously this is so, absolutely, worthy-of-expletives-of-the-favorable-complimentary-variety DELICIOUS. The only thing that kept me going - kept me restlessly mum, rather - was my foresightedness and dedication to making this post all it can be. By which I mean: I froze some and tested out some different thawing methods so that I can offer you not only the best mac & cheese recipe ever, but also a surefire way to freeze and reheat it in the event that you, like me and my husband and baby daughter and fetus, can't eat a giant pan of rich, decadent, super cheesy, delightfully pumpkiny mac & cheese all by ourselves, and accordingly have to freeze it before getting on a plane the next morning.

Man, I go the distance for you people. Or for my bottomless pit of a stomach anyway.

pumpkin mac n cheese prep
Pumpkin Mac n Cheese

Pumpkin Mac & Cheese
Adapted (generously) from Lottie & Doof
Yield: about 8 servings

2 tablespoons bacon fat (or butter)
3 tablespoons butter, divided
2 large leeks, white and pale green parts only, finely chopped (these will wilt down to about half original amount)
1 teaspoon red pepper flakes
3 garlic cloves, finely chopped
3 tablespoons flour
1 1/2 cups whole milk (or a combination of cream and milk)
1 1/2 cups homemade pumpkin purée (or a 16-ounce can of pumpkin)
1 teaspoon Worcestershire sauce (optional)
1 teaspoon dijon mustard (optional)
3 cups coarsely grated sharp cheddar cheese, divided
1 cup Parmesan cheese, grated
1/2 cup ricotta cheese
2 slices whole wheat bread, pulsed in food processor or blender to make breadcrumbs
1/2 cup minced scallions, white and green parts (approximately one bunch)
1 pound fusilli or penne or other comparably sized pasta

Cook pasta according to package instructions until al dente. Drain well.

Melt 2 tablespoons bacon fat or butter in a large pot (I used a dutch oven) over medium heat. Add leeks and sauté until tender, about ten minutes. Add red pepper flakes and garlic, stir for 1 minute. Stir in 2 more tablespoons butter, allow to melt, and then add the flour and stir for a minute. Gradually whisk in milk and then pumpkin. Simmer until thick enough to coat a spoon, about 5 minutes, stirring frequently. Remove from heat and whisk in 2 cups of cheddar, the Parmesan, and the ricotta cheese. Stir in worcestershire sauce and dijon; taste, smile and be impressed with yourself, and season sauce with salt and pepper.

Preheat oven to 375 degrees. Lightly butter one 13X9" glass baking dish, or a similarly sized gratin or casserole dish, or two 8X8" or 9X9" dishes (you can freeze one of them*).

In a large nonstick skillet, melt the remaining tablespoon of butter over medium heat. Add the breadcrumbs and scallions and stir until bread smells and looks toasty, and scallions are crunching up a bit, about 5 minutes. Remove from heat.

Toss the pasta with the pumpkin-cheese sauce and transfer mixture into prepared baking dish(es). Top with remaining cup of cheddar cheese and the breadcrumb-scallion mixture. (You can follow freezing instructions below at this point, if you'd like.) Bake for about 30 minutes uncovered, until the meal is hot all the way through and the topping is golden brown and bubbling. Let sit for at least 5 minutes before serving.

* To freeze, allow mac & cheese to cool. If you have a sealed lid for your pan, go ahead and just cover it with that and stick it in the freezer. If you don't, either cover the pan with plastic wrap followed by aluminum foil, or transfer the mac & cheese into a freezer-safe container with a sealed lid.
To reheat pasta, whether or not it's been baked already, remove lid or plastic wrap and replace with a sheet of aluminum foil. Place in 400-degree oven (or 375-degree, using convection bake setting) and cook for about an hour. Check halfway through and if the mac & cheese looks dry, add enough milk to fill any crevices - I used about a half a cup of milk for my 8X8" pan's worth of pasta - re-cover with foil and continue baking. Once heated through, remove the foil and broil for 5-10 minutes, to recrisp the top. At all stages, keep a close eye on it. Note that the reheated mac & cheese won't be quite as attractive as the freshly baked one, but it will taste just as good. (And it's not that unattractive. Could be served to people you love, easily.)

Monday, December 6, 2010

Ten Posts of Pumpkin: (9) Warm Pumpkin, Pomegranate and Kamut Salad

Kamut? What the heck is kamut?

Well. Let me just tell you: Kamut is a brand of wheat. Literally, it's been branded by an organization called Kamut International Ltd. In addition to being brand-name wheat, it's also organic and allegedly ancient, and when prepared in its whole-grain form, it's higher in protein, complex carbohydrates, and certain minerals (selenium, zinc, and magnesium) than the wheat we consume more regularly. We buy cereal made with kamut and I sometimes grind kamut grains into flour for my daughter's super baby porridge, but this time around, I actually prepared it as a whole grain. Doing so is quite a process, v. similar to cooking dried beans. (I've described the process at the end of the actual recipe - note that you have to start the day before you want to eat the salad.) It resembles farro or brown rice when dry, but then more than doubles in size when cooked.

kamut before and after

I ended up making two different meals with my pot o' kamut, and all in all I'm quite pleased with this little brand-name grain. It's mild in flavor, which makes it quite versatile, but its texture is interesting enough to make it distinctive. It's sort of chewy, in a good way - chewy delicious. And it's v. filling. This salad could easily be a main course, served with a simple green salad or curried soup on the side. I've included a few ideas for substitutions in the notes preceding the actual recipe, in the event that this post does not sufficiently inspire you to find your way to the health food store and get yourself some kamut.

salad in serving bowl

Did I mention this salad is also quite pretty? Well, it is. I wish I had a party to bring it to.

Final pre-recipe notes:

1. There are good instructions for how to cut and seed a pomegranate here. Be sure to wear an apron and have your computer reasonably far away from you and the pomegranate. Once you remove the seeds you will understand why pomegranate juice and pre-packaged pomegranate seeds are so pricey.

pomegranate

2. I used "2 cups" of pumpkin, which was about half a small pumpkin. I think a small butternut squash, or half a medium or large butternut squash, or a whole acorn squash, would work just as well. While I steamed my pumpkin, roasting it would probably add even more autumnal flavor to the salad. (Next time.)

3. In place of kamut, cooked farro, wild rice, or wheat berries could be used, or even chickpeas. You could also go side-salad with this and just toss the pumpkin, pomegranate, dressing, etc. with some fresh, torn spinach, or some barely-wilted kale or chard, instead of a grain or legume.

4. There's no substitution for the pomegranate molasses if you go ahead with the dressing recipe. It is an especially unique, complex, sweet, wonderful component to this concoction, and it smells like candy. But a homemade or purchased tahini dressing (like Annie's Goddess dressing) or an orange vinaigrette of some kind would probably be a decent substitution for the pomegranate molasses dressing in its entirety. You'll want to use about 1/3 cup of dressing to start with.

pumpkin kamut salad
single serving of salad

Warm Pumpkin, Pomegranate and Kamut Salad
From yours truly, inspired by this
Yield: about 3-4 cups; 4 main course servings

Salad
2 cups cooked kamut*
2 cups pumpkin or other winter squash, peeled and cut into 1/2" dice
Seeds from one pomegranate (about 1 cup)
2 ounces feta cheese
1 tablespoon chopped parsley

Dressing
4 tablespoons good quality olive oil
3 tablespoons pomegranate molasses
1 teaspoon brown rice syrup (or honey or maple syrup)
1/2 teaspoon salt (or more, to taste)

Start out by either steaming or roasting your pumpkin until it's al dente. (About 15 minutes of steaming on the stove; or tossed with 1 tablespoon of olive oil and roasted in a 425-degree oven for 20-25 minutes.) In the meantime, whisk together all the dressing ingredients until emulsified.

Place kamut in serving bowl. Evenly distribute warm pumpkin on top of kamut, followed by the pomegranate seeds. Drizzle about half the dressing over the salad and finish by crumbling the feta cheese and then sprinkling the parsley on top. Toss just before serving. Serve at room temperature with the remainder of the dressing on the side.

* To cook kamut: Place 1/2 cup dried kamut in a saucepan. Cover with water and soak overnight, or at least 8 hours. When ready to cook the kamut, which you can do a couple days before making the salad (just keep it in the refrigerator until you start cooking your pumpkin, then remove it and allow it to come to room temp), drain the kamut and rinse it well. Place pre-soaked kamut in the saucepan again and cover with 2" of water. Bring to boil and then simmer, uncovered, for 50-60 minutes, until kamut is cooked through, but a little chewy.

Friday, December 3, 2010

Ten Posts of Pumpkin: (8) Pumpkin Waffles

Every time I make waffles I wish I made waffles more often. Maybe you have felt that way too. If you haven't, it's probably because you haven't gotten over the impulse to thoroughly clean your waffle iron after every use. I got over that about two years ago and it was v. liberating. Cleaning? Bah! What a waffle iron needs is seasoning. And I think the definition of "seasoning" is something like: cleaning as best as you can without hurting yourself, using obscenities, or experimenting with tools stolen from your dental hygienest, and then stopping. It was a process, I'm not going to lie. Where kitchen cleanliness is concerned, I'm generally my mother's daughter. But then I got knocked up and everything changed. (It didn't for her though. And she had lots of kids.)

Anyway, these waffles are super awesome, because they're only ever-so-slightly adapted from my second favorite cookbook, Vegan with a Vengeance, which includes only super awesome recipes. And they're vegan, if you don't swap out the non-dairy beverage for milk.

I only got this one picture because (a) I made them on a weekday morning, so we were a bit rushed, and (b) they were promptly devoured. We ate them with some decidedly non-vegan Apple Cider Syrup, and it was a nice, albeit morally ambiguous, combo.

Oh. If you make these waffles and they are not as super awesome as I imply, perhaps your waffle iron isn't quite seasoned enough.

Pumpkin Waffles
Yield: 12 4X4" waffles (three full-size sheets)

1 1/4 cups whole wheat flour
1 teaspoon baking powder
1/4 teaspoon baking soda
1/4 teaspoon salt
2 teaspoons ground cinnamon*
1/2 teaspoon ground ginger*
1/4 teaspoon freshly grated nutmeg*
1/8 teaspoon ground cloves
1 cup soy milk (or oat milk or rice milk or regular milk or whatever)
1 cup homemade pumpkin purée or canned pumpkin
2 tablespoons oil
2 tablespoons maple syrup
2 teaspoons vanilla extract

*You could just use 2 or 3 teaspoons of pumpkin pie or apple pie spice, if you have either on hand.

Preheat waffle iron according to manufacturer's instructions.

Sift together flour, baking powder, baking soda, salt, and spices. In a separate bowl or large measuring cup, with gusto, whisk together soy milk, pumpkin, oil, maple syrup, and vanilla until well blended and slightly frothy. Pour the wet ingredients into the dry and mix. A few lumps are okay. Cook the waffles according to the manufacturer's instructions.

I put four cooled waffles into a freezer bag and reheated them in the toaster for myself and my daughter later in the week. Worked super great. Naturally.

Wednesday, December 1, 2010

Ten Posts of Pumpkin: (7) Pumpkin Cream Cheese Brownies

(My last repost, from exactly a year and a day ago.)

Are you ready for these? Because they are good. They are pumpkin plus chocolate plus cream cheese good.

It all started like this: as I began my pumpkin recipe quest, I started with one of my favorite food blogs, er - one of everyone's favorite food blogs - Smitten Kitchen. It didn't let me down. Deb, its hostess-with-the-mostest, had a Martha Stewart Living recipe for Pumpkin Swirl Brownies. They looked delicious. A big change from my previous ideas of what a pumpkiny dessert should be -- i.e. Beth's frosted pumpkin cookies and Alta Cafe's pumpkin bar back in the no-nuts-or-raisins days -- but still yummy-sounding. Deb stated the following in her blog, however: "[E]very time I try a bite of one, I find myself wishing they were either all pumpkin bars or all brownies. Oh, and I'd like either version to have a cream cheese swirl." Did this deter me from trying the recipe? Heck no at all. But it certainly inspired me to add a cream cheese swirl. So... marrying and adapting Deb's recipe + this recipe from David Lebovitz, I did just that. And then I ate almost the whole pan.

pumpkin cream cheese brownies in pan
close up

I know Thanksgiving is over and now we are shifting from pumpkin to peppermint... but maybe you can bookmark this page and make these next fall. Or maybe you can somehow add peppermint.

Here's me grating nutmeg with care:

Oh my heavens what a flattering photo!

(12/1/10 comment: I have a lot less hair and a lot more belly presently.)

Anyway.

Here's the recipe:

Pumpkin and Cream Cheese Swirled Brownies
Adapted (and quite improved!) from Smitten Kitchen
Yield: one 13X9" pan - about 20 good-sized brownies, more if you're a dainty eater

1 stick unsalted butter (8 ounces)
6 ounces bittersweet chocolate, chopped
4 ounces semi-sweet chocolate, chopped, or chocolate chips*
2 cups all-purpose flour
1 teaspoon baking powder
1/8 teaspoon cayenne (optional, but nice)
1/2 teaspoon salt
1 1/2 cups brown sugar
4 eggs
1 tablespoon vanilla
1 1/4 cup pureed pumpkin or canned pumpkin
2 tablespoons olive oil
1 tablespoon cinnamon
1/2 teaspoon freshly ground nutmeg

8 ounces cream cheese (I only had 6 oz and it worked fine)
1 egg yolk
5 tablespoons sugar
1 teaspoon vanilla

*I used a cayenne-orange spiced chocolate bar and it was perfect. But I'm sure chocolate chips would be good too in the event that you don't happen to have a cayenne-orange spiced chocolate bar lying around.

[NOTE: Because I was adding the cream cheese swirl and because the Smitten Kitchen notes said that even without the cream cheese swirl these brownies were really huge in an 8X8" pan, I used an 11X7" pan. Next time I will use 13X9" pan because they were still huge.]

1. Line a 13X9" pan with criss-crossed sheets of foil and butter the foil well. (Don't spray. BUTTER. It tastes so much better.) Preheat oven to 350 degrees.

2. Melt bittersweet chocolate and stick of butter in double boiler over simmering water, stirring occasionally until smooth.

3. Whisk together flour, baking powder, cayenne, and salt in large bowl and set aside. In separate bowl (your KitchenAid Mixer bowl if you have one), beat together brown sugar and eggs (adding one at a time) until fluffy. Add 1 T vanilla. Slowly beat in flour mixture.

4. Scoop two cups of this batter into a separate bowl and stir in chocolate-butter mixture. Once well-combined, add semisweet chocolate chunks or chips. Pour chocolate batter into pan.

5. Stir pumpkin, olive oil, cinnamon, and nutmeg into remaining batter. Once combined, pour on top of chocolate batter. Using the wide edge of a butter knife, swirl the batters together.

6. With hand-mixer, beat cream cheese, egg yolk, regular sugar and 1 t vanilla until well-combined. (Maybe your baby is sleeping at this point, and her bedroom is right next to the kitchen. Maybe you will learn that hand-mixers work just as well in the bathroom as they do in the kitchen. So do blenders, for that matter.) Spoon the cream cheese mixture on top of pumpkin batter in eight dollops. Using knife, swirl in same manner as above.

cream cheese dollops

swirling
Pretty!

7. Bake 40-45 minutes (or a little less if you are like us and you like your brownies gooey).

8. Smile at your baby. Or my baby.*

(Goodness gracious, she's so much bigger than that now!)
9. Enjoy.

10. Share with your friends.

11. Tell your friends that your friend Edith-Nicole w/ a Child gave you this genius of a recipe.

*My baby looks a little more like this lately.

Tuesday, November 30, 2010

Ten Posts of Pumpkin: (6) Butternut Squash and Pinto Bean Enchiladas with Mole Sauce

This post has been hard to assemble because there are many parts, the pictures do not do the recipe justice, and, um, I can't seem to find my notes. I'll let you decide what to do with that little disclaimer.

But please note: these are as good and unique as they sound.

The best part is the mole sauce. If you aren't in a mood to make your own refried beans or peel and dice a butternut squash or grate an obscene amount of cheese, that's fine. But make the mole sauce. It's totally easy and it's the best mole sauce I've ever had and, while it involves a lot of ingredients, most of them are available at health food stores or co-ops or even some regular grocery stores in bulk and BULK IS CHEAP. Especially spices. The best part of my grocery shopping experience is when I pay 14 cents for fresh nutmeg. It's even more edifying when I happen to have caught a glimpse of the jars of nutmeg for sale three aisles down, which cost like $4+. Preposterous.

spice blend

Okay. So first I'll give you the mole recipe, adapted (to be made nut-free and slightly simplified, i.e. I don't peel the chiles or tomatoes and I just blend everything together) from a David Lebovitz blog post, and after that I'll elaborate on the enchiladas. But seriously, if you don't feel like assembling enchiladas, just use the mole sauce with chips or poured over some poached chicken breasts or drizzled on rice and beans or WHATEVER. Just make it and eat it. It's spectacular.

mole

Yum. I miss it.

Chocolate Mole Sauce
Adapted from David Lebovitz
Yield: about 2-3 cups

5 dried ancho chiles
1 tablespoon olive oil
1 onion, chopped
1 clove garlic, thinly sliced
2 tomatoes, seeds squeezed out
1/3 cup unsweetened shredded coconut
1/3 cup diced prunes (or raisins)
1 tablespoon toasted sesame seeds
1/4 teaspoon each: cinnamon, cloves, oregano or epazote, cumin, coriander, allspice
1 teaspoon salt
1/8 teaspoon black pepper
1/8 teaspoon cayenne
1 cup warm water (or more, as needed, ideally reserved from soaking the ancho chiles)
1 ounce unsweetened chocolate, melted

Cover chiles with water in a saucepan and bring to boil. Turn off heat, submerge the chiles by setting a bowl on top of them, and let soak for 30 minutes or so.

Have all your spices and herbs ready to go in a small prep bowl.

In a skillet over medium heat, sauté the chopped onion in the olive oil until soft and translucent, about 5 minutes. Add garlic and sauté another minute. Add spices and herbs and cook, stirring constantly, for about 30 seconds. Remove from heat and allow to cool for a few minutes.

Meanwhile, drain the ancho chiles and reserve the cooking water. Remove the seeds and stems from the chiles.

Using a food processor, or if you are lucky enough to have one, your Vita-Mix or another comparably awesome blender, purée the ancho chiles with the cooked onion-garlic-spice mixture, coconut, tomatoes, prunes (or raisins), sesame seeds, salt, and pepper, adding cooking water 1/4 cup at a time until the mixture is smooth. It might take a couple minutes and about 1 1/2 cups of water, but mine came together beautifully, and rather easily. Taste the mixture and add more salt or pepper as desired. Stir in the melted chocolate and add a little more water to obtain a smooth, saucy consistency. Store in the refrigerator until ready to use.

And now for the enchiladas...

super cheesy enchiladas

This makes kind of a weird quantity, because I was making it all up as I went along. I believe it would make one 15X9" pan's worth of either properly rolled enchiladas or enchiladas layered, casserole-style. But what I ended up with was a 9X9" pan of rolled enchiladas, and a 13X9" pan of "enchilada casserole".

roasted butternut squash
enchiladas in progress

Butternut Squash and Pinto Bean Enchiladas with Mole Sauce
From Yours Truly
Yield: about 8 servings (see above)

1 butternut squash or other winter squash, peeled and cut into 1/2" cubes (you'll want about 1.5 lbs flesh)
1 teaspoon chili powder
1 teaspoon cumin
1 teaspoon salt
2 tablespoons olive oil
12-16 small corn tortillas
2-3 cups Mexican Whole Beans or Refried Beans or some sort of canned equivalent (about two 15-oz cans)
1 recipe mole sauce
3 cups shredded monterey jack cheese

Preheat oven to 350 degrees. Whisk together chili powder, cumin and salt. Spread butternut squash onto baking sheet or roasting pan and toss with spice mixture and olive oil. Roast until starting to brown, about 20-30 minutes.

Once squash is cooked and cool enough to handle, assemble your enchiladas.

To make layered enchiladas (the easy thing to do), layer 4-6 tortillas in glass baking dish, followed by half the beans, half the squash, and a third of the cheese. Repeat layers again, starting with tortillas and ending with cheese. Add one more layer of tortillas, pour mole sauce evenly on top of tortillas, and finish with a sprinkling of the final third of cheese. Bake for 30-40 minutes, until everything is bubbling a bit and the cheese is starting to brown.

To make rolled enchiladas, first warm the tortillas in the microwave or on the stove so that they can be rolled without breaking. Fill each tortilla with about 1/4 cup beans and 1/4 cup squash, roll the tortilla tightly and place in pan, so that they are all side by side and there is very little space anywhere in the pan at the end. Pour the mole sauce evenly on top, followed by the cheese. Bake for 30-40 minutes, until everything is bubbling a bit and the cheese is starting to brown.

Enjoy!

Saturday, November 27, 2010

Ten Posts of Pumpkin: (5) Pumpkin Cranberry Muffins

I am so going to fail. I tried! But then I ended up on a plane. With a baby. And a nice helpful grandmother who cared for her while I added "stranger/grandmother" to my list of things to be thankful for. And then there were the friends! With their lasagnas and trips to the park and Starbucks beverages and nuptials. And I had a dance card to fill, a bride to dote on, a family-size portion of warm apple crostada to consume all by myself, a Hwy 5 to tackle, and a toddler to keep tabs of (sort of - as soon as we parted ways with stranger/grandmother we had aforementioned friends and subsequently a real grandmother to do my dirty work). Then there was Aptos and siblings and nephews and Thanksgiving and Scrabble and homemade brioche and cinnamon rolls and the best stuffing on earth and endless food, food, everywhere you turn, food! I have been too busy digesting to actually WRITE about food! Oh, also, I forgot my computer.

The worst part is that I actually made and documented all my pumpkins-a-plenty creations. I just haven't had an opportunity to sit down and put it all together into a useful, aesthetically acceptable format.

So about those muffins...

that I made like a month ago...

with my homemade pumpkin puree...

1 lb of pumpkin

after I ate a pumpkin-cranberry muffin at a coffee shop and fell in love with its moderate sugar content and bursts of juicy warm fresh cranberries...

and of course felt I had to make them myself...

and try out the mess-free-trick I'd read about elsewhere on the internets...

kitchenaid tip!

They're good. Really good. Not too sweet. Not too spicy. Just perfectly pumpkiny with a tart bite. I made muffins as well as a loaf and the loaf is in my freezer in Minneapolis and as I write and reflect on these little treasures, I mostly can't wait to get home, thaw the loaf, and dig in.

pumpkin cranberry loaf

Probably because I am wasting away here at the Lenz house, where it's just really hard to find something to eat.

pumpkin bread batter
before and after

Pumpkin Cranberry Muffins
From Bon Appétit, November 1995
Yield: 24 muffins or two regular-sized loaves (I made 12 muffins + 1 loaf)

2 cups all purpose flour
1 cup whole wheat pastry flour
2 teaspoons ground cinnamon
1 teaspoon ground cloves
1 teaspoon ground nutmeg
1 teaspoon baking soda
1/2 teaspoon salt
1/2 teaspoon baking powder
2 1/2 cups brown sugar
2/3 cup grapeseed or other mild oil
3 large eggs
1 pound pumpkin puree (equivalent of 16-ounce can solid pack pumpkin)
1 teaspoon vanilla
1 1/2 cups fresh cranberries (or an 8- or 10-ounce bag frozen cranberries)

Optional cinnamon sugar topping: 4 tablespoons sugar + 1 teaspoon cinnamon

Preheat oven to 350. Grease and flour loaf or muffin pans.

In a medium-sized bowl, whisk together dry ingredients, not including brown sugar. In a large mixing bowl, beat together brown sugar and oil. Add eggs, one at a time, then pumpkin puree and vanilla. Beat until incorporated. With electric mixer turned off if that's what you're using, carefully pour in the dry ingredients. Cover top of bowl and mixing attachment with a kitchen towel and mix on low speed until the messy puff of flour smoke has dissipated (about 20 seconds or so). Move the towel and mix on low until just combined. Stir in the cranberries. Pour batter into loaf pans or spoon into muffin tins (make muffin cups about two-thirds full). Top with cinnamon-sugar mixture, if using. Bake until tester inserted in center comes out clean, rotating about half way through, for a total of about 60-70 minutes for loaves and 18-22 minutes for muffins.*

*Confession about baking times: Because my oven does not cook especially evenly on the regular "bake" setting, I actually used the "convection bake" setting and baked the muffins at 325 degrees for 16 minutes, rotating pan halfway through. The loaf took about an hour with same setting and temp. The temp/time listed above are from Epicurious, a far more trustworthy site than my own. But then, they probably have more reliable ovens in their test kitchens.

Monday, November 15, 2010

Ten Posts of Pumpkin: (4) Gingery Lemony Pumpkin Soup

I just want to mention, before I get to the soup, that I made those pumpkin blondies again this weekend for a bridal shower and they were (a) even better than I remembered and (b) quite popular. I'm also going to go ahead and be a bit of a critic and advise you to not, under any circumstances, make this dessert. I read the sketchy comments and defied the warnings, because it sounded so interesting. Please learn from my mistake. Interesting doesn't cut it when you are trying to impress 20 semi-strangers. Comments are meaningful. I should have listened. I should have known that, when a recipe is followed by a slew of comments dotted with words like "weird" and "disappointing", it is not worthy of experimentation. Particularly right before a party. Particularly when it involves several expensive ingredients. Seriously. Three-quarters of that cake went in the rubbish bin, people. Thank heavens I had pumpkin blondies and a fabulous pear cake (with chunks of bittersweet chocolate) to offer as well.

And now: soup. This soup is so great and easy and simultaneously refreshing and fallesque! It's adapted from a recipe for carrot soup that Charlotte made for me and my family a month or two ago. The carrot soup was great but I had winter squash to use up when I next craved the soup... and an even swap worked beautifully. It was in fact even a little creamier and smoother than the carrot version, likely because winter squash is so much softer than carrots.

lemon ginger butternut squash soup collage

This is a forgiving recipe, as soup recipes often are. Fresh lemon zest is about the only super important, inflexible component. I used jarred ginger when I made this, a random assortment of onion-types that were on my counter, and I added a little curry because I love curry. I suspect that sweet potatoes would work just as nicely in this soup as the carrots and winter squash did.

bowl-o-butternut soup

We enjoyed it with some homemade seedy soda bread and a sprinkling of red salt. It's really a nice soup and it makes a manageable amount - something I appreciate as fall approaches, my freezer continues to be full, and my daughter fails to appreciate the wonders of soup. My husband and I ate it for dinner, had seconds, and had one lunch portion left over.

butternut squash soup close up

Gingery Lemony Pumpkin Soup
Yield: 4 servings

3 tablespoons butter or olive oil
1 1/2 cup chopped onion (any kind of onion)
1 tablespoon fresh minced ginger
3 cloves garlic, sliced
1 1/2 pounds pumpkin or other winter squash, peeled, seeded and cut into 1/2" pieces*
1 tablespoon tomato paste (or 1 or 2 fresh tomatoes)
1 teaspoon curry (optional; I used muchi curry, which is semi-sweet)
zest and juice of one lemon
3 cups vegetable or chicken broth

Melt butter or olive oil in heavy large pot over medium-high heat. Add onion; sauté 4 minutes. Add ginger and garlic; sauté 2 minutes. Add winter squash, tomato paste (or tomatoes), curry (if using), and lemon peel; sauté 1 minute. Add 3 cups broth and bring to boil. Reduce heat, cover partially and simmer until squash is very tender and flavors marry, about 12-15 minutes. Puree soup with immersion blender or in batches using a regular blender. (If doing the latter, allow the soup to cool slightly and return to pot after blending.) Gently stir in lemon juice. Season with salt and pepper. Add a bit of water or more broth if you want a thinner soup. Bring to a simmer again. Serve in big bowls and, if possible, devour slowly next to a warm fireplace while it is raining or snowing outside.

Can be made 1 or 2 days ahead. Cover and chill.

*The first time I made this, I used the long, tubular part of a medium-sized butternut squash and that equaled about 1.5 lbs. The second time, I used a delicata squash (unpeeled) and an acorn squash (peeled). Both times, the soup was great.

Thursday, November 11, 2010

Ten Posts of Pumpkin: (3) Ginger Pumpkin White Chocolate Blondies

WARNING! Another Re-Post!!! But oh-so-worthy of reposting. Believe me. This recipe shall redeem me from my pumpkin seed debacle. Forever. Not only is this recipe worthy of a FOOD BLOG, as opposed to what I often call "my Sadie blog" - but also, I'm super busy for the next few days. Mostly in the kitchen, though, which is good, right? So there will be two re-posts. Anyway, I apologize for any resulting formatting issues. Too busy to fix them. Just focus on the recipe, dudes.
---------------------------------------

11/27/2009

A while back, my friend Nicole solicited pumpkin recipes on her blog. She needed pumpkin recipes because she had pumpkins-a-plenty growing in her yard. Later, I needed pumpkin recipes because I had pumpkins-a-plenty growing in my yard. Just kidding. I don't have a yard. I did have a lot of pumpkins though; they were from - where else? - our CSA. So MC and I have been quite resourceful in our use of pumpkins in our little kitchen, and now I have a response for Nicole, four months later. (I think these recipes are worth the wait.)

The first recipe, featured below, is only barely adapted from this Ginger Pumpkin White Chocolate Blondies recipe. It was a fun one because we got to use two new kitchen gadgets: the VitaMix, to puree the pumpkin, and a kitchen scale, to, well, weigh things, like butter, which we wouldn't want to skimp on. (In case you were wondering, Sadie is just two pounds too big for the kitchen scale.)

Pumpkin and butter

I wasn't sure about the crystallized ginger in this recipe. Generally, crystallized ginger is only good in theory, you know? I find it to be prettier than it is tasty.

crystallized ginger

So I only put it into half the batter - the half that I made into cute mini-muffin-blondies - and they were good, but the half that I made into blondie bars (no picture - but they looked like the one pictured here) had the crystallized ginger in them (double the amount in fact, because I put all the ginger from the whole recipe into this half), and they were even better. And I wasn't sure if something with that much white chocolate could get better.

batter with white chocolate

But it could.

mini muffin blondies

NOTES: You could of course use canned pumpkin too. It might be better, actually, or at least more pumpkiny and denser. And, sadly, I don't recommend making the mini-muffin-blondies. The consistency of these is a perfect combination of crumbly and gooey. But this perfect consistency made them hard to get out of the muffin tin intact. So although they were cute, chunks of blondie or - horror! - white chocolate would stick in the pan, like so:

white chocolate fail

So stick with a 13X9" pan or two 8X8" pans. (Or maybe just regular cookies even.) Here's the recipe.

Pumpkin White Chocolate Blondies with Crystallized Ginger
Adapted from here
Yield: One 13X9" pan or two 8X8" pans' worth; about 24-30 ample servings

1 c all-purpose flour
1 c stoneground whole wheat flour (adds good texture)
1 1/4 c brown sugar
1 c pumpkin, pureed
1 c butter, softened
1 egg
1 T vanilla
1 t baking soda
1 t salt
1 t ground ginger
2 t cinnamon
1/2 t ground allspice
1/2 t ground cloves
1 1/2 c good quality white chocolate, chopped
1/4 - 1/2 c crystallized ginger, chopped

1. Preheat oven to 350 degrees, or "Betty Crocker temp", as sexy Michael Chiarello would say. Butter or spray pan(s). (If you are not lazy, you could also line pan(s) with parchment paper or aluminum foil and spray them, which makes for easiest blondie removal.)

2. In a medium bowl, stir together flour, baking soda, salt, and spices. Set aside.

3. In separate bowl, cream together the butter and brown sugar until fluffy. Add the pumpkin puree. (It might look kind of curdled, but it still turned out fine.) Add egg and vanilla and beat until combined.

4. Gently stir in flour mixture until just incorporated.

5. Stir in white chocolate and crystallized ginger chunks.

6. Spread into pan(s) and bake for 30-35 minutes (if in two pans) or 40-45 minutes (if one big pan).

7. Cool, cut, and enjoy the tasty bad boys.

Happy fall!

Michael Chiarello