Monday, December 15, 2014

Business Cards (finally) and Saveur's Icelandic Rye Bread

Check it out!

Untitled

I got even cuter!

But more importantly, this.

Brown Bread - sliced

I fear its appearance isn't doing it justice. But I also think it's really beautiful. (I am nothing if not conflicted.) Or maybe I can taste it in my mouth right now and the depth and aroma I'm conjuring are so so so lovely, especially warm from the oven and slathered with some good butter - I just know this bread is not as photogenic as it is delicious. It's something new, you know? At least for me. Similar in texture to a British steamed pudding, but different in that it's not all that sweet (cup of Lyle's notwithstanding).

brown bread collage

So there it is. Just a really delicious brown bread. With an incredible chew and a little bit of caramel in every bite. Handsome byproduct: since it bakes at a low temperature for 8 hours, it conveniently gives your radiators a little break. 

The recipe is here, on the Saveur website.

Saturday, November 15, 2014

Pre-Thanksgiving Classes!

January-March 2015 Class Schedule is posted on the Local D'Lish website! Hooray!

There are a handful of spots available in my Holiday Sides class this Sunday at Local D'Lish. On the menu: Italian sausage and kale stuffing, blanched green beans with shallot-mustard vinaigrette, salade de carottes râpée (nothing says Thanksgiving like some French influence?), and roasted sweet potato-wild rice salad. All but the stuffing are (or can easily be) gluten free and vegetarian. Call Local D'Lish if you want to sign up! Mention my name and maybe you'll get a deal...

There are also two open spots for Thursday night's Culinary Basics: Simple Seasonal Soups class - a good one to sustain you in between holidays. Hope to see you soon. xoxo

Wednesday, November 12, 2014

Weeknight Dinner: Easy Arroz Con Pollo

A while back I posted about this great recipe from Yotam Ottolenghi's Jerusalem: cardamom-spiced rice with blackened chicken thighs and caramelized onions. It's delicious and the recipe is available via the New York Times online. If you haven't yet, you should probably make it.

If you have made it, or if you're not keen on buying whole spices or caramelizing onions but you're intrigued by the method Ottolenghi recommends for what I consider to be the ultimate comfort food - chicken and rice - try this one instead. The only spice you need is some good quality chili powder. Probably the same one you'd use in the chili you make for your company's annual chili cook-off. Or if you consistently don't win at your company's annual chili cook-off, I'm sorry, and maybe upgrade to this one, from Penzey's. At any rate, try to find a salt-free one. This allows you more control of the flavor (and saltiness) of your food.

Easy Arroz Con Pollo is featured in the new Quick Weeknight Meals class I'm offering this fall and winter at Local D'Lish. It's QWM #2 - all one-pot meals. This recipe is listed with a caveat: it's not as quick as the other recipes I share in my QWM classes. However! Forty of the fiftyish minutes it takes to make this are basically inactive, so you could help your daughter with homework or go shovel some snow while this dinner is basically making itself. Then you'd be basically living the dream. Right?

Special picture for you: the mysterious steaming process.

steam

The last cooking step involves steaming the rice with a clean dry kitchen towel. (I've found that pretty much any kind of towel works, just avoid something that's going to leave terry pills in your food. Tea towels or flour sacks are ideal.) Is this essential? If you want perfectly cooked, perfectly dry, discreet grains of rice alongside your chicken, then yes. The steaming time allows the towel, rather than the rice, to absorb any remaining moisture, eliminating any potential for mush.

Arroz con pollo collageplated arroz con pollo

Finally: (1) The lime juice is important. Don't skip it. Acid enhances a savory dish like this big time. (2) FAQ: Do you have to use bone-in, skin-on chicken pieces? My Answer: If you want all the flavor that bones and skins afford this dish as they cook and steadily infuse the rice and vegetables with their juicy deliciousness, HECK YES. But. Because I love you and I know you're all afraid of bones and skins (even though that's where the flavor is! this is CHICKEN, folks!), I'm working on a version with boneless, skinless chicken pieces. Stay tuned. In the meantime: you don't have to eat the skin. I don't; MC does.

Arroz Con Pollo
Serves 4-6

2 tablespoons oil, divided
2 – 2 ½ lbs skin-on, bone-in chicken thighs (or 1 whole chicken, quartered) 
2 tablespoons chili powder
2 ½ teaspoons salt, divided
1 ½ teaspoons freshly ground pepper
1 small onion, finely chopped
1 carrot, finely chopped
1 red pepper, finely chopped (or - as in pictures above - a few tomatillos, chopped up a bit)
4 cloves garlic, thinly sliced, or 1 teaspoon garlic powder
1 cup frozen peas (optional, but nice)*
1 2/3 cups white basmati rice
2 ¼ cups boiling water
Juice of 1 lime
Fresh cilantro, sour cream, sliced avocado, and/or salsa, to serve

Using kitchen shears, cut off any large pieces of fat from the chicken. You want enough skin to cover one side of each piece, but you don't need more than that.

In a large bowl, toss the chicken thighs with the chili powder, 1½ teaspoons salt, pepper, and 1 tablespoon oil until well coated. Heat skillet/frying pan over medium heat; add remaining tablespoon of olive oil. Sear spiced chicken in frying pan for 5 minutes on each side. (You can chop your vegetables while chicken is par-cooking.) Remove chicken from pan and set aside.

Bring 2 ½ cups water to boil in a kettle or small saucepan. (You’ll only need 2 ¼ cups, but you might lose a little in the boiling process, so boil more than you need.)

Add onion, carrot, red pepper, garlic, frozen peas (or beans - see note below), and remaining 1 teaspoon salt to pan. Sauté for 5 minutes over medium heat, then add rice. Stir everything for another minute. Place seared chicken thighs on top of rice mixture. Pour 2 1/4 cups boiling water over top. Cover pan, reduce heat to very low, and cook for 30 minutes. Turn off heat (don't forget to do this! I don't want your towel to start a kitchen fire!) and move pan away from burner. Remove cover from pan, quickly place kitchen towel on top of pan, and reseal with lid. Allow to steam for 10 minutes. Remove lid and towel; squeeze juice from half a lime on top of dish. Taste and adjust seasonings as necessary. Serve topped with fresh cilantro and whatever else you'd like.

This keeps well for a few days in refrigerator and gets even more flavorful reheated on days 2 and 3.

* Could substitute a 12.5-oz can of black beans for peas, rinsed and drained well.

Tuesday, November 11, 2014

Omega 3 Salad with Maple-Mustard Vinaigrette

You guys. I don't only eat doughnuts. I swear. I mean, maybe I did make one more batch of baked apple spiced doughnuts with a maple glaze last week.

National doughnut day!

But it was National Doughnut Day. What else was I supposed to do?

When it's not National Doughnut Day. And when it's not family pizza night...

Untitled

We've actually been eating quite healthily lately. And while healthy food isn't as fun to talk about on the internets as doughnuts, I do have a recent gem to share. It's a salad. A delicious, colorful, texturally-complex salad. I totally hope you make this salad some time. But the reason I made it the way I did was more to use up the last-of-the-farmer's-market produce than to make a rainbow plate of vitamins, minerals, and omega-3 fatty acids. I encourage you to do the same: use what you've got, aim for a good mix of colors and a little to crunch to make your greens more interesting. But MAKE. THIS. DRESSING. It's wonderful and I'm proud of it and it will make whatever you've got in your refrigerator taste like you're at a fancy restaurant.

Salmon Salad just the veggies
Salmon SaladMaple Mustard Vinaigrette

P.S. This salad is best followed by a doughnut.

Omega-3 Salad with Maple Mustard Vinaigrette
Serves 2

For salad
4 cups torn spinach or other salad greens
1 cup shredded purple cabbage (about 1/2 a small head of cabbage)
3 tomatillos* or 1 cucumber or both, coarsely chopped
1 carrot, chopped or ribboned with a vegetable peeler
6 oz cooked salmon, torn into bite-sized pieces
Handful of raw pepitas
A hardboiled egg or two, crumbled

For Maple Mustard Vinaigrette
¼ cup olive oil
2 tablespoons apple cider vinegar
1-2 tablespoons maple syrup (depending on how sweet you like it)
2 tablespoons Dijon mustard or something grainy like Local Folks Stoneground XXpress (my favorite)
½ teaspoon salt
½ teaspoon pepper (or Golden Fig’s maple pepper!)

Put all your dressing ingredients in a jar with a tight-fitting lid. Shake the heck out of it. (Stores well in refrigerator for a few weeks.) Layer salad ingredients on two plates. Season with a little salt. Drizzle about 2 tablespoons of dressing on each salad. Eat it fast so you can have a doughnut.

* Tomatillos aren't just for roasting. They have a nice, mild tartness when raw, and a reliably satisfying texture (unlike tomatoes, they don't get mealy or mushy ever). They are green and sometimes purple. Something pretty and new for a salad. Go for it!

Tuesday, November 4, 2014

Other People's Food Baggage

Two contrasting articles on family dinner recently appeared in New York Times Magazine: The Food Issue. One was by Mark Bittman, and it was pretty much exactly what you'd expect. To paraphrase: "My grown daughters eat essentially everything, have an excellent relationship with food, and cook well. I didn't mean to raise such awesomeness, but there it is. Let's blame food policy for everyone else's children's pickiness." The other one, written by Virginia Heffernan and appearing under a tendentious "Down with Dinner!" headline in the print version of the magazine, is essentially a fiery rant about the nightly horror that Heffernan (and me and you and everyone we know except Mark Bittman) calls "figuring out dinner". She loads up the issue of feeding one's family with a bunch of feminist lip service and ultimately settles on the following rhetorical question as her thesis statement: "Cooking! Aren't we past that?" The article is framed - awkwardly and unfairly - as a critique of what Heffernan labels "the latest avalanche of family cookbooks", many of which were authored by home chef bloggers. The food blogosphere's response to Heffernan's piece has been - fittingly and fairly - critical.

Here's the thing.

I love me some Mark Bittman. This more recent piece by him - it eloquently delineates all the things I ineloquently obsess about all day long. I mean seriously. The man makes me want to change the world, one organic apple at a time.

But the topic of feeding one's family is harder for most people than it seems to be for Mr. Bittman - and it's on my mind a lot. Further, at least according to the internets and the "food baggage" component of my classes - during which everyone talks about what gets them in the kitchen and keeps them out and why they eat the way they do now versus five years ago, et cetera - it's on the minds of a lot of people. Whether we love cooking or find cooking a troublesome chore or both, whether we use food to express our identity as coming from somewhere or going somewhere - on that topic, check out this brilliant article from The New Yorker - feeding others is hard. Maybe a rewarding hard (at work, or at home when I'm making pancakes), maybe a thankless, demoralizing hard (at home when I'm not making pancakes), probably depends on who you're feeding. But hard. Full stop.

Heffernan's article is unpopular because she took the low-blow route a few too many times and went pithy-sassy-extremist in her effort to be publishably humorous. (Publishably's not a word but it should be.) Ultimately though, I found her points highly relatable. Her clever joke about the soy vs. cow's milk dilemma? SPOT. ON. We've all been overwhelmed by the complicated, contradictory information we get about what to eat and why. Beyond eating more vegetables (other than nightshades, and only after massaging them), it's all rather confusing.

So go read those articles and cut Heffernan a break. You know you know what she's on about. And there's no shame in that. These are good problems to have. And we can't all be Mark Bittman.

Friday, October 24, 2014

Overnight Pumpkin Chocolate Chip Pancakes
(vegan, gluten free, need a VitaMix)

Happy Friday! Lately, Fridays have been for pancakes. Here, I'll show you:

stacked

What better way to say hooray!-to-72-hours-free-of-pitch-black-mornings-and-homework-complicated-afternoons? There isn't a better way if your pancakes have chocolate chips in them.

These are another batch of my blender pancakes, this time made with a trio of whole grains, a can of pumpkin puree, some molasses and baking spices to embrace the season (note: Fall 2014 has been an easy season to embrace here in Minnesota), and chocolate chips. Naturally.

Here's what my trio of grains looked like:

Whole Grains

And here's the rest of the process:

Just add chocolateIn the skillet

Ugh! Edith! I don't have a VitaMix and why on earth would I blend whole grains?! 

Fine. Make these equally delicious oatmeal pancakes instead. We had them last Friday. 

Pumpkin Chocolate Chip Pancakes (Gluten-Free and Vegan)
Yield: about 20 five-inch pancakes

1 1/4 cup brown rice*
3/4 cup whole oat groats, raw buckwheat groats, sorghum, millet, teff, or a combination*
2 tablespoons apple cider vinegar
--------------
1 can pumpkin puree (or 1 1/2 cups homemade)
1 cup water or milk/non-dairy beverage
2 tablespoons ground flax seed
2 tablespoons oil
1 tablespoon maple syrup or other liquid sweetener
1 tablespoon molasses
1 teaspoon vanilla
1 teaspoon apple cider vinegar
1 teaspoon salt
1 teaspoon cinnamon
1 teaspoon pumpkin pie spice or something similar
--------------
2 teaspoons baking powder
1 cup mini chocolate chips (optional, I suppose)
--------------
Oil or butter for frying

Day 1: In a large bowl or measuring cup, cover whole grains with water by about 2 inches. Add 2 tablespoons apple cider vinegar and soak for 8-24 hours.

Day 2: Drain the grains, rinse them in a fine sieve, and pour them into your blender. Add the remaining ingredients, except for the baking powder, and blend until smooth. Pour batter into a large measuring cup or bowl. Sprinkle batter with baking powder and whisk until it's thoroughly incorporated. Add chocolate chips, if using, and stir.**

Heat a skillet or griddle over medium heat. Grease skillet with oil or butter. Add 1/4-cupfuls of batter to pan and cook for a couple minutes over medium heat and once bubbles begin to form, flip and cook another minute or two.
---------------

* Note regarding grains: You just need a blend of a bunch of sturdy grains and a smaller bunch of less sturdy grains, totaling ~2 cups. So, if you want to use something like millet or quinoa, which are a little more delicate, try 1 1/4 cups brown rice and 3/4 cup millet, quinoa, or a mix. But if you're using something else chewy and sturdy, like oat groats or sorghum, you could go half-and-half or just use 2 whole cups of oat groats. This morning, I used the following: 1/2 cup ivory teff (only use this if your sieve has VERY fine mesh), 1/2 cup oat groats, 1 cup brown basmati rice. Delicious. All grains hydrate a little differently, so have a little extra liquid on hand to thin out batter as needed.

** Note regarding liquids: Make sure the batter isn't too thick if you don't want overly doughy pancakes. Thinner batter firms up more evenly. Once you've blended everything and stirred in your baking powder and chocolate chips, if the batter needs a little loosening up, add water or milk, 2 tablespoons at a time, until you get a more traditional pancake batter consistency. That's what we're after, but when you're working with whole grains and flax seeds and pumpkin puree and molasses, a little finessing might be in order.

Friday, September 19, 2014

For Nicole: Gluten Free Chocolate Doughnuts with Coconut-Chocolate Glaze

Dear Nicole,

So, I totally kept my word. This is something I try to do on a regular basis but sometimes I forget or get lazy or my children exist (and, well, you've met them). It is easier to keep my word when it involves my new favorite thing: the doughnut pan.

as good as it looks

Which reminds me! Hey! True story: "Mom, I am allergic to peanuts, right?" "Yes. You are allergic to peanuts and I am allergic to tree nuts. So we don't eat nuts in our house." "But I am not allergic to all nuts, right?" "We don't really know." "But, like, I am not allergic to doughnuts, right?" "Right." Accompanied by much laughter, naturally.

On a more serious note though, I think, seriously, that you (and maybe everyone) need(s) a doughnut pan. I especially think that gluten-free bakers need doughnut pans. They are a recipe for success. Because, here are some things that help with gluten-free baking: short cooking times, small items, eating baked goods day-of. Cookies and muffins? Great gluten free options. Cakes? Well, sometimes, depending on what other restrictions you might have. Pastries, pies, bread? Trickiest of all. Bring on the eight thousand ingredients. Baked doughnuts, I am happy to report, are basically muffins with a nice firm exterior. Think muffin top. But muffin top on top and bottom. Win-win. They bake in 15-20 minutes, they taste best on the first day but that is true of all doughnuts really, and I am fairly certain they are full-proof. Also, they are crazy-go-nuts good.

I adapted this recipe just barely from a woman named Jeanine whose blog is called The Baking Beauties. She is from Canada and she has done A LOT of work for you. I think she should be your go-to source for standard baking recipes made gluten-free.

You can go now. Because I think you need to get yourself a doughnut pan. Miss you.

xoxoxo
E-NC

GF Choc Donut Collagedonies

Gluten-Free Chocolate Doughnuts with Coconut-Chocolate Glaze
Adapted from Baking Beauties
Yields: 6

Doughnuts
3/4 cup sorghum (that's what I used) or brown rice flour*
3 tablespoons tapioca starch*
1/2 teaspoon xanthan gum*
1 teaspoon baking powder
1/2 teaspoon salt
2 tablespoons: dry instant chocolate pudding mix, dry milk powder, or whey protein powder**
3 tablespoons cocoa powder
1/2 cup sugar
2 large eggs
1/4 cup oil (I used melted coconut oil)
1/4 cup milk
1/2 tsp apple cider vinegar

Frosting
1 cup powdered sugar
2 tablespoons cocoa powder
2 tablespoons coconut oil or butter
1-2 tablespoons milk or water

Preheat oven to 375° F. Lightly grease a doughnut pan.

In a large bowl, whisk together all of the dry ingredients. I recommend sifting cocoa powder into the bowl to avoid lumps. In another bowl, mix the wet ingredients. Pour wet ingredients into the flour-cocoa mixture and stir until fully combined. Spoon mixture into prepared doughnut pan: aim for 3/4 full. Bake in preheated oven for 10-12 minutes, rotating pan 180 degrees after 6 minutes, or until a toothpick inserted into the thickest part of the doughnut comes out clean.

Let doughnuts sit for 5 minutes before turning them out onto a cooling rack. Allow to cool completely (20-30 minutes was sufficient) before frosting.

When ready to frost: Stir together the powdered sugar, sifted cocoa powder (sifting really is a helpful step here), butter or coconut oil, and enough milk or water to make the glaze the consistency you want. Dip your cooled doughnuts into the glaze and place on cooling rack until frosting firms up a bit. I dipped my doughnuts three times in the glaze to get them as shiny and evenly-coated as I wanted. There was more than enough frosting to do this.

* 1 cup less 1 tablespoon of whatever gluten-free baking mix you have on hand will work in place of the flour and starch in this recipe. Use the xanthan gum only if your baking mix doesn't include any. You can also substitute potato starch, arrowroot, or cornstarch for the tapioca starch.

** Jeanine consistently uses pudding mix in her recipes. I imagine, based on my use of milk powder in conventional baking, that this makes for a more *tender* (ew!) texture. I didn't have milk powder or pudding mix in my kitchen, so I used some whey protein powder and evidently it worked fine, since I think these doughnuts are perfect. Comments on the Baking Beauties site indicated that a tablespoon more of cocoa powder + 1 tablespoon of flour works fine too, just to even out the dry-to-wet ratio. Maybe *tenderness* (ew!) is compromised, but they will still be doughnuts.

Wednesday, September 10, 2014

Go Big or Go Home: Spiced Pumpkin Doughnuts

It is fall and so we are sick. Well, I'm not actually (yet), but the rest of my family has their first cold of the season. My tiny sidekick has a cruddy variety of whatever's going around so I put community health above my own and skipped the gym today (and Kid Zone childcare (germville)). And then I was like, if I'm skipping the gym anyway, I might as well make doughnuts. So Beckett and I braved the cold (it dropped thirty degrees over the last 20 hours, because Minnesota is glorious like that), got a little token exercise / fresh air exposure (me on foot, B on scooter), and walked (or scooted) first to the local kitchenware store (not Target in this instance) for a doughnut pan and then to the nearest grocery store to pick up the only ingredient we didn't have on hand to make these bad boys: pumpkin puree (on sale - just in case I needed one more sign indicating today was doughnut day).

Pumpkin Doughnuts

These are adapted from King Arthur Flour. Here's what I did differently: halved the recipe (if I made twelve, we'd eat twelve), reduced sugar by a third in the doughnut recipe but used more for dusting (these do not need to be sweeter), increased spice a bit (subtlety, I feel, is best left to the novelists), and subbed half bread flour and half whole wheat pastry flour for all-purpose (this was based on what I had on hand and a little knowledge about flours and I'm fairly certain that in the future I will use the exact same flour blend - texture was perfect).

As this was my first time using them, I slightly overfilled my doughnut molds, so my holes were not quite holes (but I didn't have anywhere else to put the remaining batter - what's a baker to do?). This aesthetic error was by no means a deal-breaker: these are hands down the best homemade baked good I've had in a long time. I can't think of a better tonic to counter your family's change-in-seasons malaise.

Next on my list: these!

Spiced Pumpkin Doughnuts
Adapted slightly from King Arthur Flour
Yields: 6 (well, probably 7, if you've got a spare doughnut mold)

For doughnuts
1/4 cup oil (I used melted coconut oil)
2 large eggs
1/2 cup sugar
3/4 cup pumpkin purée (canned pumpkin)
1 teaspoon pumpkin pie or other baking spice
1/2 teaspoon cinnamon
3/4 teaspoon salt
3/4 teaspoon baking powder
1/2 cup (2 ounces) whole wheat pastry flour or all-purpose flour*
1/2 cup (2 ounces) bread flour or all-purpose*

For dusting
3 tablespoons sugar
1/4 teaspoon baking spice or cinnamon

Preheat oven to 350 degrees. Grease a 6-ring standard doughnut mold.**

In a large bowl, whisk together oil, eggs, sugar, pumpkin, spices, salt, and baking powder, until mixture is smooth, with no lumps. Stir in flour(s) until just combined.

Using about 1/4 cup batter per doughnut, fill each mold until 3/4 full (or 4/4 full, if you need to use up all your batter and you don't mind a slightly disfigured doughnut). Bake for 16 minutes, rotating pan 180 degrees after 8 minutes for even baking. Remove from oven and allow to cool in pans for 5 minutes.

Meanwhile, place sugar and baking spice or cinnamon in a plastic bag and shake to combine. Once doughnuts are cool enough to handle, loosen edges with fingers (this was v. easy - no knife required), remove one doughnut at a time from pan, and toss it gently in the bag of cinnamon sugar until evenly coated. Place on cooling rack for at least 30 minutes before eating (that said, if you eat one hot, you won't regret it).

* I weighed the flours, so volume measurements are my best estimations.

** I greased 5 out of 6 of my molds, just to see how nonstick the nonstick was. It's pretty nonstick. I couldn't even figure out which one it was. So, you probably don't have to grease your pans, although a little external oil will help the cinnamon-sugar stick.

Thursday, July 31, 2014

Just Do It: Pink Lemonade for Grown-ups

Hi. You know when you want to be doing something regularly but you're out of the habit? And you can come up with tons of excuses for why not do this thing that you do, truly, deep down in your heart, I think so anyway, want to do - some excuses 100% valid, some sort of random and artificial? That's what's been going on with me and the blogosphere. I got out of practice and I super lost my groove. And I feel badly about that because I've actually got a few recipes worth sharing. (There goes one excuse.) So today I'm just doing it. I'm posting about this fantastic pink lemonade.

Untitled

I'm not going to tell you why it's sort of loaded and emotional for me to post about it. I'm not going to try to put into words the amazing summer-vacation-esque magic that hibiscus brings to boring old lemonade. I'm just going to give you a recipe worth making and hope that, since I'm just doing it, you'll just make it. It's divine. And pink! Which is fun.

Hibiscus Simple Syrup
Yields 1 1/2 cups

1 cup sugar*
1 cup water
2 tablespoons dried hibiscus leaves** (I got mine in bulk from the Wedge co-op, in the spice/tea section)

Combine sugar and water in a small saucepan and cook over medium heat, stirring occasionally, until sugar has dissolved and the mixture is pretty hot (3-5 minutes). Stir in hibiscus leaves and allow to steep for 10 minutes or so. Strain into a glass jar and chill.

* Don't be all granola and use rapadura or coconut sugar here. Part of this recipe's allure is the beautiful ruby-red color that sugar-water takes on when infused with hibiscus leaves. I made it with coconut sugar once and it was way less pretty.

** My hibiscus leaves were old. At least a year old. I bought them way back when with a mind to recreate (to no avail) the spicy hibiscus punch that's sold at Bread & Pickle by Lake Harriet (a-may-zing, with all  kinds of clovey-limey complex weirdness/goodness). Anyway, I mention that to suggest that you might not need two whole tablespoons to get a lot of flavor if your hibiscus leaves are fresher. 


Hibiscus Lemonade, i.e. Pink Lemonade for Grown-ups

Per 4-oz glass of lemonade, combine the following in a glass half-filled with ice and give it a good stir:

Juice of 1/2 an average-sized, average-juicy lemon (~2 tablespoons)
2 tablespoons hibiscus simple syrup (or more, to taste (my husband, for instance, preferred 3 tablespoons of simple syrup, but he also prefers frozen juice concentrate combined with 2 containers as opposed to the standard 3-4))
1/3 cup sparkling or still water (or a little more if you like your beverages less sweet)

Oh, you thought I meant that kind of grown-up beverage? Well okay. In place of water, add 3 tablespoons vodka and a splash of soda water (2-3 tablespoons).

If you want to make 6 servings, combine the following in a big glass jar or small pitcher and chill:

Juice of 3 lemons (3/4 cup)
3/4 - 1 cup hibiscus simple syrup
2 cups sparkling or still water or 1 cup sparkling water/soda + 1 cup vodka

Serve over ice. Enjoy!

Now I'm going to make some salads. Because these are salad days as well as lemonade days, aren't they?

Wednesday, June 4, 2014

Letter to My 6/3/14 Class Participants

Dear Mexican Basics at Home Friends,

I had an unfathomable amount of fun with you last night. I miss it. Who's planning the class reunion?

Here's a recipe for coconut tres leches cake that you can use when you're trying to find a good dessert to go with all your new Mexican food recipes. And a picture:

slice of coconut tres leches cake

And here are links to some of the influences I mentioned in class:

Yotam Ottolenghi
Plenty - especially good for those of you who are CSA members
Melissa Clark
Smitten Kitchen - not to be confused with a similarly named shop on Lake and Lyndale...
Burning River Farm - where I'm a CSA member
Local D'Lish Class Schedule

And here are some other Mexican food recipes on my website:

Refried Beans
Sweet Potato Tacos (really really good)
Best Nachos Ever (same meat filling that we used for quesadillas last night)
Homemade Mole (many ingredients, but comes together v. easily)

I look forward to seeing you at another class. Thank you for being such wonderful, helpful, inquisitive, fun class participants. You are why I love my job!

My best,
Edith

Sunday, May 18, 2014

A Smitten Kitchen Sunday: One-Dish Strawberry-Rhubarb Bars and Maple-Cardamom-Bran Muffins with Peaches and Rhubarb

Consider this a little dance break from Everyday Favorites (although I wouldn't be surprised if the recipes herein become everyday favorites by next week). I just couldn't wait. Time is of the essence. Rhubarb is only in season for so long!

You see: I did some recipe testing for you. Just in case, you know, Smitten Kitchen Deb's seven years of beautiful, reliable blogging (with one memorable exception - learn from my mistake and the comments of disgruntled others and don't make it!), along with, say, her beautiful, reliable cookbook, hadn't yet won you over. Actually I'm fibbing. I didn't have you in mind at all. I just really wanted to eat rhubarb - the Minnesotan kind! from the ground! which is no longer frozen! - and I've had a near-fanatical muffin-making obsession lately. So, when recipes for rhubarb bars and, subsequently, fruity, hearty bran muffins appeared on SK's homepage in the last couple of weeks, it was just a matter of time. Specifically, time until the season-opener Mill City farmer's market (to get rhubarb, last weekend). Also for some reason it took me several trips to the grocery store before I remembered to buy bran. (A grocery list? What on earth is that? No. Way. That is genius. I'm on it. Next time.)

So I want to encourage you to make the strawberry-rhubarb bars because they are easy and delicious - definitely treat-like, and yet their sweetness is tempered by all those oats and punch of red fruit that's redolent of nothing less than spring - Spring - and all its sunshiny juiciness. They really are one-pan bars (you can even ditch measuring utensils if you use a scale, because Deb always ever so kindly provides weight measurements for her ingredients too). Here are pictures of mine (they aren't quite as tidy as the SK ones):

UntitledUntitled

And here is a link to the recipe, which I followed as written, subbing whole wheat pastry flour for all-purpose.


I'm storing them in the refrigerator and they taste v. nice cold.

My bran muffins are a little more complicated. I really wanted to not use all-purpose flour and struggled with the fact that this basically means I'm throwing all chances of lusciously domed muffins out the window. With great force. And not for lack of trying.

Untitled

Whole wheat flour, not unlike gluten-free flours and blends, is tricky to work with. It hydrates differently, it can result in a texture anywhere from sandy to brick-like depending on who knows what all variables, and some people just don't find it tasty. I do find it tasty though, and have been inspired to sort out some 100% whole grain (well, in this case, plus bran) muffins for a couple reasons: (1) while wheat is back in our lives (hooray!), we still avoid barley (an ingredient in all-purpose flour) and anyway I (sometimes feebly) aspire to feed my family less processed/more whole foods; (2) my husband makes a killer 100% whole wheat bread. Have you ever tried that? It is HARD. Most bakeries don't even bother. But he does it week after week, with no dairy or eggs or sugar to help. It's never sandy. It's never brick-like. It tends to dome nicely. I have GOT to be able to manage a muffin then!

OMG. I can't believe you're still reading. Why are we even here anymore?

Because, muffin top or not, these muffins are SO FREAKING GOOD. And pretty healthy. And I am proud of them. I think I have to be proud of them because after I made rhubarb bars and bran muffins, I made more bran muffins. The Blue Sky Bran Muffin recipe just didn't work without the all-purpose flour gluten boost. But with some help from my friends at King Arthur Flour, I figured it out.

If you want a simple recipe with bran + all-purpose flour, go to Smitten Kitchen's Blue Sky Bran Muffin recipe. They look really good.

If you want a 100% whole wheat-fruit muffin recipe (no bran), try out this King Arthur Flour Whole Wheat Blueberry Muffin recipe. They have domes.

If you want a maple-cardamom spiced hybrid of the two - you've come to the right place! Because, well, while Take 1's muffins were super tasty, their centers sunk (that is the opposite of doming), plus the fruit all pooled to the bottom of the muffins and they ended up having kind of soggy underbellies.

UntitledUntitled

Take 2, however - thank heavens, since it was getting late for this baker, tireless as she may seem - Take 2 resulted in just-enough sweet, structurally sound, perfect-crumbed, evenly-fruited whole wheat-oat bran muffins. They were everything I hoped for (minus the dome).

UntitledUntitled Perfect

And I think I'll stop rambling now because it seems about time, doesn't it?

Maple-Cardamom-Bran Muffins with [Fruit of Your Liking]
Yield: 12 muffins
Adapted from Smitten Kitchen and King Arthur Flour

Dry ingredients
1 1/2 cups (127 g) oat or wheat bran
1 1/4 cups (156 g) whole wheat flour (I used white whole wheat flour, not whole wheat pastry flour)
1/4 cup brown sugar
3/4 teaspoon salt
1 teaspoon baking powder
1/2 teaspoon baking soda
1/2 teaspoon cinnamon
1 cup berries or finely chopped fruit, fresh or frozen (e.g. blueberries + nectarine; rhubarb + peaches)

Wet ingredients
1 1/3 cup buttermilk, or plain or vanilla yogurt thinned with a little milk
1/3 cup oil
2 tablespoons maple syrup (optional, could just use 2 more tablespoons buttermilk or yogurt)
1 egg
1 teaspoon vanilla or - if you can get your hands on it, in which case you should - cardamom extract

Cinnamon sugar, optional

Preheat oven to 400 degrees. Grease a 12-cup muffin tin.

Whisk together dry ingredients, making sure no clumps of brown sugar or baking soda remain (I used my fingers for this; v. gratifying). Toss fruit with dry ingredients.

Whisk together all wet ingredients until thoroughly combined. Pour wet ingredients into dry and stir until just combined. Allow batter to rest for 5-10 minutes (this allows wheat flour and bran to hydrate a little more, making the dough more workable). Give batter one more gentle stir to make sure fruit hasn't sunk to bottom.

Measure out 1/3-cup portions of batter into each muffin cup. Sprinkle with a little cinnamon-sugar if you'd like. Bake for 9 minutes. Rotate pan and bake another 9 minutes. Use a knife to test for doneness. Allow to cool in tin for 10 minutes, then remove to racks to cool a bit more. These are delicious warm but I can tell they are moist enough to stay good for a couple days stored in an airtight container, and indefinitely in the freezer. (Microwave frozen muffins for 30 seconds or bring them to work or school frozen and enjoy a thawed, room-temp one a few hours later.)

P.S. As of this evening, I have 28 muffins, 10 mini muffins, and 6 pieces of crumb cake in my freezer. If you're hungry, you should come over. (I also have vegan, nut- and gluten-free chocolate cupcakes.)

P.P.S. Look at this POT OF GOLD I just found!

Wednesday, May 7, 2014

Everyday Favorites: Red Lentils Gone Perfect

Sometimes, I start with a recipe. There are a lot of good recipes out there, you see. And no desire for newness or inclination towards creativity in the kitchen makes reinventing the wheel worthwhile (imho). There's also all that stuff from the first day of my Everyday Favorites series - that stuff about how trying to be really experimental seems at this point like a once-upon-a-time luxury whose sun set about the time my second child started eating solids. There are other people who actually have the time to be experimental with food and even get paid to do so - all for our benefit!

Food, May

Here are my favorite places (cookbooks, this time) to find good recipes:

America's Test Kitchen Mega Tome - it's almost, almost full-proof. Good resource for how to do classics right. Sometimes things require a little more time than my typical Everyday Favorites slapdash approach, but always worth it.

The Art of Simple Food.  Exactly what its title promises.

Around My French Table. Shockingly accessible. Uncompromisingly beautiful. Around Dorie Greenspan's French table, it's about skills and quality ingredients and good habits. All in the name of feeding the people you love and basking in the glow of their company. She makes you want to entertain.

The Breakfast Book. Old-fashioned pancakes-and-eggs perfection. It's the stuff bed-and-breakfast breakfasts are made of (and I say this only having had v. positive, albeit few, b&b experiences). This book has been a little neglected on account of our "strict avoidance" throughout the last two years, but as Beckett outgrows some of his food allergies and my husband and I grow a little more cavalier about what we allow him to try (don't worry, we're v. safe about it), I am hoping it will make a comeback.

In the Kitchen with a Good Appetite. Everyone calls this book welcoming, and that's exactly what it is. Melissa Clark (NY Times columnist and covert author of as many as half the cookbooks you own) is the kind of quirky you like in a best friend and the kind of bold you wish were yourself. I like her for all the reasons all the other bloggers like her, and also because I think she and I have strikingly similar palates.

These are all excellent cookbooks. The original recipe for the lentils came from that last one - which I'm going to go ahead and (channeling my inner Melissa Clark) boldly call my favorite cookbook of all time.

Food, MayFood, May

Melissa Clark's red lentil recipe is nearly perfect as written. She seasons hers with cumin and paprika, brightens them with a lot of lemon juice and chopped carrots, and includes enough liquid to call them soup. I made them as written several times and loved them (hence the several times). But I like my lentils thicker, less soupy. And as much as I love cumin, I like to mix it up with spices as often as I can (living three and a half blocks from a Penzey's will do this to you), so I messed around until I found my own bright, citrusy-curry assortment of spices. And of course I added a sweet potato and of course I tripled the fresh herbs and of course I threw in the zest of my lemon along with the juice. And of course I now make it this way all the time, because these red lentils are now, of course, perfect.

Food, MayFood, MayFood, May

I make a pot of these early in the week and eat them for lunch for the next few days. They are good piping hot, straight from the pot. Or warm, slathered on toast. Or room temp, spread on a pita, with some fresh feta. Or over some brown rice or quinoa, topped with diced avocado and radishes and a drizzle of olive oil. They freeze well too, so if I'm tired of them after a couple days, I'll put what's left in an old yogurt container and freeze them until I crave them and/or have nothing to eat in my refrigerator.

Food, May

Spiced Red Lentils with Sweet Potatoes
Makes ~4 cups

2 tablespoons olive oil or coconut oil
½ an onion, finely chopped
1 carrot, chopped
1 celery stalk, thinly sliced
½ cup other veggies you like, chopped (e.g. fennel, bell pepper, jalapeño if you want some heat)
4 cloves garlic, thinly sliced
1 tablespoon tomato paste (optional, but nice)
1 teaspoon each: ground fenugreek seeds, ground galangal, ground coriander*
½ teaspoon each: salt and pepper
Zest and juice of 1 lime or lemon
2 cups chicken or vegetable broth
1 cup water
1 cup red lentils
1 large sweet potato, scrubbed clean and cut into ½” dice
Large handful cilantro and/or mint (or, heck! the whole bunch!), finely chopped

* Could substitute either 2 teaspoons curry powder, or 1 teaspoon cumin + 1 teaspoon coriander + 1/2 teaspoon (smoked/hot/whatever you like) paprika

In a large pot, heat the oil over high heat. Add onions, carrot, celery, and other vegetables of choice, and cook for 4 minutes. Add garlic and cook 2 minutes. Add tomato paste, lime or lemon zest, salt, pepper, and spices of choice and sauté for 2 minutes longer.

Add broth, water and lentils. Bring to a simmer, then add sweet potatoes. Add a little more water if necessary – you want just enough to barely cover everything. Return to boil, then lower heat to medium-low, partially cover pot and simmer until lentils are soft, about 20-30 minutes. Give everything a good stir. Taste and adjust seasonings.

Remove from heat. Stir in lemon or lime juice and fresh herbs.

Monday, April 28, 2014

Everyday Favorites: Saturday Smoothie with Banana, Cinnamon, and Sun Butter

Well happy Saturday! Wait a minute. Where did Saturday go? Oh yes. It drowned in the rain we're experiencing this week. My husband told me last night that many meteorologists come from Minnesota because, go figure, there is WEATHER here - dynamic, always-interesting-if-you're-into-that-sort-of-thing, worthy-of-study-and-commentary weather. I haven't fact checked this or anything, but it sounds reasonable, especially in light of a conversation I had with my bff Nicole in Corralitos, California, where their experience of weather is the exact opposite of the kind of weather above-described (and where I grew up, knowing exactly zero people who aspired to be a meteorologist). Especially in recent years, Corralitos and surrounding areas seem to cling to a general forecast of mostly sunny, highs in the low 70s. It's delightful to just be in weather like that: beautiful, fragrant, almost disconcertingly comfortable. As we sat in her backyard, Nicole had an epiphany. She observed that she never realized what the big hype about weather was, until it occurred to her recently that my life is entirely different from her own, largely because of the weather. To which I responded: Yes. We've got an urban/rural distinction too, but it primarily is the weather that gives our lives such different landscapes. Spring cleaning in Minnesota is a real thing. We literally pack up half the stuff we've been using for the last eight months and tuck it into our basements, from snow boots to pizza stones. ("Pizza stones? Why?" you (or Nicole) might ask. Because in the winter, turning our oven to 500 degrees is really just giving our furnace a break. Baking that aggressively in summer while we've got our air conditioner cranked up as high as it can go is just plain evil bad stewardship. See? Weather. It affects everything here. Especially once you move out of that condo...)

I digress. Happy Monday! About that smoothie.

So this is the smoothie I drink every Saturday. You can drink it any day you'd like, but it's fairly high calorie, so I can justify it only on Saturdays, because Saturdays are when I do my extra long workout at the YWCA. This smoothie is so delicious it has almost motivated me to do an extra long workout on other days of the week. But then I remember how nice sitting is and I opt out.

This smoothie is popular with the children and MC too. Once you read the ingredients you will understand. It's a whole bunch of yummy things blended together.

Saturday Smoothie Collage

Saturday Smoothie with Banana, Cinnamon, and Sun Butter
Yields: 1 large smoothie

A note on the optional protein powder: I use Tera's Whey or Vega Protein Powder most of the time, which both have a great texture, dissolve into liquid seamlessly, and are slightly sweetened with stevia. If you don't use a sweetened protein powder and/or a sweetened non-dairy beverage and/or if your banana isn't super ripe, a couple teaspoons of honey or maple syrup might be in order. Also, sometimes I throw in a handful of spinach. It totally works. And then you're trendy circa 2007 because you're drinking a green smoothie.

1 cup milk or non-dairy alternative
1 apple or banana
2 tablespoons sunflower seed butter, almond butter, or peanut butter
1 scoop / 2-3 tablespoons vanilla protein powder (optional)
1 teaspoon maca or lucuma powder (optional - these are weird overpriced completely nonessential natural sweeteners; I like them and you can buy maca powder in bulk at the Wedge Co-op)
1/2 teaspoon cinnamon
Pinch of salt if seed or nut butter is unsalted
5-6 ice cubes

Blend everything together until smooth and cold and perfect. Enjoy. Whatever the weather. And hey! Great job on that killer workout!

Thursday, April 24, 2014

Everyday Favorites: Blender Waffles (or Pancakes)
(gluten-free, vegan, need VitaMix other SuperBlender)

This is what I envision right now: a series of posts called "Everyday Favorites" in which all our family's standards get posted on this site.

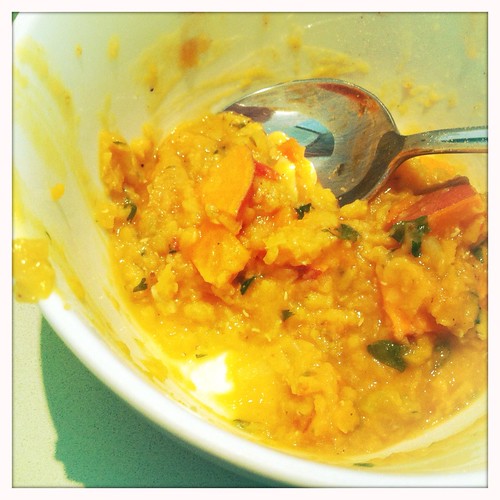
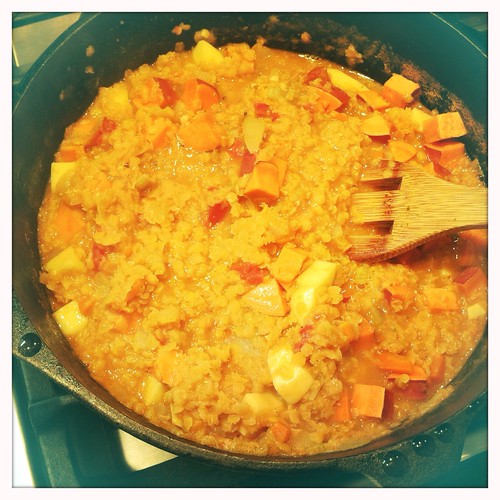
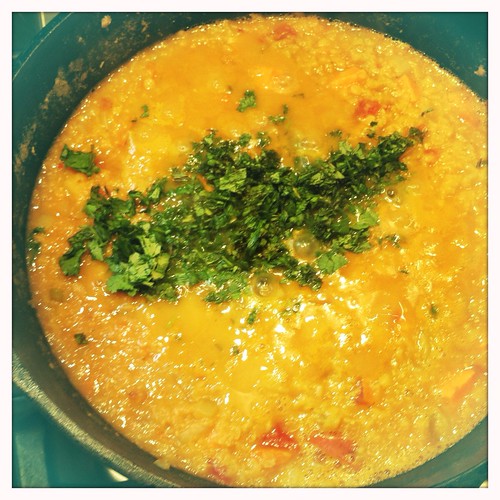
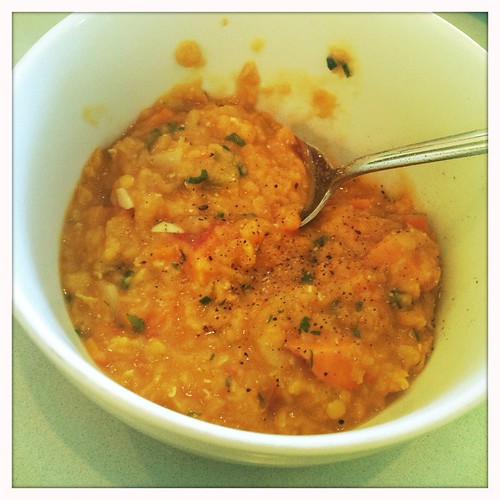
This is why: well, first of all, I'm motivated by a big old kitchen failure that occurred yesterday. It was veggie loaf - like meat loaf but with lentils and veggies instead of meat and eggs. It was horrible. Like, took a bite, made a face, spit it out, promptly threw two loaves in the garbage horrible. On Earth Day, no less! Hence a failure on several levels. On the heels of that debacle, I'm reminded, bittersweetly, of how much has changed since I started this kitchen journal, and how I need to sometimes set aside my ambition and just stick to what works. We culinarily-inclined do not find this an easy task. When life hands us lemons (or food allergies or a powerful article on the environmental impact of eating meat and dairy at the rate we do), we make lemonade! Even if our first try tastes like straight-up distilled white vinegar with a shot of flax seed oil and we wonder how all that hard work could be so utterly fruitless, we persevere! A few years ago, if I made a crap veggie loaf, I'd keep trying until I got it right. But times have changed. I have a different kitchen. I have less time. I have more mouths to feed. I work with costly ingredients that I can't afford to waste. If something isn't good to start with, I can't be bothered with it again. The tinkering in my kitchen is going to happen with things that are good to start with, but that I know I can make better, or at least own a little more (i.e. add cilantro).

So my Everyday Favorites series (I've got five things in mind - one for every meal of the day and, yes, I consider our two snacks per day meals) is meant to be my opportunity to share with you some of my most beloved recipes. The recipes that I return to over and over again - recipes that started out decent enough but, over time, after a lot of tinkering, arrived at a place that I'd call perfect.

Untitled

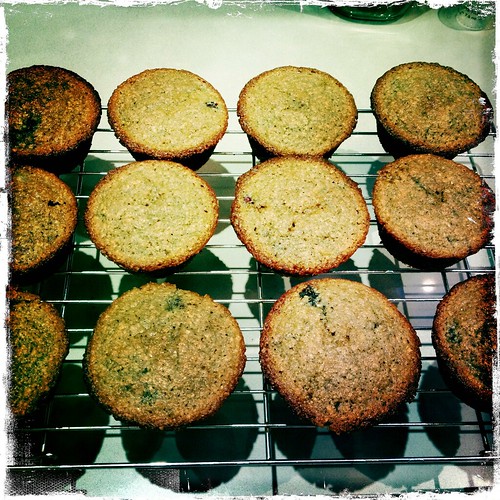
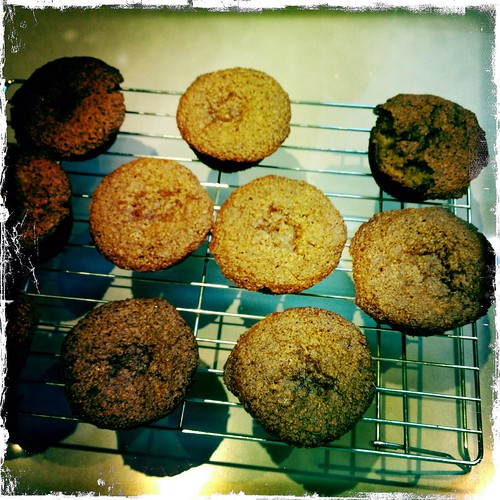
Today's is the inaugural post, starring our favorite waffles. Perfect waffles, actually.

Untitled

I mean, right? That's mostly MC's handiwork.

We make them about one night a month, usually two batches at once*; I soak the grains in the morning and make the batter at night while my husband mans the iron (how decidedly gendered of us). We let them cool on racks and then we freeze them, eight per bag, and reheat them in the toaster for quick breakfasts. (I find that all breakfasts with children need to be quick - and we haven't even started our 7:06 am school bus pick-up yet! Oh dreaded Fall 2014...)

 Untitled

I was going to rave about how economical these are but am a little reluctant. The grains, especially if bought in bulk, are super cheap. I figure these cost about $4-5 for 12 waffles, which is half the cost of the Van's gluten free ones. But then there's that VitaMix thing. Total luxury item.

Untitled

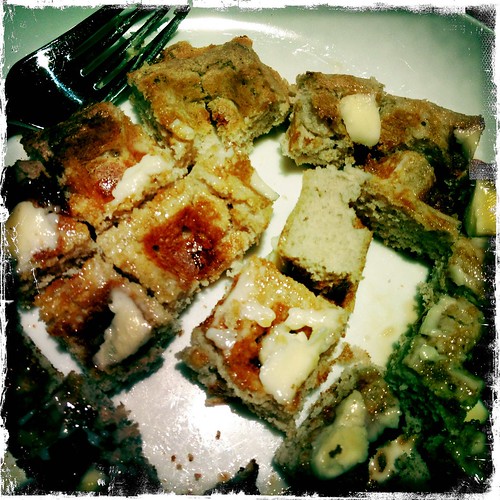
So while they are only a qualified *cheap*, they are an unqualified delicious, they have a great chewy bite but brown and crisp up perfectly around the edges, they store beautifully, and they're made from all whole foods. I've also given you a pancake variation at the bottom, if you like the concept of this recipe (and you have a VitaMix or something comparable), but you are waffle iron-averse. (Perhaps you are like me and have been burned a few too many times attempting gluten-free, egg-free waffles. Pun totally intended.)

Another reason for the Everyday Favorites series: this is a record for me as well as you. This waffle recipe took a fair amount of trial and error. MC and I agree that we have got it d-o-w-n this time. Now I've got the formula stored on the trusty internets for next month!

Other Everyday Breakfast Favorites:

Carrot Cake Pancakes (another blender recipe)

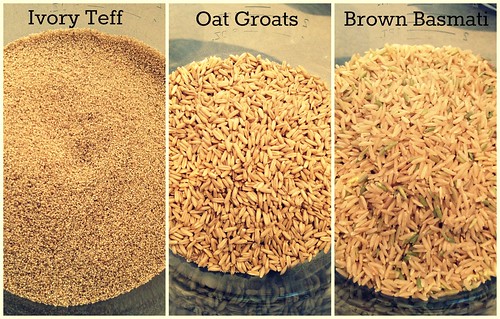
For more pictures of what the grains/process looks like, check out this old post.

* When I say we make two batches, I really mean we make two rounds of the same thing back-to-back. Doubling doesn't work because the VitaMix can only accommodate so many soaked grains and cups of fluid. FYI.

Whole Grain Blender Waffles (gluten free, vegan if you want)
Yield: ~12 waffles

1 1/4 cup brown rice
3/4 cup raw buckwheat groats
2 tablespoons apple cider vinegar, whey, or lemon juice
--------------
1 cup milk, nondairy beverage, or water
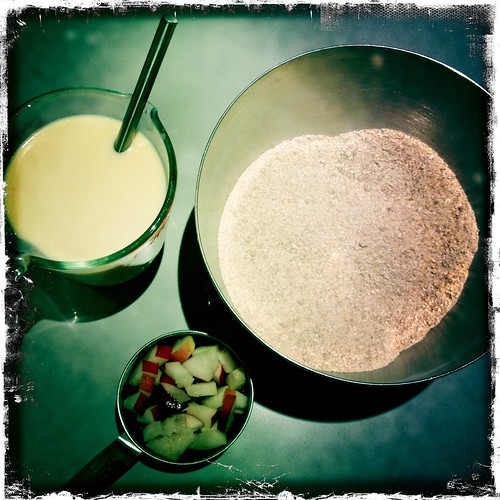
1/2 cup applesauce (could substitute: 1 very ripe banana; 1/2 cup cooked, mashed sweet potato or pumpkin)
1/4 cup oil (I've used all of the following with similar results: grapeseed, melted coconut, rice bran, or olive oil)
2 tablespoons ground flax seed
2 tablespoons maple syrup or honey
2 teaspoons vanilla extract
1 teaspoon apple cider vinegar
1 teaspoon salt
1 teaspoon cinnamon

1 1/2 teaspoons baking powder
--------------
Spray oil to grease waffle iron

Optional add-ins:
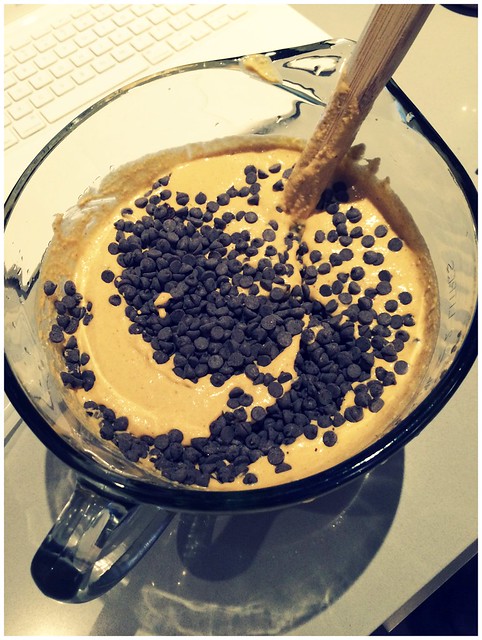
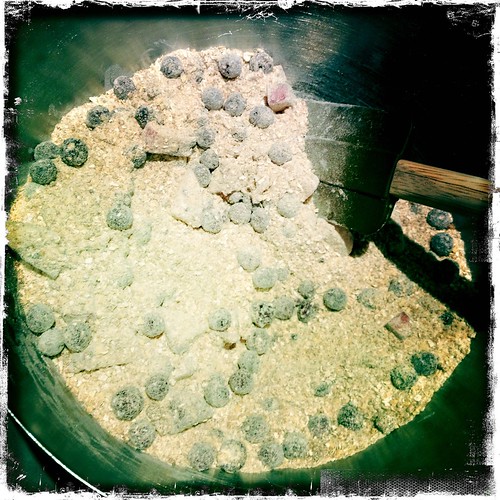
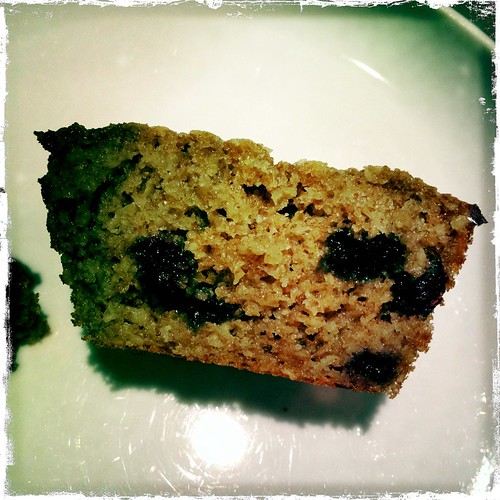
1 cup mini-chocolate chips or 1 grated apple or pear (stir into batter after you've finished with blender)
1 cup fresh or frozen berries (add to blender after everything else is mixed, before adding baking powder - you'll want the berries a little chopped up but not so processed that the batter turns blue or pink)

In a large bowl or measuring cup, cover brown rice and buckwheat groats with water by about 2 inches. Add 2 tablespoons apple cider vinegar, whey, or lemon juice and soak for 8-24 hours. 

When you're ready to make your waffles, preheat your waffle iron according to manufacturer's instructions.

Drain the grains, rinse them in a fine sieve, and pour them into your blender. Add the remaining ingredients, except for the baking powder, and blend until smooth. Add a little more water, 1-2 tablespoons at a time if you'd like a thinner batter. If you are using berries, add them now and blend until coarsely chopped and evenly dispersed throughout batter. Add the baking powder and blend on low, briefly, until just incorporated. If you are using chocolate chips or grated apple or pear, manually stir it into the batter after the baking powder has been incorporated and you are basically done with the blender.

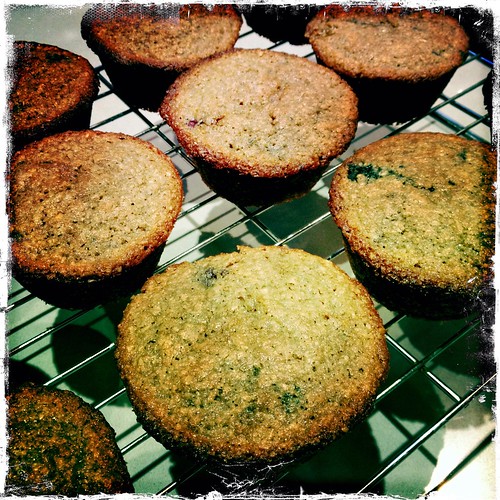
Spray the waffle iron with oil. Ladle batter into iron. (Note! Err on the side of too little batter during the first go. An imperfect-looking, small waffle is better than a waffle batter mess all over the sides of your iron.) Cook according to manufacturer's instructions. If you plan on freezing them, aim for a little underdone, as the toaster will brown them a little more. Enjoy!
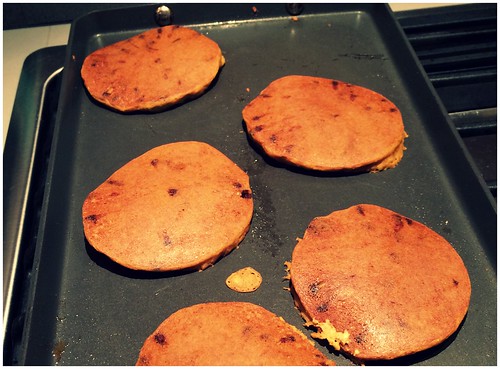
Pancake Variation
Yield: 24ish silver-dollar size pancakes

1 1/4 cup brown rice or oat groats (don't use oat groats if making waffles though! - they won't crisp)
3/4 cup raw buckwheat groats or millet
2 tablespoons apple cider vinegar, whey, or lemon juice
--------------
1 cup milk, nondairy beverage, or water
1/2 cup applesauce or 1-2 very ripe banana(s)
2 tablespoons oil (I've used all of the following with similar results: grapeseed, melted coconut, rice bran, or olive oil)
2 tablespoons ground flax seed
2 tablespoons maple syrup or honey
2 teaspoons vanilla extract
1 teaspoon apple cider vinegar
1 teaspoon salt
1 teaspoon cinnamon

2 teaspoons baking powder
--------------
Butter or high-heat oil for greasing skillet or griddle

See above for optional additions.

If making pancakes, consider some of the optional add-ins above, but quickly sprinkle them into the pancake batter once it's in your skillet or griddle, before flipping.

In a large bowl or measuring cup, cover brown rice and buckwheat groats with water by about 2 inches. Add 2 tablespoons apple cider vinegar, whey, or lemon juice and soak for 8-24 hours. Drain the grains, rinse them in a fine sieve, and pour them into your blender. Add the remaining ingredients, except for the baking powder, and blend until smooth. Add a little more water, 1-2 tablespoons at a time if you'd like a thinner batter. Add the baking powder and blend on low, briefly, until just incorporated.

Heat 1/2 tablespoon oil or butter in a skillet or griddle over medium-high heat. Add pancake batter in 2-tablespoon increments (my batter was thin and spread considerably to make perfect 4" pancakes). Cook for a couple minutes over medium heat and once bubbles begin to form (see picture above), carefully flip and cook another minute or two.

Sunday, March 30, 2014

From Baked via Joy the Baker via Cake and Edith to You with Love: Rootbeer Float Cake!

My husband's birthday is today. So is his father's. Tomorrow is my son's. Weird, right? Yesterday we hosted a multigenerational birthday party in their honor and this root beer float cake that MC requested made for a quite festive, decadent conclusion to the event.

Bday party

I don't know if it's just that I haven't had a real cake in a long time (the kind with butter and flour and eggs), or if it really was one of the best cakes E-V-E-R, but I couldn't stop eating it last night. Moist, rich, near overload of sweetness beautifully balanced by near overload of cocoa and dark chocolate. Plus, root beer. Kind of fun! My only change was to add an additional 1/4 cup root beer to frosting (1/2 cup total) because it seemed like it was going to be too thick to spread. I also reduced salt in frosting to 1/4 teaspoon, per Joy the Baker's suggestion.

I hope someone you love has a birthday soon so you can enjoy this! Alternatively, I hope you are the kind of person who just randomly makes cakes. Because this is seriously crazy good.

Almost as good as the vegan cake that the allergic kids got...

Bday partyBday party

Which actually was delicious, just not if you had the root beer float cake first. ;)

Click HERE for the recipe at the Joy the Baker's site.