Sunday, December 15, 2013

'Tis the Season for Warm Beverages:
Homemade Spiced Chai Mix

Two drinks in a row! Well. Babies, it's cold outside. I mean seriously. We are reaching the part of the year when I stop mentioning in my classes that I am a native Californian because that conversation about why I would ever choose to live in this climate when I have known and experienced a more temperate one (a glorified, glorious one, in fact!) gets tiresome. Minneapolis has its draws, I assure you. But I don't think that my appreciation for the warmth that 8 degrees offers in comparison to zero is one of them. Anyway. As promised, brunch ladies and gentlemen from last Thursday - with reiterated apologies for not actually making it that night - please warm up with this. It's nothing short of delightful. More pictures to follow. (Not to ruin the surprise or anything, but: it looks like... chai.) 
xoxo
e-nc

P.S. Would you like to know how I came up with this recipe? Several years ago, my dear friend Alicia (hi, wifey!) bought for me a chai spice blend from a fancy spice store in her part of the world (the OC). It was the best chai I've ever had, and I have had a lot of chais. Fortunately, she bought me TWO packets of the mixture, so when I opened the second one, carefully now that I was cognizant of its status as precious gold, I actually counted all of the individual spices (even the anise and fennel seeds, before I measured them and realized they added up to a nice round teaspoon each), one by one, and then recreated the recipe with store-bought spices just to make sure there wasn't something secret I was missing. These are the kinds of things you must do to become a cooking instructor. DECONSTRUCT! FIGURE IT OUT! At least when WINGING IT hasn't paid off. The fenugreek is a recent addition brought to you by my own imagination and a recent personal fancy for fenugreek in just about anything I consume. Entirely optional, but subtly special if you can get your hands on it and are into random, exotic ingredients that look like mutant ninja bee pollen. Adds a nice hint of malt and caramel to the chai. Your choice.

Untitled

P.P.S. Buy in bulk if you make this. It is a cheap way to go (see below: six cents for the fennel - yes please!) and then you won't allow $8 worth of cardamom or fenugreek to go rancid in your spice cupboard over the coarse of the next three years. Remember the rule of thumb for spice shelf life: 6 months for ground spices and herbs, 1 year for whole. Or... just trust your nose.

Untitled

P.P.P.S. Don't skimp on the ginger, even if you think you don't love ginger. It's key, both for potency and sweetness.

Homemade Spiced Chai Mix
Yields: 4 cups chai concentrate; enough for 6 large or 8 normal servings

2-3 tablespoons crystallized ginger (¾ ounce)
1 cinnamon stick (3-4 inches)
2 bay leaves
7 green cardamom pods
20 black peppercorns
20 cloves
1 teaspoon anise seeds or 2 star anise
1 teaspoon fennel seeds
1 teaspoon whole fenugreek (optional)

2 heaping tablespoons loose leaf tea (black or rooibos)
To serve: milk, sweetener of choice

Place all ingredients in a 2-quart saucepan. Add 4 cups water, bring to boil, reduce heat and simmer for 10-15 minutes. Remove from heat, add 2 heaping tablespoons of your choice of black (more traditional) or rooibos (decaf, lighter-flavored) tea. Steep 5 minutes. Strain, stir in 3 to 6 tablespoons of desired sweetener (honey in my case). Combine one part chai concentrate with one part milk or non-dairy beverage of choice and serve over ice or hot (about 180 degrees). 

Saturday, December 7, 2013

A Drink for Health: Coconut Spice Elixir

This is to make you feel better when you're under the weather. Turmeric + raw honey + Himalayan sea salt for wellness. Coconut + chai spices for taste. It's delicious and theoretically nourishing and that's about all I have to say about it. Here are some pictures to further entice you where my words, I suspect, will fall short this evening. Now excuse me while I go give my neti pot some exercise. (What? That didn't make you all hungry?)

UntitledUntitled

Oh wait. One more thing. Don't leave this to simmer unwatched.

Untitled

A mess like this is the last thing you want to deal with when you and your children are all sharing a cold.

P.S. Good news: this post was a few days in the making and we are well now. Elixir indeed.

Coconut Spice Elixir
Adapted from Journey Kitchen
Serves 1 adult and 2 small children

1 can full-fat coconut milk
1/2 cup water
1/2 teaspoon turmeric powder
2-3 whole black peppercorns
2-3 whole cardamom pods, cracked
About 1 teaspoon grated fresh ginger
1/8 to 1/4 teaspoon Himalayan pink sea salt
1/4 teaspoon each of whatever of the following spices you have and like: fennel seeds, cinnamon stick, anise seeds or whole star anise, cloves, whole fenugreek seeds
1 heaping tablespoon raw honey

Bring coconut milk, water, and all the spices to a low boil in a small saucepan over medium heat. Reduce heat to low and simmer for 2 minutes. Remove from heat and allow to steep for 5 more minutes. Strain. Stir in honey and serve.

Saturday, November 30, 2013

God of All Harvests: a Thanksgiving poem + Kale-Apple-Lemon Salad with Honeyed Sunflower Seeds

God of all Harvests
By Barbara Molinari Quinby, MPS
©2013 Catholic Relief Services, www.crs.org, used with permission

God of sun and God of rain,
In you, there is no dryness.
In you, no weed chokes the root.
No blight withers the leaf.
No frost bites at the blossom.
And, so, we pray for farmers and their harvests everywhere.
In you, seeds of tears yield a bountiful harvest of joy.
May the rice farmer in Madagascar know such bounty.
In you, seeds of truth and courage yield a bountiful harvest of justice.
May the coffee farmer in Honduras know such bounty.
In you, seeds of compassion yield a bountiful harvest of wisdom.
May the cacao farmer in the Philippines know such bounty.
In you, seeds of hope yield a bountiful harvest of fulfillment.
May the vegetable farmer in Haiti know such bounty.
In you, seeds of love yield a bountiful harvest of forgiveness and reconciliation.
May the cassava farmer in Zambia know such bounty.
In you, seeds of the Gospel yield the glorious harvest that is our salvation.
God of all harvests, bless all planters everywhere:
All who sow and all who gather,
All who nourish and all who weed,
All who thresh and bundle and bring to market.
And bless all harvests.
Sprinkle your living water on our fields, on our relationships, on our communities, on our hearts.
And kiss us with the light and warmth of your undying sun.
May all our harvests reflect the Harvest that is to come.

Thanksgiving

Oh, kale. You are just like the rest of us. You start out prickly and tense and tough.

Thanksgiving

And then after a little TLC, you're soft and sweet and ready to be friendly.

Thanksgiving

Who are we getting friendly with? Lemon dressing, honeyed sunflower seeds - though a cup of granola instead worked just fine at the Thanksgiving brunch I hosted this week - some fresh herbs and a chopped apple or two.

ThanksgivingThanksgivingThanksgiving

This is basically autumn in a salad bowl.

Massaging kale is impressive. It reminds me of how blessed most of us are to have hands.

My salads classes love this salad.

My brunch guests devoured it more aggressively than they tackled Aunt Judy's Egg Casserole and some superyum pumpkin muffins.

I wish I could eat some right now but instead I'll settle for popcorn.

Kale-Apple-Lemon Salad with Honeyed Sunflower Seeds
Yield: 6-8 servings

For lemon dressing (which, by the way, tastes great on just about anything), stir together:

1/2 cup lemon juice
1/4 cup olive oil or sunflower oil
1 tablespoon honey (or agave nectar or 2 teaspoons sugar)
1/4 teaspoon salt
1/4 teaspoon pepper

For seeds*:

In a dry skillet, toast 1 cup raw sunflower seeds (or pumpkin seeds). When aromatic and slightly golden in color, add 1 tablespoon honey and 1/4 teaspoon salt, stir until well coated and then transfer them to a plate to cool.

For salad:

Clean, remove stalk, and shred or tear up one big bunch of kale (any kind of kale will work). Place torn leaves into a large bowl, drizzle with 1 tablespoon olive oil and 1 tablespoon lemon juice, and massage with your hands until it is soft and almost cooked in appearance and texture, 2-4 minutes. Add 1 or 2 apples or pears, chopped into 1/2" chunks, the seeds (which might be all stuck together in one clump, but once you toss them with dressing and massaged kale, they'll break up nicely). Optional additions: a couple tablespoons of chopped mint, chives or scallions. (At brunch and in class I usually do a mix of mint and scallions.) Enjoy and feel healthy! Happy belated Thanksgiving!

* In case you skipped my ramblings at the top - note that a cup of granola is a lovely substitute for the sunflower seeds. That's what I added for crunch on Thanksgiving and it gave the salad a decidedly brunchy flare.

Wednesday, November 20, 2013

For Rhiannon: Fall Quinoa Bowl with Roasted Sweet Potatoes, Broccoli, and Chickpeas

Rhiannon! I've been thinking about you this week. I hope the transition back to work has been smooth and that the soup challenge is paying off. I also wanted to tell you that I am obsessed with my homemade moisturizers, so thank you for inspiring me.

The rest of you! This is the best thing I've eaten in a long time. It's not a one pot meal, or a quick weeknight meal, or anything decadent. But it's DELICIOUS. And flexible (I've embedded a few alternatives into the recipe, but you know your kitchen and palate better than I do). Also, please note that this is a clever combination of all whole foods. And with the exception of the roasted vegetables, everything is theoretically do-ahead. And this is the time of year when using your oven is totally a good idea - doesn't your furnace need a little rest now and then?

Untitled

So here are the main parts:

A couple cups of cooked quinoa. Maybe the costly multicolored kind because it's pretty. (They cook the same. Don't listen to anyone who tells you otherwise.)

Untitled

Spiced, roasted vegetables. I used broccoli and sweet potatoes. I think parsnips and cauliflower would be good too. You want about 2 pounds of whatever vegetables you like; use common sense or the google machine to sort out your cooking times. I inadvertently charred mine and everything still ended up crazy good.

Untitled

Even my children enjoyed their deconstructed portions. (Except for the quinoa. They used to like it but I stopped making it for a while so now it is weird to them. Take note, parents! Sadie tried, literally, two grains of quinoa and declared it was too spicy for her. There was no spice in it whatsoever.)

Untitled

Roasted chickpeas. These are super yummy. Their texture is best the day they're made (and better if you're using fresh cooked chickpeas instead of canned ones), but I wouldn't kick 'em out of bed on day 2. They're oddly reminiscent of corn nuts.

Untitled

Quick cooking lesson: you want to use your two biggest roasting pans/baking dishes for the veggies and chickpeas, respectively, and you want to spread out your vegetables and chickpeas so that there is as much space as possible between pieces. Here's why: when vegetables and legumes (and anything you plan on eating) hit heat, the moisture that can be found in all (most?) organic matter is released. When food is crammed together on a pan, this moisture results in a steaming effect, rather than roasting. More space = less steaming = more dry, crunchy bits = good. 

Not pictured:

Dressing. You want something really bold and punchy that's going to tie everything together and brighten up the smoky spices (and, perhaps, "charred" flavor profile) you went for with your veggies. I used Smitten Kitchen's carrot-ginger-miso dressing, omitted onion and added 1 clove garlic and more water than she calls for in her recipe (at least 2 extra tablespoons, maybe up to 1/4 cup), subbed apple cider vinegar for rice vinegar (resourcefulness at its best). This dressing, even with necessary modifications, is fabulous - original source is Gwyneth Paltrow, so how could it not be? - and lasts a good week in the refrigerator (mine was at least 5 days old when I dressed my quinoa bowl with it). But you've got options if you don't have all those Asian pantry ingredients at hand. I've included three alternatives in the recipe below because I super love you.

Feta cheese.

Fresh mint.

Untitled

You're welcome.

Fall Quinoa Bowl with Roasted Sweet Potatoes, Broccoli, and Chickpeas
Yield: 3-4 servings

2-3 cups cooked quinoa*
1 large sweet potato (~1/2 pound), scrubbed and chopped into 1/2" pieces
1 large head broccoli (or, in my case, 3 small ones), florets broken up, stems chopped into 1/2" pieces
2 cups cooked, drained, dried chickpeas**
2-3 tablespoons olive oil, divided
Salt, pepper, other spices you like (I used Penzey's 4S seasoned salt on the sweet potatoes and broccoli, and then big pinches of ground coriander, smoked paprika, Golden Fig's Smoky Habanero Salt (available at a Local D'Lish near you! hey, while you're there take a class!), black pepper, and ground fenugreek seeds on the chickpeas; you could use a good curry powder that you like if you want less heat, or for more heat some cumin and a lot of cayenne, chipotle, aleppo, or freshly ground black pepper plus some fresh lemon or lime zest during the last 20 minutes of roasting)
Dressing options: Carrot-Ginger or Cranberry Miso or Garlicky Peanut Sauce or recipe at bottom of this post***
Feta cheese (optional)
Fresh mint or cilantro (optional)
(Oh wait, everything is optional, this is a grain-veggie bowl!)

Preheat oven to 400 degrees. You'll need two large roasting pans for the vegetables and chickpeas. (See cooking lesson above.) Toss sweet potatoes with 1 tablespoon of oil and salt, pepper, and some spices you like. Spread them out on one of your roasting pans and place pan in oven. Cook for 15-20 minutes, until starting to soften but you don't want them to be browning yet, so check on them early and often. In a bowl, toss broccoli with 2 teaspoons olive oil and a pinch each of salt, pepper, and spices. In your other roasting pan, toss chickpeas with 1 tablespoon olive oil and about 2-3 teaspoons of combined spices of choice + 1/2 teaspoon salt. Add broccoli to the sweet potatoes on roasting pan and return to oven, on lower rack. Place pan of chickpeas in oven on the rack closer to the burner. Cook for 18-22 minutes more, tossing with a spatula every 5-8 minutes. Remove from oven when everything is just starting to brown nicely and chickpeas are crunchy.

Scoop 1/2 - 1 cup quinoa into each bowl. Top with a cup of vegetables, a good amount of dressing, some crumbled feta, chickpeas (or nuts or seeds - see note below), and some fresh herbs if you've got some. Happy healthy dinner! Happy fall!

* How do I cook quinoa? I'm so glad you asked. Like this: Toast 1 part quinoa in a dry saucepan for about 3 minutes, stirring occasionally. Add 1.5 parts water, bring to boil, reduce to simmer, cover and cook for 15 minutes. Allow to rest, covered for 5 minutes, then fluff with a fork.

** Ultimately, the roasted chickpeas are just there for some crunch and protein (and, you know, they're a bit of a novelty item). You could easily omit them and substitute some toasted, spiced nuts or seeds (or, heck, corn nuts, I won't judge). Probably about a cup of them.

*** Another dressing idea is this zippy ginger-maple dressing that my friend Amber made for me and now I make it for my classes (with a little acid added (lemon/lime juice) because I like a lot of acidity in my food). Blend everything together: as much grated ginger as you can handle (1-2 tablespoons, by the way: no need to peel the ginger, especially if you use a microplane to grate it), 2+ large garlic cloves, 2 tablespoons soy sauce, 2 tablespoons maple syrup (or honey or agave nectar or apricot preserves), ¼ cup olive oil or melted coconut oil, juice of half a lemon or lime.

Sunday, November 17, 2013

Cookies again! But of an entirely different sort: Hippy / Breakfast / "Healthy" Cookies

In my classes, I often ask people a couple things about how they relate to recipes. I've found, through my ongoing v. scientific study, that about 30% of people really, really, really need a recipe and need to follow it to the letter in order to be comfortable in the kitchen, about 25% of people like to start with a recipe that they follow precisely the first time around but if it's worth making again they'll own it a little the next time, about 25% of people like a recipe to look at but are comfortable immediately modifying it to make it taste like something they know they'll like, and about 20% of people literally cannot follow a recipe to save their lives. Which category do you think you fall into?

Personally, my relationship with recipes is in flux. Historically I've been among that last 20% - I can't leave well enough alone so I'll improve a recipe before I even try it as written once. Often that means I'm not following the recipe at all. The recipe is just one of many ideas at play as I make dinner or sweet rolls. After a year of lessons learned the hard way, however - and by "the hard way" I mean the expensive way, because alternative grains and starches and egg replacers and sunflower seed butter can get quite pricy - I've taken a different approach. If a recipe that is safe for my family intrigues me, it's probably a gamble. So I usually make it as written first, to figure out if the source is even trustworthy, and then if it turns out awesome I'll stick to the recipe in the future with perhaps minor adjustments, and if it turns out decent but in need of improvement, I'll have a good sense of how to improve it based on the taste and texture of the followed-recipe-as-written version. I continue to learn without reinventing the wheel. I get to be creative and apply my own culinary skills and knowledge with some actual method.

Here are some of the sources I go to over and over again, for those of you who might be in a similar situation in terms of food restrictions (nuts, eggs, gluten, dairy, some legumes):

My New Roots. The things one woman can do with some ground oats and chia seeds. Her "Life Changing Loaf of Bread" is indeed a revelation; her fig-carob muffins are a tutorial in minimalist vegan, gluten-free baking. She's my hero. 

Baby Cakes Covers the Classics. This cookbook's not perfect and there are some angry reviews of it out there on thesehereinternets. But if you really want sweets to be a part of your life and you can't eat any allergens and you are willing to commit to Erin McKenna's ingredient preferences once and then experiment a bit the second time around... this book is pretty great. We really like her waffles and chocolate chip cookies (I make it according to her "thick and chewy" recipe adjustment guidelines). Her pastry dough recipe, which I used to make cinnamon rolls, is flawed but by no means unpalatable. (Non-allergic visitors went back for seconds.) Furthermore, amidst all the negative reviews on Amazon and Goodreads, people consistently say that her madeleine and thin mint cookie recipes are foolproof. They are on my list but I can't vouch for them yet.

The Allergen-Free Baker's Handbook. Again, with vegan/gluten-free baking there are no guarantees. But the now famous Cybele Pascal's recipes seem pretty well-tested and I make the following on a regular basis, with a few modifications because I avoid Ener-G egg replacer as much as possible and she doesn't: cornbread, chocolate sandwich cookies (like homemade Oreos, but softer), thumbprint cookies, dark chocolate cake, brownies (these really are the best brownies, but I use 2/3 the amount of sugar called for), and all the muffins (literally). Her chocolate chip cookie recipe failed me, however, and I've found better cake recipes than hers from... next please!...

Living Without Magazine. This magazine truly changed my life, and it is the source of the recipe which I've modified and am sharing with you in this post.

To a lesser extent, and a little quirky/more radical, but still really helpful and inspirational for me:

WholeMade, most recent favorite is these pumpkin cookies
Purely Twins, especially these

More resources become accessible as you accrue more weird ingredients. Different cooks have different pet ingredients. (I sometimes think I should have a note on my bio at Local D'Lish that says, "Oh, and if you don't like sweet potatoes and cilantro, maybe you should take a class with Kate instead.")

Today's recipe is for some healthy cookies. They have chocolate chips and puffed cereal in them but otherwise no highly refined products. To me, and my children, they are just enough sweet. (But if you want them sweeter you can always add sugar; start with 1/4 cup.) Even the first time I made them, when they were kind of weird and in need of something (and I worked hard to think of what that something could be besides straight up sugar) they were strangely addictive. Now - after adding some puffed flax/rice cereal for crunch, the oats for substance, cinnamon for depth, and upping the amount of salt for *ahem* some actual flavor - they are awesome, still addictive but less strangely. And I don't feel bad giving them to my children for a snack (or second breakfast) because they have only 4 grams of sugar in each cookie, and good amounts of fiber and protein. (But can still pass for cookies.) They are also way cheaper than a box of Enjoy Life cookies, which is the most readily available treat for my son.

Untitled

Does that gooey, shiny stuff on the right look like something you want to eat with a spoon? That's because it is something you do want to eat with a spoon. It's like not-too-bad-for-you candy.

UntitledUntitledUntitledUntitledUntitled

Hippy / Breakfast / "Healthy" Cookies
Adapted from Living Without Magazine, December/January 2014 (recipe by Kelly Brozyna at thespunkycoconut.com)
Yield: ~ 40 cookies (more precisely: 42 cookies)

1/4 cup ground flax seeds
1/2 cup coconut flour
1 1/2 teaspoon salt
1/2 cup mini chocolate chips
1/2 cup thick rolled oats
1/2 cup shredded unsweetened coconut (or use more thick rolled oats - total of 1 cup)
1/2 cup Crunchy Flax cereal or other crunchy puffed rice (or other grain) cereal
1 teaspoon cinnamon
2 cups sunflower seed butter or other nut/seed butter (you want a whole jar here, basically: 1 lb)
1 cup coconut milk (canned kind, full fat)
1/2 cup liquid sweetener (so far I like 1/4 cup maple syrup + 1/4 cup brown rice syrup best, and all honey least)

Preheat oven to 350 degrees. Lightly grease a baking sheet or line it with a Silpat.

In a large bowl, stir together flax seeds, coconut flour, salt, coconut, oats, chocolate chips, cinnamon, and cereal.

In a separate bowl that can be used with an electric mixer, or in your blender or food processor, combine sunflower seed butter, coconut milk, and sweetener and mix until there are no clumps of any one thing and the consistency is that of caramel. This mixture, by the way, if you allowed it to firm up a bit or reduced the amount of coconut milk, would make a great cupcake topping or a drizzle for some homemade Samoas. (I'm on it. I inspire MYSELF!)

Toss dry ingredients into wet and combine with a spatula or spoon or your hands. Using a tablespoon measure (or, better yet, a cookie scooper - those things are so great), dollop batter onto your prepared baking sheet. You don't have to space the cookies apart very far, as they don't really spread at all. Wet your fingers with water and press down on the tops of the cookies to flatten them a bit (the shape they're in when they go into the oven will be the shape they maintain when they come out of the oven). Bake for 18 minutes, rotating pan 180 degrees after 9 minutes, for even baking.

Wednesday, November 6, 2013

You Asked. Spiced Whole Wheat Ricotta Cookies.

Hello friends. I baked you some cookies. And then - what do you know - you wanted the recipe. So here it is. Enjoy and try hard to not eat them all in one sitting. They are soft and cake-like and just barely sweet. The whole wheat flour gives them a texture that your inner hippie will adore. I like them and love them and am glad they are gone. I'm making them with my Mambo Italiano class on Sunday as well, so if that's why you are here - welcome and enjoy the rest of the site!

Love and cookies,
E-NC

P.S. 11/10/13 - Ricki, Scott, Angela, Raela, Jeni, Kelly, Katie, and Jessi!* You are the best! I had a wonderful afternoon with you and I am sleeping with your notes under my pillow tonight. I hope that's not creepy. Here you are looking really cute and skilled in the kitchen. Thank you for making my family's dinner. My husband was v. pleased. Buonanotte. I hope to see you all again soon.

P.P.S. Everyone else: Kelly's new favorite cookie was made with L.C. Finn's Anise Extract and zest of one lemon.

UntitledUntitled

Spiced Whole Wheat Ricotta Cookies
Adapted from this
Yield: about 2 dozen cookies

3/4 cup sugar
Zest of half an orange or whole clementine/tangerine/blood orange
1/2 cup butter, softened (1 stick)
1/2 cup ricotta cheese
1 egg (see note)
1/2 to 1 teaspoon cardamom extract, anise extract, almond extract, or vanilla extract
2 cups whole wheat flour, spelt flour, whole wheat pastry flour, or all-purpose flour (see note)
1/4 cup milk (maybe: see note in recipe)
1 teaspoon baking soda
1 teaspoon salt

Note: Whole wheat flour hydrates differently than more refined flours. If some extra liquid isn't used in a baking recipe where whole grain flour is used as a substitute for refined flours, whole wheat cookies and pastries can end up crumbly or sandy. My rule of thumb is, if I'm substituting whole wheat flour where all-purpose flour is called for: add 2 tablespoons milk per cup of flour (4 tablespoons = 1/4 cup, so in this recipe we are using 1/4 cup milk to hydrate 2 cups whole wheat flour). An extra egg can sometimes help with texture and binding as well - so if you like a firm, soft cookie, go ahead and use 2 eggs in this recipe, and maybe just 2 tablespoons of milk. If you are using all-purpose flour instead of whole wheat flour, omit the milk. The butter, ricotta, and egg will sufficiently hydrate all-purpose flour.

Preheat oven to 350 degrees. In a bowl, whisk together flour, baking soda, and salt. In a larger bowl, (ideally the one that goes with your stand mixer), use either a wooden spoon or the paddle attachment of your mixer to cream together the sugar, orange zest, and butter. Add ricotta cheese and milk (if using - see note) and stir to incorporate. Add egg and stir to combine, followed by flavored extract of choice (or convenience anyway). Add in the flour mixture and stir until you've got a nice soft, tacky, pliable dough. Measure out tablespoon-sized balls onto a baking sheet (no greasing or Silpat required), leaving at least a couple inches between (they expand a lot). Bake for about 15-17 minutes, rotating pans 180 degrees after 8 minutes for more even cooking. Cool for at least 5 minutes on baking sheets and serve. Allow them to cool completely before storing them in an airtight container (where they will get softer over time).

* I hope I got everyone's name right. 

Tuesday, September 3, 2013

Zero for three in my aspirations for this post, and yet... Cannellini Bean Hummus


One time, in early August, I wrote the following post while I was sitting on an airplane headed to California. I developed this recipe the last time I was in California and thought I could somehow make sense of posting it six months later by somehow tying it into the fact that this was the first time I've been back to to this recipe's birthplace since its birthday. Nostalgia, place, food, home, comfort, smells, sunshine, strange loops, hummus, you know. (Happy half birthday, Cannellini Bean Hummus!) 

Hummus brownies and bdays oh my!

One time, in early September, I gave myself a challenge to post every day in September - allowing me the opportunity to post from the substantial backlog I've got (there really are some good ones!) and you the opportunity to fall in love with me all over again. (That's how I make people fall in love with me: by being exceedingly PRESENT. Hello! Hello! I'm here! Still here! Here again! Do you love me? But then I confuse you. As it turns out I am totally the flaky person who never calls. You probably shouldn't waste your time pining. I'm never gonna deliver. The space I occupy in your brain could be better used. Go study quantum mechanics or write a novel.)

Did I mention I am super loopy lately? I am. A little unfocused. (Except when I'm with YOU, students! Hiya! I am v. professional!)

One time, in February, which was ages and ages and ages ago, I made some wonderful cannellini bean hummus for my sister’s fortieth birthday party. It was my mom’s idea to use cannellini beans in place of the standard star of hummus, the lovely and ever-so-structurally-sound garbanzo bean. Her primary motivation was safety, as chickpeas are among Beckett’s food allergens. The primary result, however, was a creamy, silky smooth hummus that was lighter in texture and brighter on the palate than your run-of-the-mill chickpea hummus. The fresh, citrus element was much more flavor-forward than usual as it didn’t have to compete with the nutty, earthy quality of chickpeas. Once I figured that out, I played it up big time by incorporating the zest of my lemons as well as their customarily involved juice, and adding enough freshly ground coriander to give it a subtle limy twist. It was perfect. And did I mention smooth? So smooth!

So, thanks to mom’s emphasis on safety-first food preparation when we’re in town, even though the safety aspect became sort of irrelevant because Beckett didn’t really eat any of the cannellini bean hummus (he likes his chips and carrots straight up, yo, and anyway why we would he eat hummus when there were brownies on the horizon?), I’ve got for you today, a mere six seven months later, what I think is a new and improved version of super smooth, lemony-delicious hummus. You’re welcome.

Hummus brownies and bdays oh my!

Cannellini Bean Hummus, a Basic Formula
Yields about 3-4 cups
Have a little more of every ingredient on hand, other than the beans, so you can adjust the flavorings to find the balance that suits you best, based on your palate and also on the potency of each ingredient, which can vary significantly.

2 14.5-oz cans cannellini beans (or butter beans or, for more traditional texture, garbanzo beans)
2 cloves garlic
1/3 cup tahini or other nut or seed butter (optional - no joke! this is optional! it's lighter and lemonier w/o)
½ teaspoon ground cumin
½ teaspoon ground coriander
1 teaspoon salt
1 tablespoon olive oil
2-4 tablespoons fresh lemon juice (or more; from 1-2 lemons)
Zest of 1-2 lemons

Have all your ingredients prepped and measured; start running food processor fitted with regular S-blade. Drop in your garlic, one clove at a time, into flute and process until minced, about 10 seconds. Remove lid and add beans, cumin, coriander, zest of one lemon, and salt. Process until everything is thoroughly combined. (Add a little water, one tablespoonful at a time, if you need some help to get it going.) Slowly drizzle in olive oil, followed by the lemon juice, and process until you’ve reached desired consistency. Taste and adjust seasonings. Serve with an extra drizzle of olive oil and something colorful sprinkled on top, e.g. z'atar, black sesame seeds or nigella seeds, paprika, aleppo pepper.

Tricks! (See? I'm tricky too. Run!)
1. Too much tahini can be balanced out with a little more lemon juice or zest.
2. Too much salt can be balanced with a tablespoon of water or a pinch of honey. (Way too much salt, however, is a disaster, unless you have a lot of all the other ingredients on hand and you want to make A LOT of hummus...)
3. For a thinner, smoother hummus, add more olive oil or some water, a teaspoon to tablespoon at a time.

Wednesday, June 19, 2013

For Your Next Picnic: Grandma Cameron's Coleslaw

Though my siblings, my mother and her siblings, and certain in-laws of my father (see here) all have mad skills in the kitchen that have informed my own palate and culinary style, neither of my grandmothers - wonderful and talented as they were in other ways - was known for her kitchen exploits. My maternal grandmother made traditional Colombian food on occasion, but she wasn't much of an eater, frankly, unless that which was being eaten was deep-fried and heavily coated in sugar, so she probably didn't have much personal motivation where food preparation was concerned (I find my love for all things food is the greatest motivator for me in the kitchen), plus she was pretty busy using her brighter talents (she was an amazing seamstress). My paternal grandmother - well, I guess it wasn't quite accurate to say she wasn't known for her kitchen exploits. She was known for them. They were worthy of much teasing, in fact. She was a rather dreadful cook but a good baker, mostly of cookies and of course, as she was a native Minnesotan, bars. I did so like her cookies and bars.

Anyway. Until I got married, I didn't have "grandma's recipe for [fill in the blank]." Grandma's recipe for chocolate chip cookies was probably the one on the back of the Tollhouse bag (no shame in that though).

Cole slaw and cakeCole slaw and cake

My husband's paternal grandmother, however, is a rather inspired cook. She raised five boys on a farm and cooked the way all the latest cookbooks with catchwords like locavore, farmer's market, "farm to table", seasonal, et cetera, tell you to cook. She gardens and cans and pickles and bakes and saves bones and stalks and rinds to throw in her soups. She uses what she grows and sends the rest home with whoever stops by. And her food is really good. It's v. typically midwestern -  a nice blend of novel and comforting to me, even after 11 years as a Minnesota resident - but a little richer in some ways. She doesn't ever skimp on sugar or seasoning.

This cole slaw recipe is one of my favorites. I never liked cole slaw growing up because I hate mayonnaise and I didn't think you could make cole slaw without it. Grandma Cameron corrected me. I love cole slaw the way she makes it - it's creamy despite absence of mayo or dairy, and it usually has twice as much sugar as is written into the recipe below - but, over the years, I've reduced the sugar a little more each time until I figured how little I could get away with while still loving the dressing.

The addition of dried cranberries is inspired by the fish fry down the road from my friend Lindsey's cabin. I miss that fish fry. Grandma Alice sure would have liked their sugar-dusted fry bread.

UntitledUntitled

Grandma Cameron's Coleslaw
Yields: about 1.5 cups dressing + 8 cups slaw (enough to share at a big potluck)

For dressing
1/2 cup mild-flavored oil (I use sunflower or grapeseed usually, but mild olive oil would be fine)
1/4 cup sugar (you could use up to 1/4 cup more sugar if you want it super sweet)
1/4 cup apple cider vinegar
1/2 an onion, chopped into a few chunks
1/2 teaspoon ground mustard seeds (could sub 1 teaspoon yellow mustard)
1/2 teaspoon caraway seeds (I sometimes use the ground ones from Penzey's)
1/2 teaspoon salt

For slaw
1 small purple or green cabbage or a mix, sliced as thinly as you can manage
2 carrots, shredded or ribboned with a vegetable peeler
1 cup dried cranberries

Blend all the dressing ingredients in a blender until smooth. Toss vegetables with half the dressing, add more as you see fit and serve the rest on the side.

If you want an even creamier dressing, you could use 1/4 cup heavy whipping cream + 1/4 cup oil instead of 1/2 cup oil.

Saturday, June 15, 2013

Many Ingredient Peach-Rhubarb Pie

The good news is this: I made an amazing pie. Twice.

The bad news is this: sometimes to get a gluten-, chickpea- and nut-free blend of flours to work as magnificently as good old all-purpose flour does, and to get it to actually taste like something other than "weird" or "chalky" or "off", you have to use a daunting number of ingredients. Some of these ingredients have the consistency of powdered sugar and will leave your hands, your clothes, and many surfaces in your kitchen coated in white. Some of these ingredients are super expensive. All of them are highly processed, highly perishable, tricky to store, and rather unsavory on their own.

Sometimes when I open my freezer full of these items, I just sigh wistfully, missing the days when 101 Cookbooks and Smitten Kitchen provided my uncomplicated dinner inspiration and Joy the Baker was my main squeeze for sweets.

Sometimes I suck it up and experiment.

Sometimes I experiment and I whip out a fabulous, fabulous, breathtaking, unbelievably better-than-normal-tasting, delectable gem. This coffee cake was a recent one. But - friends! - it pales in comparison to the pie I made yesterday. (The fact that I made it yesterday and am posting about it today should be proof enough of that point. When was the last time that happened?) (Full disclosure: I made this on Wednesday, which was "yesterday" when I started this post on Thursday. And then I made it again on Saturday, the new "today".)

PiePie

I know this pie won't be for everyone. So:

(a) If you and your family can eat wheat, just head on over to Joy the Baker's site for the recipe that inspired my own pie. Swap in peaches for strawberries and you'll have a less fussy version of what's below.

(b) If you are appalled by the number of ingredients I call for in my pie crust flour blend (SIX!), you can modify it based on the Living Without template I provide following the recipe, or you could try using a purchased high-protein gluten free baking blend. It will likely include one or more of the following as the first ingredient: soy, fava, or chickpea flour (besan). (Example: Bob's Red Mill makes a gluten free all-purpose baking blend starring chickpea flour and it gets rave reviews and is the primary blend used in the vegan, gluten-free Babycakes bakeries (according to their cookbooks).)

(c) You could skip the crust and just make a crumble. It will be comparably delicious and much easier.

For those of you in my situation, though - those of you in my situation who want to make a pie, anyway - I am so happy to share this with you! It's A-MAY-ZING. Come try some for yourself. You have five minutes.

Are you ready for the recipe?

I bet you are, but I have more to say. Here's the deal. There are no eggs, no dairy, no wheat, no nuts, no besan in this recipe. You know what it's not free of, though? SUGAR. Sugar is bad for you but it tastes good. Pie is bad for you but it tastes good. I made this same pie crust a few weeks back and used it for a plum galette. I was so impressed with how manageable the dough was and it ended up looking and tasting like a real pie - of course I was going to make it again, before I even tried it!

Pie

Wouldn't you?

But then we ate it. And it wasn't bad; no crumb went to waste. It was super tart though. I had tried to go the healthier route (might as well go all out, eh? - vegan! gf! no refined sugar! 7 minute workout!), so I used date sugar instead of regular sugar. And I used plums and apricots, neither of which are super sweet. The tartness of it all was a little much for us (thank heavens for ice cream), so I vowed that next time I messed around with this pie crust, a high level of sweetness was not something to be compromised.

I think I am done now. Pardon my amateur "fluting". Enjoy!

Pie
PiePie

Vegan, Gluten Free Peach Rhubarb Pie
With some help from Living Without and Joy the Baker
Yield: 3 8 servings 

Note: Make the filling before the crust. Make the crumble after the crust, in the same bowl.

For filling
1 pound rhubarb, sliced into 1/2 to 1" pieces
2-3 white peaches, pitted, sliced and cut into 1/2 to 1" pieces (don't bother peeling)
1/3 cup brown sugar
1/3 cup sugar
2 heaping teaspoons cinnamon (or apple pie spice if you want more spice)
1/4 cup corn starch

For crust
1 1/2 cups gluten-free high-protein flour blend (recipe following pie recipe)
1 1/2 teaspoons xanthan gum
1/2 teaspoon salt
3 tablespoons sugar
6 tablespoons coconut oil (= 1/3 cup, if that is easier for you to measure)
1/3 cup cold water 
3 teaspoons cider vinegar

For crumble
3/4 cup gluten free flour
3/4 cup oats
2/3 cup brown sugar
1/2 teaspoon salt
4 tablespoons coconut oil (= 1/4 cup) (soft or melted, it really doesn't make a difference)

Make your filling by gently tossing the rhubarb, peaches, and other filling ingredients in a large bowl until the fruit is all covered with sugar and cornstarch and spice. Set aside.

Prep for crust, as you need to work quickly so it doesn't dry out: Grease your 9 or 10" pie plate liberally. (I used coconut oil and this worked fine.) Have a large surface available and clean (ideally a large cutting board), cover it with a large sheet of parchment paper, and dust it with some flour. Have your rolling pin available and dust it with a little flour too. Clean your hands so that you can get them messy. In a large bowl, whisk together flour, xanthan gum, salt, and sugar. Melt the coconut oil in a measuring cup until just liquid. Whisk coconut oil, water, and vinegar together. Pour wet ingredients into dry and combine with your hands until you have a sticky but workable dough. Form a ball with the dough and place it in the center of your floured parchment paper. Dust the top of the dough with a little more flour. Roll the dough into a circle about 12-13" in diameter. Invert your pie plate into center of rolled dough. Now, either flip whole cutting board over while holding pie plate on top (so that at the end the pie plate will be on the bottom with the dough on top), or very carefully use the parchment paper to flip crust into pan. Gently coax the dough into the pie plate and use any extras that hang over the sides to patch holes or thicken thin spots. 

Pour the filling into the pie crust and place in the freezer for 30 minutes.

Meanwhile, preheat your oven to 350 degrees. Make crumble by combining all ingredients in a large bowl with your hands, squeezing it in little handfuls until you get a nice mix of big and small sticky crumbs. 

After pie has chilled for 30 minutes, top rhubarb mixture with crumble and spread it out over top of filling. Place in oven and bake for 30 minutes, then rotate pie 180 degrees and bake for 15-20 minutes more, until crust is golden brown and filling is bubbly. Allow to cool for 2 hours before slicing and serving.

--------------------

My high-protein blend, which made about 4-5 cups of flour and which I will make again:

 cups soy flour
1 cup tapioca starch/flour
1/2 cup arrowroot starch
1/2 cup potato starch
1/2 cup white rice flour
1/2 cup superfine brown rice flour

---------------------

Living Without's template for a High-Protein Flour Blend, which the magazine specifies "works best in baked goods that require elasticity, such as wraps and pie crusts."

1¼ cups bean flour (your choice), chickpea flour or soy flour
1 cup arrowroot starch, cornstarch or potato starch
1 cup tapioca starch/flour
1 cup white or brown rice flour

Saturday, June 8, 2013

Putting the Cake Back in Cake and Edith: Apricot-Cardamom Crumb Cake For All!

I am so out of practice. Lost my voice a bit, if you will. I have so many recipes to share with you though so I want to just dive in and not care too much about all the areas in which I fall short. (Like - am I seriously still using Hipstamatic to photographically document all my food? And grammar? What is grammar? I do not know what that word means.) Anyway, I have a few things to tell you NOW and the first is this:

I can't stop eating this cake. Did you hear that? CAKE. Like the good old days! CAKE!!! BUT FOR THE WHOLE FAMILY.

Coffee cake for everyone!

I'm just going to ramble like a madwoman for a while now because I am so excited and pleased with how this turned out and, if you lived nearer, I'd invite you to check out my girthy waistline to prove it. Because, in case you missed previous paragraph, I can't stop eating this cake.

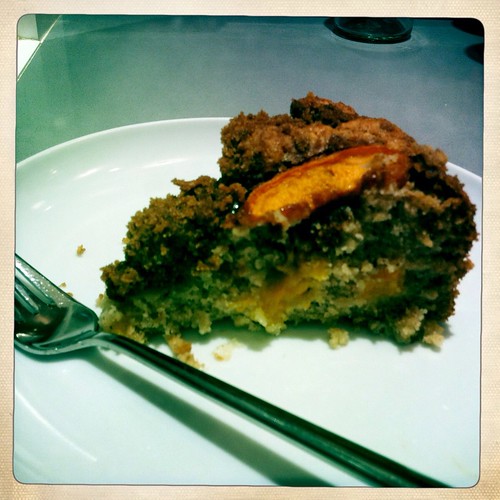
So, obviously, this cake is pretty tasty, or else it won't be quite so irresistible. And it's summery (apricots!) and versatile (good for dessert AND breakfast!) and fairly attractive (sliced fruit: works every time!), particularly given all the obstacles it faced coming into existence.

Obstacles? you might wonder. What do you mean, exactly?

Well, friends, the obstacles are called "dietary restrictions". You see, cake is traditionally made with flour, eggs, and butter. These three ingredients, along with varying amounts of baking powder, sugar or sweetener of some sort, spices, fruit, chocolate, nuts, what have you, are the fundamental ingredients for pretty much every cake you've ever had in your entire life. They are fabulously popular ingredients because they are reliable and yummy and when you mix them up and put them in the oven they transform from batter to moist, crumby perfection. For some reason, and I suggest that the reason is a global addiction to and glorification of all things sweet and crumbly, we hypoallergenic preparers of food always get a little surprised, sad, and frustrated when we don't end up quite making "cake" out of a bunch of ingredients that do not include flour, eggs, and butter. This is sometimes amusing to me, as I wouldn't ever try to make carnitas out of apples and then be surprised, sad, and frustrated that it didn't work. And I definitely wouldn't give it a second go. Yet. I bake a lot. Sans flour, eggs, and butter. I fail often, but my success-to-failure ratio is improving all the time, and now, not only do I have some reliable recipes for brownies, a few kinds of cookies, several muffins and quick breads, pancakes, and cupcakes, but I also can improvise a bit - something I historically haven't felt comfortable doing with the allergen-free baking. Despite said progress, cake has been particularly daunting, because, well, cakes are hard. Even when you use the ingredients typically found in cake. (Ask Nicole. She's been with me the whole way.)

This cake is BECKETT SAFE. In case you are not as on top of my family's allergies, this means it is gluten-free (we can't do wheat or barley) and vegan (no eggs or milk). There are no nuts or chickpeas in it (you might think nuts and chickpeas are easy enough to avoid, but they make frequent appearances in gluten free flour blends so we have to be picky about what flour and starch combos we use, and we're deprived of some of the more flavorful ones). Because I've got allergies and food is always on my mind and my goal is to make treats for everyone who might come round to enjoy, these are also soy free for one of my besties and her allergic baby. Woo hoo!

Coffee cake for everyone!Flax eggDiced apricotsCake batter!Crumble + Sliced Apricots = Glamming it Up a BitBaked!

A few notes before you dive into making this badboy:

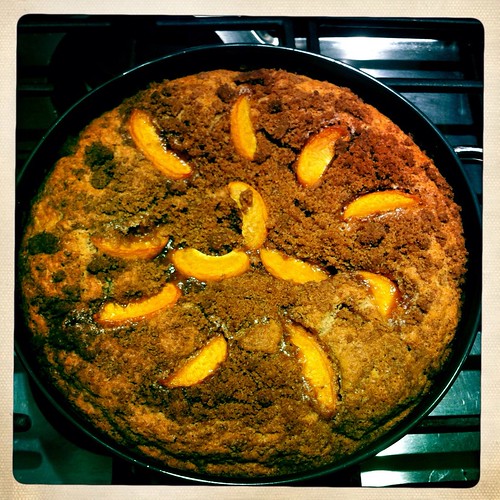
1. If you're not using eggs OR wheat, you pretty much have to accept that you aren't going to end up with a light, airy baked good. C'est la vie. This cake is moist and dense in a decidedly coffee cake way. Both the batter and the finished baked good are more reminiscent of a muffin or banana bread in texture than of a Betty Crocker yellow cake. Allow to cool for at least an hour for best texture.

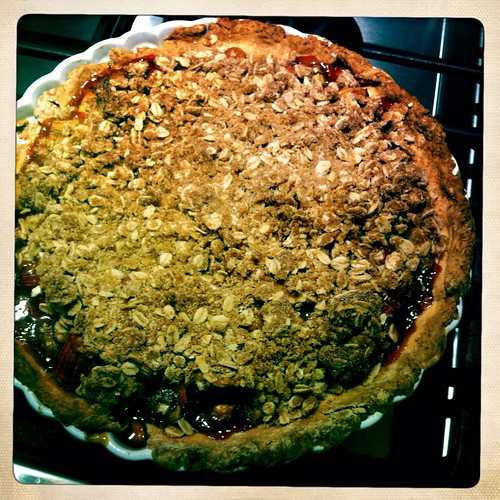
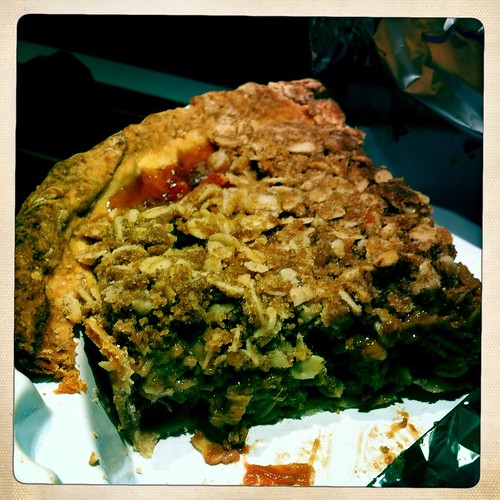
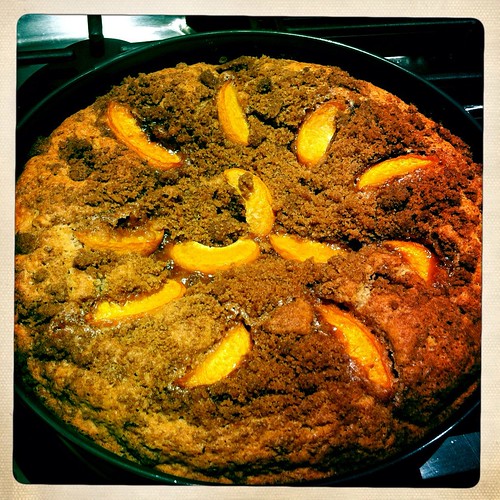
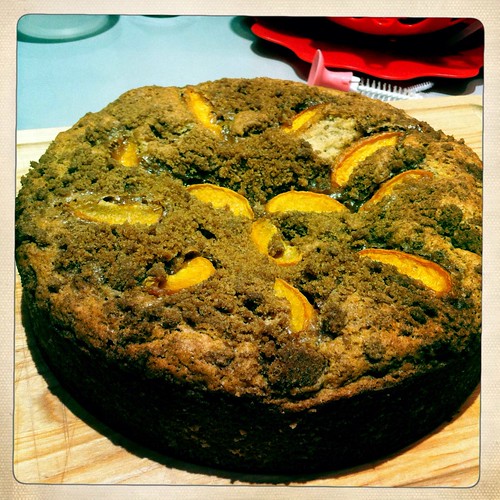
Day 1, not quite cooled because we were super eager:

Not quite cooled...

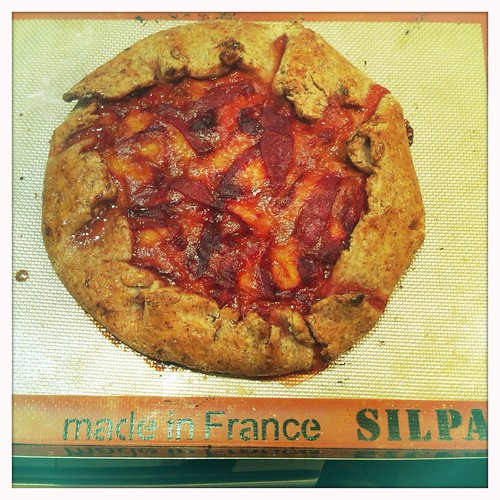
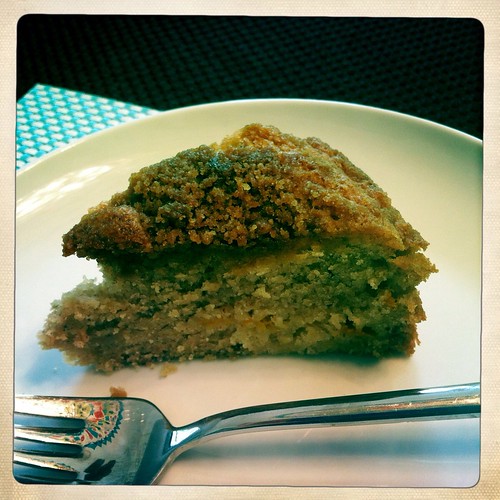
Day 3, still super moist and much more sliceable:

Cole slaw and cake

2. You can use a mixer or a wooden spoon or whatever. I highly recommend using a spring form pan for easy removal of cake. If you use a regular round cake pan (9" minimum) or Bundt cake pan, I suggest putting the crumb topping in the middle of the cake, like a streusel filling, if you don't want any of those crumbs to go to waste. If you want the crumb topping but don't have a spring form pan, I suggest using a 11-X-7" or 9" square pan and serving it directly from the pan in squares.

3. Theoretically, you could use 2 eggs in place of flaxseed mixture and/or three cups of any gluten free all-purpose baking mix that you know and trust in place of brown rice flour and starches. I have tried neither of these substitutions, however, so cannot vouch for their workability. 

4. You could increase the sugar by up to 1/2 cup if you'd like, particularly if you're using apricots or another semi-tart fruit (e.g., shredded granny smith apples, raspberries, blackberries). I felt the lesser amount of sugar was fine since it had the brown sugary topping, and I didn't want to feel super guilty about giving this to my children for breakfast. That said, my recipe as written does not produce a terribly sweet cake.

5. This cake comes together quickly and has lasted beautifully in an air-tight container on my counter for four days. It's texture improves as it cools - it doesn't dry out, it just firms up, becoming less crumbly. The flavors also get better rather than worse - the blend of flours and starches I used is mild and does not go rancid quickly like some gluten free ingredients do (e.g. millet flour, quinoa flour, chickpea flour), even at room temp. I have not frozen this but I suspect it would freeze v. well: allow to cool for several hours and then wrap in plastic wrap, then tin foil, then place in a freezer bag.

Highly recommended for easy cake removal and aesthetic integrity: Spring Form Pan

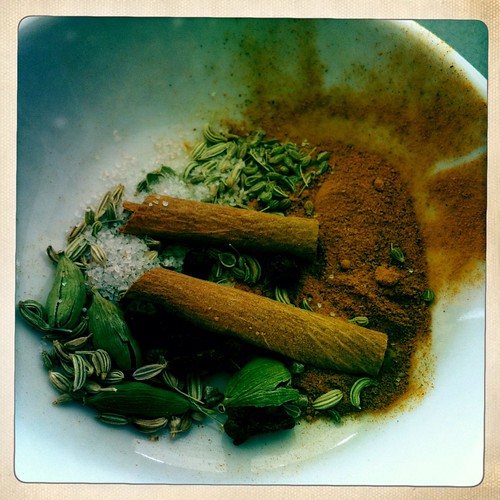
Apricot Cardamom Crumb Cake
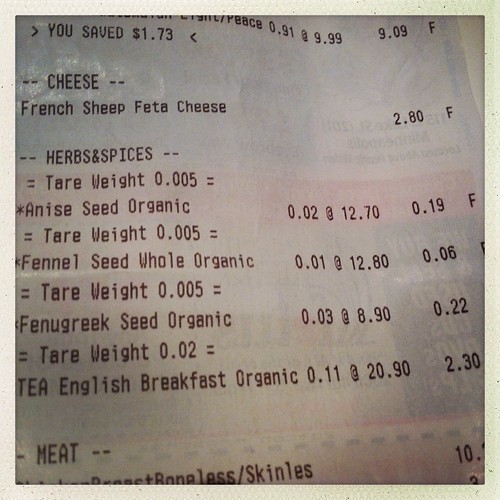
From me! ... with some help from Living Without's Special Spring/Summer Edition 2013: Gluten Free Baking Recipes and How To's. (This magazine was a gift from my friend Lisa (thank you so much!) and it is hands down the best resource I've come across for gluten-free recipes, with excellent advice on gluten-free baking without eggs, nuts, and dairy. E-book edition can be purchased HERE.)
Yield: 10-12 servings

Dry ingredients
2 cups superfine brown rice flour (I used Authentic Foods brand)
2/3 cup potato starch
1/3 cup tapioca starch
1 cup sugar (or more, to taste, see note above)
4 teaspoons baking powder
1 teaspoon cinnamon
1 teaspoon baking soda
1 teaspoon xanthan gum
1 teaspoon salt

Wet ingredients
2 tablespoons ground flaxseeds
6 tablespoons hot water
1 1/2 cups rice milk
1/2 cup olive oil*
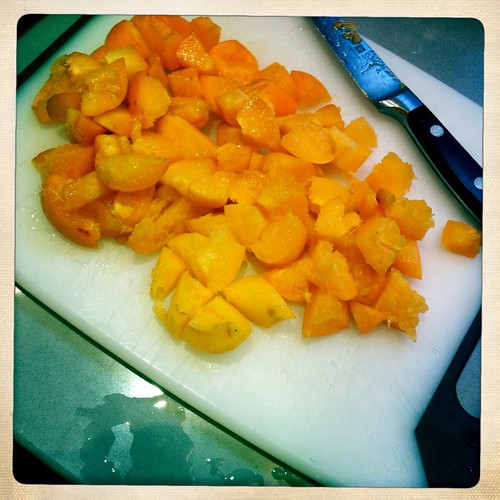
1-2 cups barely ripe apricots or other chopped fruit + 1/4 to 1/2 cup more, thinly sliced, for top (optional)
1 teaspoon cardamom extract**

Crumb topping
4 tablespoons gluten-free flour blend or ground oats
7 tablespoons brown sugar
2 tablespoons Spectrum shortening (or butter or margarine) (plus more for greasing pan)
1 teaspoon cinnamon

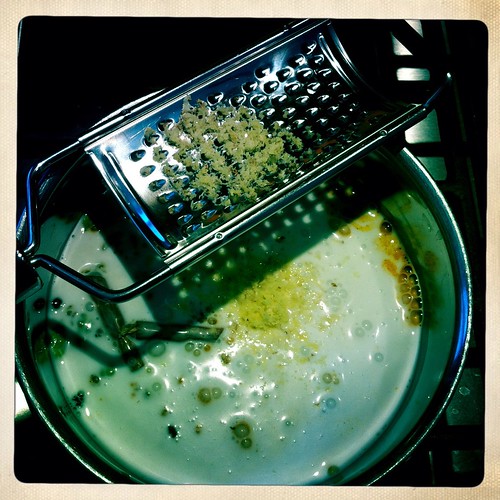
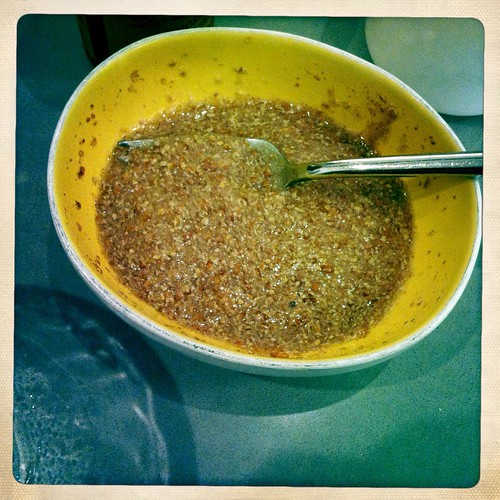
Preheat oven to 350 degrees. In a small bowl, whisk together ground flaxseeds and hot water and set aside to thicken for 5 minutes or so. Liberally grease a 10" springform pan (see notes above for alternatives).

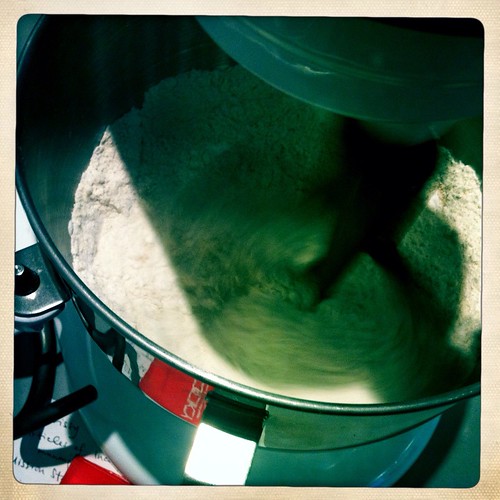
Whisk together all the dry ingredients in a large bowl, ideally your stand mixer bowl. In a medium bowl or measuring cup, whisk together rice milk, olive oil, and flax-water mixture. Add cardamom extract.

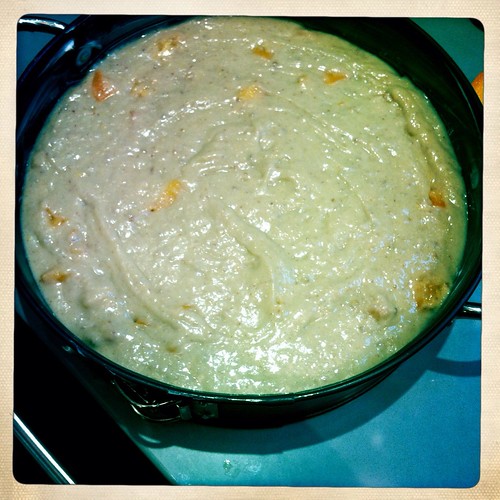
Add wet ingredients to dry and blend with a rubber spatula, wooden spoon, or the paddle blade on your stand mixer. Stir in chopped apricots. Transfer batter to greased springform pan.

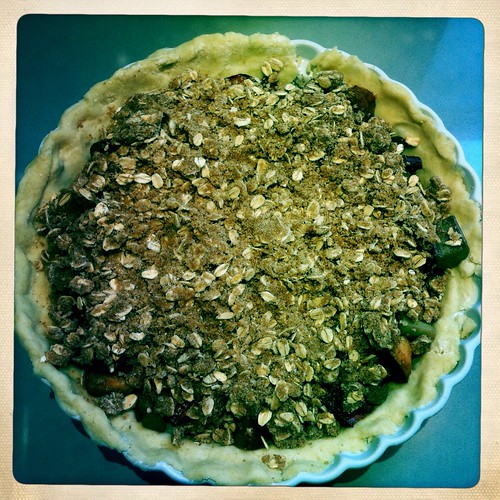
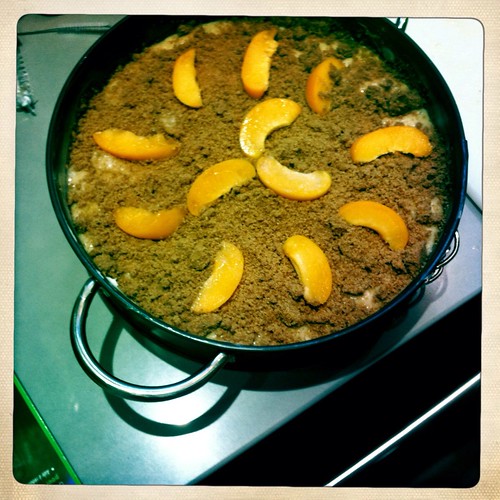
In a large bowl (perhaps the large bowl that you just used to make your cake batter? save yourself a dish to wash!), pour all topping ingredients and combine them using your fingers. You want some little crumbs and some big chunky crumbs. Pour crumbs evenly on top of cake batter. Place sliced apricots on top like in my picture above.

Bake for 25 minutes. Rotate pan 180 degrees and bake for an additional 25 minutes. Test for doneness by inserting a toothpick or knife in the center and seeing if it comes out clean (a few dry-ish crumbs are okay). When done, allow to cool for at least 30 minutes in the pan. Before slicing and serving, allow to cool at least one hour more.

Cake will last in air tight container at room temperature for at least five days. Its consistency actually improves after a day.

* The olive oil doesn't impart much flavor, so you could use a less expensive, mild flavored oil if you'd like. 

** You could add 1/2 teaspoon ground cardamom in with dry ingredients in place of cardamom extract, or you could go with a different flavor profile and through in 1 teaspoon almond extract or 2 teaspoons vanilla.

Saturday, April 27, 2013

Five-Minute Gems! Featuring: (1) Cherry Coconut Smoothie and (2) Herbed Feta Guacamole

Yesterday I was doing my usual throwing-everything-I-need-to-use-up-in-[Vitamix/food processor/bowl and mashing with a fork], and I ended up with some surprisingly ab-fab delicious concoctions: a cherry smoothie and some guacamole with sheep's milk feta, mint, cilantro, and purple spring onions. They went down far too easily and probably deserve their own individual posts, but I can only do what I can do, right? So I'm giving you two super easy, lovely recipes that you'll be able to make in five minutes if your pantry and freezer are stocked similarly to mine (and sometimes I like to think they are and that's why you're here).

Ready? Oh, you'd like some pictures to further entice you? Well, the pictures don't really do these bad boys justice, but I'll show you what I've got anyway.

Food duhFood duhFood duh

Cherry Coconut Smoothie
Serves approximately 2 children + 2 adults

8-10 oz frozen cherries
1 banana
1/2 cup plain coconut yogurt or other yogurt of choice, sweetened or not (most coconut yogurts are sweetened)
Juice of 1 orange (about 1/3-1/2 cup; optional)
1 teaspoon maca powder (optional)
1/4 - 1/2 teaspoon cinnamon or galangal powder (optional)
Boosters of choice: 3 tablespoons hemp seeds (I used this) or chia seeds or flax seeds; 2 tablespoons flax seed oil (I used this); 3 tablespoons protein powder of choice; 1 tablespoon ground psyllium husk (for fiber)
Flavor enhancers of choice: dash of Himalayan sea salt (I used this); 1 tablespoon honey or maple syrup, especially nice if you're skipping juice and/or your yogurt is unsweetened
1-2 cups water, to get desired thickness

Blend everything. Drink. To health!

Untitled

Feta-Herb Guacamole
Serves: um... I don't want to talk about it

1 ripe avocado
1-2 tablespoons each: minced cilantro, shredded mint leaves, thinly sliced spring onion (purple!)
2 ounces crumbled sheep's milk feta
1/4 teaspoon cumin
1/4 teaspoon coriander
1/2 a jalapeƱo, seeds and veins removed, minced (optional)
Juice of 1/2 lime (or whole if it's not a v. juicy lime)

Mash everything together. If you're going to eat this with chips, don't bother with salt. If you're eating it with some beans and rice, taste and add a little salt if you'd like.