Thursday, September 30, 2010

Fig-Orange Shortbread Bars

These bars made me famous in the neighborhood. They also made me a little fatter than I was before I made them. Halfway through eating the whole pan on my own is when I decided to go on a walk and share them with the locals.

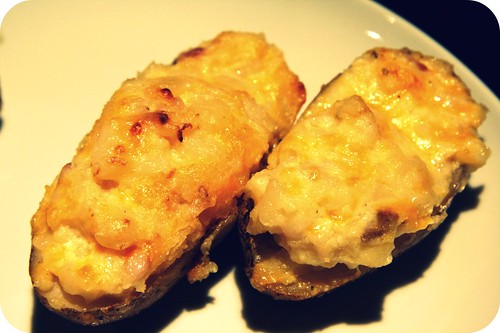
Here's the best part: I invented them myself! (Yes. Worthy of an exclamation point!) And while the crumbly topping didn't do exactly what I'd envisioned - I think only even more butter would have accomplished what I was going for - the finer, not-super-sweet crumble that resulted, marbling into the gooey baked fig preserves, was just perfect. Far better, in fact, than what I envisioned.

I've been wanting to make something combining fig and orange for a while now. "Figgy pudding" is sort of a mythical British dessert with dried fruit and orange and lemon flavorings. And by mythical I simply mean that, yes, obviously, I'm sure it at one point it existed and was popular enough to make an appearance in a Christmas song, but it doesn't really exist now. Nevertheless, this American gal who opened a cupcake shop in London, either wanting to bring it back or maybe unaware of the treat's extinction, offered a "figgy orange" cupcake when I visited a few years back, and it was excellent. So for three years now I've been keeping my eye out for some kind of figgy orange recipe with zero success. And you know, when things don't come to you readily is when you get creative - Anne Bogart taught me that. So true. Hence, my little, luscious, delicious concoction.

butter

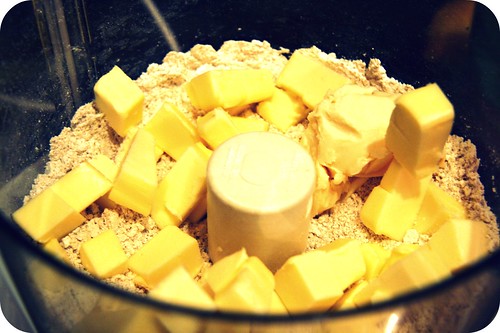
(When starting from scratch, the use of massive amounts of butter helps to guarantee something wonderful.)

Fig shortbread in process

baked bars

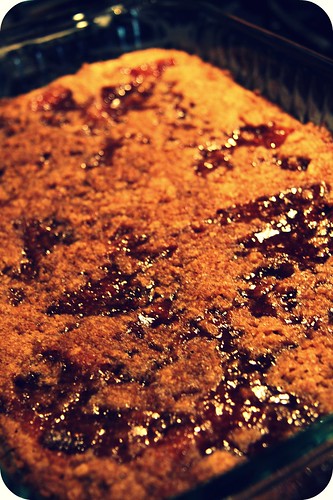
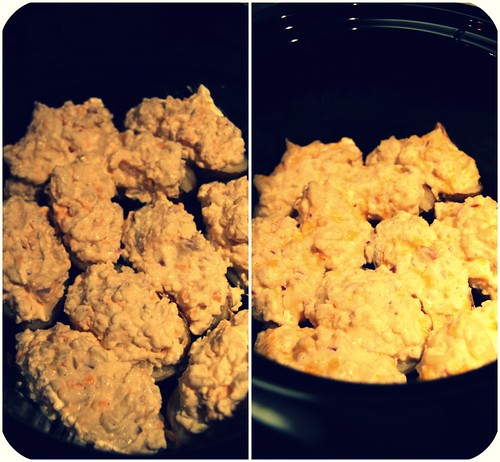
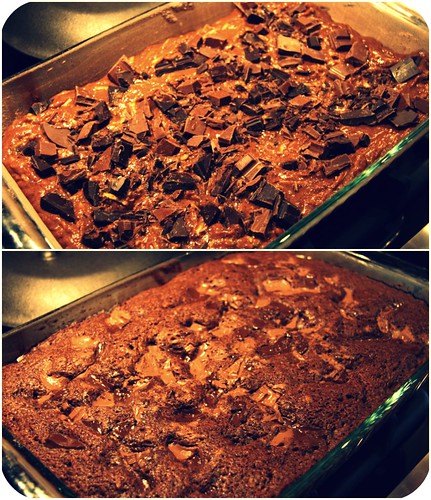
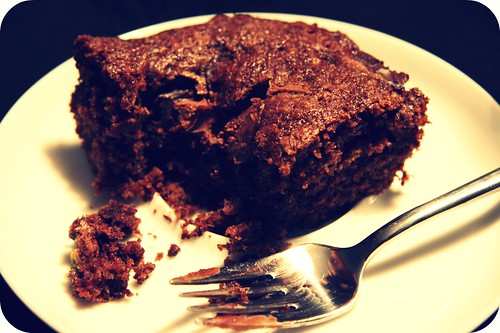
My favorite part was when I took the pan out of the oven and the fig preserves were all shiny and magical and aromatic. I couldn't wait for them to be cool enough to handle.

bite sized figgy orange bars

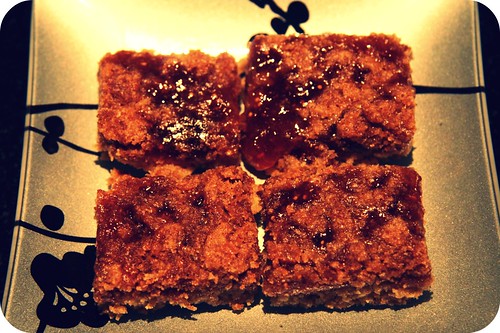
And then my patience paid off; they were as good as they smelled and looked and I was v. pleased with myself. So pleased that I felt it was okay to eat half of them. That's the trouble with "bite-sized pieces" - TOO MANY BITES.

Figgy Orange Shortbread Bars
From Yours Truly
Yield: 1 serving. Just kidding. About 50 or 60 bite-sized bars.

For shortbread
2 cups flour (I used whole wheat - it tasted good)
1/2 cup brown, turbinado, or muscovado sugar
1 tablespoon orange zest (from one whole orange)
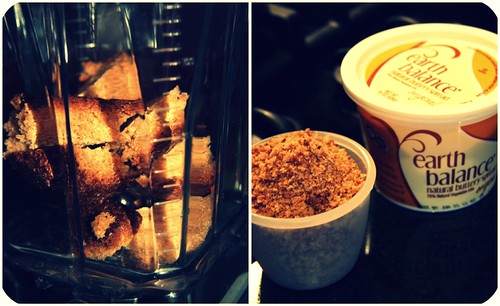
1 cup butter, cold and cut into 1/2" cubes (that's 2 sticks, baby, and it's what makes shortbread wonderful)

For filling
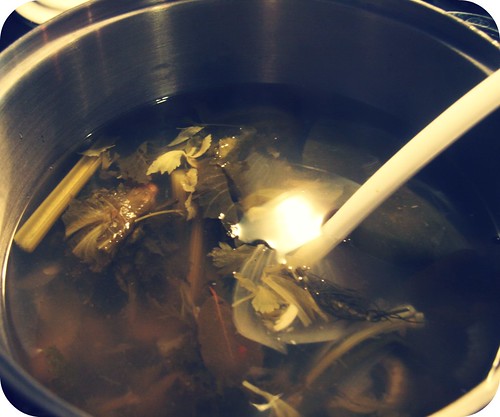
1 cup fig preserves, heated on stove so that it's easy to spread

For crumble topping
1/2 cup flour
1/2 cup brown, turbinado, or muscovado sugar
1/4 cup butter, cold and cut into 1/2" cubes
1/2 teaspoon cinnamon
1/8 teaspoon nutmeg (optional, but nice)
1/8 teaspoon cardamom (also optional, but nice)

Preheat oven to 350 degrees.

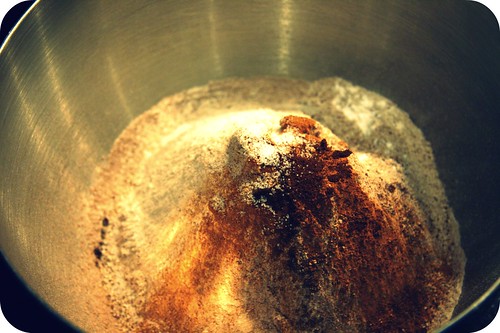
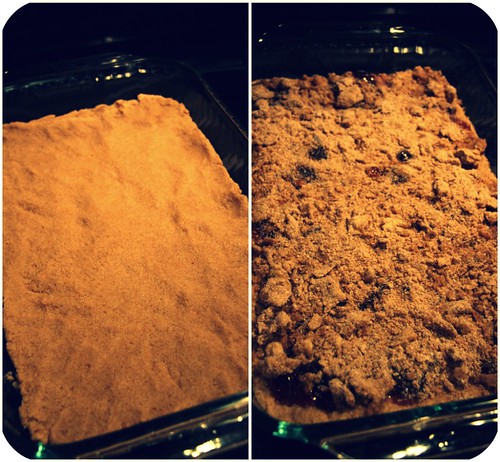
Whisk together flour, sugar, and orange zest. Place in food processor or stand mixer (or use your hands), add 1 cup butter, and pulse until a thick, crumbly dough forms. Knead with your hands a couple of times and then flatten into an ungreased 13 X 9" pan. Bake for 10-12 minutes, until dough is dry and perhaps darkening slightly around edges.

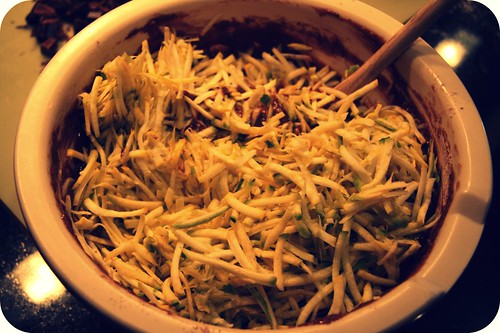
Meanwhile, make your crumble: either pulse all the ingredients together in the food processor until fine crumbs form, or just mix it all with your hands in a large bowl. The mixture will be quite sandy but should have some larger, buttery chunks as well.

Remove shortbread from oven and drizzle fig preserves on top, evenly distributing the preserves as well as you can. Sprinkle sandy crumble mixture evenly over the top of preserves. Bake for 20-25 minutes, until fig preserves are shiny, gooey, and bubbling around the edges, and the crumbs are starting to brown a bit.

Allow to cool completely before cutting and consuming them.

Wednesday, September 29, 2010

Salsa Verde

This is just a quick little post to remind you that I'm alive and tell you I'm back from California, where I spent the last week celebrating the nuptials of two v. dear friends, whose legal union was of particular poignance to my husband and me. (They met at our wedding, six years ago.) The wedding was fairy-tale-perfect, the weather was amazing, and the food was spectacular: buttery, melt-in-your-mouth steak, salty-sweet scallops, a stack of creamy scalloped potatoes, and two kinds of cake - white cake studded with Schaffenburg chocolate and key lime with something else delicious in between its three layers. I've been craving it all ever since. (I'm pregnant so I'm allowed to say I crave things.)

The only thing missing from this trip was Mexican food. So this post is my little Minnesota shout out to California Mexican food. What's Minnesotan about it? It's mild. If you want some more spice, double (or triple) the peppers.

tomatillos

tomatillos on stove

Salsa Verde
Only slightly adapted from The Art of Simple Food, a v. inspiring cookbook indeed
Yield: 2-3 cups

1 pound tomatillos, papery skins removed (about 10-15, depending on size)
1 jalapeño, seeded and sliced (I used just one and it was v. mild - use 2 or 3 for a spicier salsa)
1 large handful cilantro, leaves and stems, rinsed
2 garlic cloves, sliced
1 tablespoon freshly squeezed lemon or lime juice
1/2 teaspoon salt, to start (plus more to taste)

Rinse tomatillos and put them in a saucepan with water barely covering. Add a pinch of salt and bring to boil. Lower heat, simmer for 4-5 minutes. Drain, reserving cooking liquid.

Place tomatillos in blender with 1/2 cup cooking liquid, jalapeño(s), cilantro, garlic, and 1/2 teaspoon of salt. Blend briefly, until you have a semi-chunky salsa. Add more salt and more cooking liquid to acquire the taste and consistency you like best. Let the sauce sit for a few hours at least so that the flavors marry and the salsa gets a bit bolder.

Stores nicely (and quite attractively) in a jar in the refrigerator for at least a week. To make a nice, mild guacamole, mash one or two avocados with 1 cup of salsa verde.

tomatillos salsa

Wait. What do I do with all this lovely salsa verde? you are probably wondering.

Well, here are some ideas...

tomatillo salsa collage

... from top to bottom: drizzle it on a taco for dinner, serve it with rice and beans and carnitas* for lunch, add to your eggs and potatoes for breakfast. It's also nice with tortilla chips.

* I really did make those carnitas and, despite learning how much saturated fat is in carnitas (ah, the things you discover when you cook decadent food for yourself!), I enjoyed them thoroughly and so did everyone else who happened to try them at my home. If you have a day at home to cook and if you like carnitas, this is a cheap, delicious way to have them in the comfort of your own dining room. But if you're not keen on having your house smell like pork for a few days, you could just order take-out, especially if you live in California and probably have like fifty Mexican-food options within a mile of your home.

Monday, September 20, 2010

Ten Days of CSA: Day 10, Sunchoke and Celery Root Soup

Sorry I'm late. Again. Life gets busy, you know? And our CSA share this week was not terribly overwhelming, so we felt quite alright dining out a few times over the weekend. And then Charlotte, our lovely visitor, made us Carrot Soup and Seeded Soda Bread and Brown Butter Shortbread, all of which, by the way, were utterly and absolutely lick-smacking delicious. And so, basically, I wasn't in the kitchen quite as much this weekend as I usually am.

But I did make another soup. And I wasn't sure if another soup was worth posting about, especially after the Cauliflower Bisque, which I didn't want to compete with, intentionally or otherwise. Yet, on the other hand, I had a bunch of dirty, fall root vegetables and all that vegetable broth to use up before we catch a plane in less than 48 hours, so I just ignored my insecurities, went for it, and am grateful that I did.

About those dirty fall root vegetables...

Two years ago, for the first time, we got sunchokes, alternatively known as Jerusalem artichokes, in our CSA box. I did not know what they were. I did not know how to clean them, prepare them, or store them. They went bad quickly on our counter, where I'd left them as I would a potato or other root vegetable, and so I threw them out.

sunchoke

The following summer, we received them again. But this time, they weren't just a one-off and we actually received them several weeks in a row. Also, I had just had a baby and my mother was spending a few weeks with us, and she found it quite exciting that we received vegetables that she'd never seen or heard of before, and took it upon herself to do some research. She thought ginger or turmeric at first, but then, on some website about "tubers" found photos like the one above and solved the mystery. Sunchokes! Also known as Jerusalem artichokes, I suspect because they taste faintly of artichoke, and perhaps are related. They are good cooked up any way that you'd cook a potato. Roasted, boiled, mashed, and, of course, pureed into a soup with leeks. (I'm also convinced - though I haven't tried it - that they'd make an excellent pureed, warm cheesy dip, like regular artichoke dip.) Since August 2009, we've never not eaten our sunchokes. They're good, and interesting, and you just need to give them a good scrub to clean them - no need to remove peel - and they store best in a plastic bag in the refrigerator, like a carrot rather than a potato.

Next on our list of dirties is celery root (a.k.a. celeriac - a word I don't care for). This vegetable was tricky for me because, like kohlrabi, if you slice off the peel you are left with far less flesh than seems worth cooking. But, also like kohlrabi, if you carefully, patiently use a vegetable peeler, you end up with a lot more vegetable left at the end, and celery root is indeed worth cooking. It's like celery, but more satisfying and less stringy.

celery root

So, using little more than these bad boys and a bunch of onion/garlic types, a pretty awesome soup can be crafted. I looked to David Lebovitz for some initial guidance - and I learned that, at least in pureed soups, slicing garlic is best because it results in nicer, more even cooking (as opposed to those little brown bits of minced garlic that develop after about 2 minutes over a medium flame) and thus better flavor and aroma - but I ultimately ended up making my own thing. The soup was healthy, low-cal, used up a lot of vegetables, but didn't produce a daunting amount of soup, which can happen easily in a household of two (plus our little mini girl, who doesn't eat soup v. well yet). Most importantly - and I sure hope this is a given to you all since I wouldn't bother posting it otherwise - it's v. tasty. The ingredients I used are all interesting and intense, and combining them resulted in something perfect for a dreary fall evening, and even better for lunch on the following dreary fall afternoon.

If you manage to get your hands on sunchokes and celery root, I hope you'll try it.

celery soup collage

cuppa soup

Sunchoke and Celery Root Soup
From yours truly
Yield: 4 servings

2 tablespoons olive oil
2 cups chopped onions, shallots, and/or leeks (I used one large onion + one small leek = 2 cups)
4 celery ribs, diced
4 garlic cloves, thinly sliced
1/2 teaspoon ground fennel seed
1-2 celery roots, peeled and cut into 1" cubes (about 2 cups)
3 handfuls sunchokes, scrubbed clean and chopped into 1" pieces (about 2 cups)
4 cups vegetable stock
1 cup water (or more, as you see fit)

Cream or crème fraiche, coarse salt, freshly ground pepper, and nutmeg or paprika, for serving

In a stockpot or dutch oven, heat the oil over medium heat. Add the onion mixture and diced celery, with a generous pinch or two of salt, and cook, stirring occasionally, for about 5 minutes. Add the garlic and ground fennel seed, lower heat a bit, and cook for 2 minutes, until garlic is super fragrant. Add the celery root, sunchokes, vegetable stock, and water. Bring to boil, then lower heat and simmer, with lid ajar, until the vegetables are quite soft, about 40 minutes. Once the vegetables are soft, allow the soup to cool for a few minutes and then puree all or a portion of the soup, whatever you prefer, using an immersion blender or a regular blender. Taste and adjust seasonings to suit your liking. Serve immediately, drizzling 1 tablespoon of heavy whipping cream or crème fraiche into each cup or bowl, and sprinkling coarse salt, pepper, and paprika or nutmeg on top. Enjoy with some dense, crusty bread - like the seedy soda bread Charlotte made last night.

Friday, September 17, 2010

Ten Days of CSA: Day 9, Everyday Sesame Stir-Fry with Greens and Tofu

This post will probably be the least impressive-looking post of the Ten Days of CSA to which you've been privy, but if you like the basic ingredients in the featured recipe, I bet it will be one of the most useful posts.

Here's why: The sauce described below goes well with pretty much every summer vegetable you can think of or buy or grow, and the flavors are simultaneously light and complex and nourishing, and, in no uncertain terms, it is really [expletive] yummy.

It's from my historically favorite cookbook, Vegan with a Vengeance, which might be demoted to second place since the recent addition of the America's Test Kitchen Cookbook to my collection. Thanks, Amber! (Tangent: Every single thing in the America's Test Kitchen Cookbook is the best version of that particular single thing that I've ever made/eaten. It's unbelievable. Evidently testing is worthwhile.)

Anyway, we eat this about once a week during the early summer, when we're getting asparagus and beans and leafy greens and all those delicious veggies whose freshness shines best when they're just barely cooked and paired with an Asian-style, semi-salty sauce. It's a good, light summer meal. And it's really versatile. And did I mention [expletive] yummy? Yeah. It is.

Everyday Stir Fry

Everyday Sesame Stir-Fry
Yield: 2-4 servings

2 tablespoons toasted sesame oil (one of the tastiest ingredients of all time)
4 cloves garlic, finely chopped

3 tablespoons soy sauce
3 tablespoons rice vinegar or mirin or sake
1 tablespoon honey or agave nectar (optional)
2 teaspoons red pepper flakes

1 pound crunchy vegetables cut into bite-sized pieces (e.g. zucchini, asparagus, carrots, green beans, snow peas, kohlrabi)
Bunch or two of leafy greens, coarsely chopped, stems removed (e.g. kale, chard, watercress, spinach, cabbage) (optional)
1 pound sesame or teriyaki tofu (homemade or purchased - Wildwood is good and Trader Joe's has a good, cheap, organic teriyaki tofu block - it's perfect for this recipe), cut into 1/2" inch cubes or crumbled

2 tablespoons toasted sesame seeds

In a small bowl or measuring cup, mix together the soy sauce, vinegar or mirin or sake, red pepper flakes, and honey or agave nectar, if using. In a skillet, sauté the garlic in the sesame oil over medium heat for a minute or two. Pour in the soy sauce mixture and give it all a good stir. Add your crunchy vegetables and sauté for 5 minutes or so, until al dente. Add your leafy greens, if using, and tofu and cook, stirring occasionally, until the greens are softened and the tofu is warmed through. Serve the stir-fry by itself or over some brown rice, and sprinkle with the toasted sesame seeds.

Thursday, September 16, 2010

Ten Days (out of 11) of CSA: Day 8, Slow Cooker Twice-Baked Potatoes

I failed.

There was no post yesterday.

It was a long day.

Today's been long too, actually, but I'm forcing myself to ignore my to-do list and crying baby - just kidding, my baby's not crying, and I have not the ability to ignore her when she does cry; she's actually taken a break from crying (she's teething) in order to nap for a little while - and continue documenting the kitchen frenzy that has been going on all week.

We are super honored to have my friend Charlotte staying with us for ten days and her presence has been a huge help in getting food prepared, photographed, and recorded here. Not only does she love great, healthy food (and cookies) and appreciate my concoctions, which is motivation to cook in and of itself, but also, the moral support that casual, easy company provides is just priceless, as are extra eyes and hands, particularly when you have a monster baby who, if you turn away from her for one minute, manages to find the food processor in the one non-baby-proofed cupboard in our kitchen and gets her arm stuck in its chute. (For the record: The blades were safely stowed out of reach, so she was only afraid, not injured.)

Anyway.

I don't know about you, but we've gotten a lot of potatoes this year from our farm. In fact, we do every year. And in Minneapolis, I've not had luck storing them for v. long, I think because of the humidity here. I've heard a bucket of sand is a good place for potatoes, but where does one get sand?

2 lbs potatoes

In addition to throwing potatoes in just about every soup, egg dish, baby food puree, and slow cooker meal I've made lately in my efforts to use them, I also tried my hand at twice-baked potatoes last night - slow cooker style - and they were melt-in-your-mouth, yes-I-will-have-one-more-please delicious. I like potatoes because they go well with cheese and sour cream and butter. They are so original like that.

So, my recipe is a variation of one from this great, giant cookbook called Not Your Mother's Slow Cooker Cookbook. I don't know why it's called that, because I wouldn't consider its recipes especially contemporary or unique. But it's like a slow cooker bible. It has everything. Maybe your mother's doesn't.

Two final notes before I get to the recipe, which will also be followed by two notes: (1) Slow cookers are often taken out in the colder months of the year, which makes sense of course because they can be used to produce the kind of comfort food that you crave in winter (like twice-baked potatoes). But they use way less energy than an oven (560 watts for 8 hours of slow cooker vs. 2400 watts for 1 hour of oven) and they don't heat up your whole house when in use, so they are great for summer and fall too, particularly if you, like me, don't have a grill. So, yeah, that was just an FYI. (2) My crock-baked potatoes didn't get the crunchy, slightly browned tops that I wanted, so I stuck mine in the oven and broiled them for about five minutes before serving. That's the last step I included in the recipe, but it's not necessary if you are satisfied with a creamier, melty potato (as featured in middle before-and-after photos, on right).

potato jackets

stuffed before and after

twice baked potatoes

Slow Cooker Twice Baked Potatoes
Yield: 10-12 stuffed potato halves (we each ate two)

6 small or medium baking potatoes, scrubbed, rinsed, but not dried (about 2 lbs)*
3 tablespoons butter, softened
3/4 cup sour cream
About 1/4 cup milk or cream
1/2 teaspoon salt
1/2 teaspoon freshly ground pepper
1 cup shredded cheese (I used 3/4 cup colby (melty) + 1/4 cup parmesan (salty))
1/4 cup minced red onion

Place each still-wet potato into the slow cooker. Cover and cook on HIGH for 3 to 5 hours, or LOW for 6 to 8 hours. To test for doneness, stick a knife in the end and make sure it gives a little and there's no crunch left.

Remove the potatoes from the slow cooker and cut each potato in half, lengthwise. Allow them to cool for a few minutes (this will make them less malleable and more handleable) before using a spoon to scoop out as much flesh from each potato half as you can without having the potato fall apart. (I had two casualties, and I just tore the skins off and dumped the flesh into the mixing bowl.) Put the flesh into a large mixing bowl and add the butter, sour cream, milk or cream, salt and pepper. Stir until the mixture reaches your preferred consistency, using either a fork, electric mixer, or potato masher (I used the latter). Add the cheese and minced red onion and stir until combined. Gently spoon the filling back into the shells (they will be v. overstuffed and fabulous). Return the potatoes to the slow cooker, arranging them in a single layer so that they are touching each other. Cover and cook on high for 60 minutes.

Remove from the cooker and either (a) eat immediately, sprinkled with snipped chives and crumbled, crispy bacon, if desired, or (b) place them in the oven and broil them for 5 minutes, until the tops get brown and crispy, and then sprinkle them with snipped chives and crumbled, crispy bacon, if desired.

* If you are buying potatoes from a store, they will probably be bigger than ours were. If your potatoes weigh more than 2 lbs., just add more sour cream, milk and butter proportionately.
-------------------------------------------------------
Post-recipe notes:

1. If you want to make these in the oven instead of a slow cooker, there are good instructions for that at Simply Recipes.

2. If you want to freeze some or all of these, do so after you stuff the potatoes but before you put them back in the slow cooker. Wrap them individually, tightly in aluminum foil. Place them in a freezer bag and keep them for 1-3 months in the freezer. To cook them in the slow cooker, allow them to thaw overnight in the refrigerator and then remove the foil and follow final slow cooker step an hour before you want to eat. To cook them in the oven, don't remove the foil and don't thaw them. Preheat oven to 350. Bake 60-75 minutes.

Tuesday, September 14, 2010

Ten Days of CSA: Day 7, Turkey Tomato and Corn Pie

This is a regurgitated post from my personal blog, initially published about a year ago. I know it's sort of cheating, but it's also fitting because it's an example of how, with a little planning, some flour, and a lemon or two, your CSA ingredients can be turned into hearty, belly-warming comfort food. To the friends and relatives who have dutifully read my blogs since their inception: apologies for the re-do. It might be worth skimming nonetheless, however, as I dolled up the pictures a bit.
-------------------------------
Sept. 29, 2009

Today I cooked. It's the first time I've really done that since my mom left last Monday and it was tricky. Sadie was in the Baby Bjorn most of the time and I'm hoping that all that watching-mama's-hands-do-a-million-things-at-once (yeah, I'm that good) will teach her to discover her own hands. I'm thinking once she finds her own hands she might be able to entertain herself a bit more. (As opposed to the current crying and farting - entertainment for the whole family!)

I bet you're wondering what I cooked. And I bet you're wondering if it was good. Well, I made Turkey-Tomato-Corn Pie, and it was excellent. Super tasty and pretty easy if you, say, have a CSA membership and thus have all the ingredients on hand.

The pie was based on the Tomato Corn Pie recipe that, since its appearance in the August 2009 issue of Gourmet, has found its way onto just about every food blog worth reading (except 101cookbooks.com, which is probably the food blog MOST worth reading since it is called a "Healthy Recipe Journal"). My version was only barely adapted from the Everybody Loves Sandwiches version, primarily because the biscuit crust in this version was based on a biscuit recipe that I had used before with great success. (It also was the easiest version and now that I have a baby I am quite fond of all things easy.) I added some turkey (MC doesn't like a meatless dinner), doubled the basil (one can never have too much basil), substituted a leek for the scallion (that's what my CSA had to offer), and - only after making it and learning from my experimentation - would have cut back on the lemon juice a bit, as that made the end result more-than-enough-lemony and a bit runny in my opinion. (MC disagrees; so if you like a runny, uber-lemony savory pie, go ahead and use all that lemon juice called for in the linked recipes. Otherwise, follow recipe below, which has been modified to reflect cut in juice.)

So if you're interested... here's the recipe.

Tomato, Corn and Turkey Pie
Adapted from here and here

Biscuit Dough
2 c flour
2 t baking powder
1/2 t salt
1 c buttermilk
2 T oil (I used canola)

Filling
2 T mayo
1 T lemon juice
Zest of 1 lemon
1/2 lb deli turkey, sliced (this is totally optional, or cooked chicken or ham could be used)
4 delicious bright fresh tomatoes, seeded, sliced, and allowed to sit in a colander for a little while to eliminate as much juice as possible
Large handful basil leaves, torn up a bit (about 1/2 cup)
1 cup corn, fresh or frozen (I used frozen corn from a recent CSA share, but thawed it under running water)
1 medium leek, coarsely chopped
Salt and pepper
1/4 cup sharp cheddar cheese

Butter (to grease pan and to glaze top of pie before baking)

Preheat oven to 400 F. Grease a pie plate with butter or spray or whatever is your norm.

Mix together lemon juice, lemon zest, and mayo and set aside.

Whisk together the dry ingredients for the biscuit dough and then add in the buttermilk and oil and stir until tacky dough forms. Roll (or if you are lazy like me, stretch with your hands) half the dough into a large circle and stretch it over bottom and sides of pie plate.

Layer the following: half the turkey, then half the tomatoes, half the basil, salt and pepper, half the corn, half the leek (or scallions), and drizzle with half the lemony mayo. It might look like this:

tomato pie 1

Now repeat with a second layer and top with cheese.

tomato pie 2

Roll (stretch) second ball of biscuit dough into another circle and place on top of pie. Seal edges with fingers and/or a fork. Cut a few vents in top (use a sharp knife because the dough is a little bit fragile and sticky) and brush some melted butter over top and rim.

unbaked tomato pie

Bake for about thirty minutes and then VOILA! You will have a savory pie that is as delicious as it is lovely.

baked tomato pie

slice-o-tomato pie

So easy and delicious and decidedly end-of-summer-esque. To make up for the fact that this post is a repost... I might just have to make this again this weekend.

Monday, September 13, 2010

Ten Days of CSA: Day 6, Dreamy Creamy Vegan Cauliflower Bisque

Okay. I can't even tell you how excited I am to share this recipe with you. Here are the top five reasons why:

1. This soup is all kinds of expectedly and unexpectedly good. More on the unexpected later (see paragraphs 4 and 5).

2. My friend Lisa in the OC emailed me and a bunch of our other kitchen-and-food-loving friends across the nation a link to the recipe on which my recipe is based, found on Alicia Silverstone's vegan-lifestyle blog. (It's an interesting blog - way existential - I used to reference it a lot when I briefly, without much personal conviction, tried to be vegan - and also, hello, I am of the Clueless generation, so a little Alicia Silverstone in my adult life every so often is sort of sweet and nostalgic. Now if you'll excuse me while I go break in my purple clogs.) Lisa, with incredible foresight, rightly thought the recipe sounded wonderful, encouraged one or all of us to try it and report back, and I jumped on the challenge because I had a lot of cauliflower in my refrigerator begging to be used in something that wasn't baby food. (My husband and I are not huge fans of cauliflower, particularly because our oven doesn't work a lot of the time so we haven't had a chance to try any of the roasted cauliflower recipes out there insisting that cauliflower can be delicate, rich, and sweet all at once. As if.) Anyway, Lisa - thank you!

3. This post allows me the opportunity to rave about my VitaMix. You should all get one! I know it's expensive, but it's AMAZING. And quite handy, especially when you have to use it three times to make one soup.

4. I get to boast here about a v. successful nut substitution. You see, one thing that deters me from the vegan diet, along with bacon, is that vegans eat a lot of nuts, and I'm allergic to them. I can do seeds, however, and legumes (e.g. peanuts) for now, so I substitute sunflower seeds, pepitas, and sesame seeds where I can. The original recipe for this soup, however, called for making "cashew cream" - a puree of cashews + vegetable broth - and I just wasn't sure if a seed cream would provide comparable consistency and flavor. And, to be fair, I guess I don't know if the seed cream I made is as good as the cashew cream would have been, since a taste test would be the death of me. I simply know that, while "sunflower and pepita cream" doesn't roll off the tongue quite as nicely as "cashew cream," it definitely gave the soup a creamy texture, a significant nutritional boost (hi, protein!), and, when added to the soup along with lemon juice, a really unique, unexpectedly buttermilk-like flavor and aroma. You realize how amazing this is, right? The soup is vegan. But it tasted like buttermilk. I want to make sunflower and pepita cream all the time now. It was delicious.

sunflower and pumpkin seed cream

5. When I served this to my husband and friend last night for dinner, the general consensus was that you couldn't even taste the cauliflower. Now that might not be a selling point for all of you, but I bet it is for at least some. I mean seriously. It's cauliflower. (Which reminds me - I'm convinced that two pounds of potatoes or other mild-flavored root vegetables or winter squash could be substituted for cauliflower with great success.)
---------------------

So. Other than my variation on the cashew cream, I made a few additional modifications based on what I had in my kitchen and some personal cooking preferences, based on experience, such as:

I didn't have Herbes de Provence, so I used a Penzey's blend called Bouquet Garni, with a little ground fennel seed, which is evidently an important ingredient in Herbes de Provence.

spices

I doubled the amount of lemon juice called for and added it in after the soup was pureed, along with the sunflower seed and pepita cream. I never add lemon juice while a soup is cooking because I think that dulls the bright flavor that citrus brings to a warm food.

I used whole wheat breadcrumbs from a loaf my husband baked last weekend. Combined with buttery Earth Balance margarine (which I doubled), the breadcrumbs were great, but they required the use of more senses to test for doneness than white breadcrumbs would have, because they were already brown, so I couldn't exactly rely on "browning" to know they were done. I just waited for them to smell toasty. That worked fine.

buttery breadcrumbs

I guess that's all the preface I've got for you today, other than: SERIOUSLY, THIS SOUP IS REMARKABLE. And also, it feels v. nourishing in your belly. Especially after a weekend of over-consuming beer, pizza, and cookies. (Not my weekend, but my husband's. I did eat a whole lot of chocolate zucchini cake though.)

cauliflower bisque evolution

cauliflower bisque in bowl

Dreamy Creamy Cauliflower Bisque
Yield: about 6-8 servings

For the soup
1 large white cauliflower, coarsely chopped (2 lbs)
5 cups vegetable broth, divided
2 cups water
2 1-inch pieces of lemon zest
1/4 cup lemon juice
1 1/2 teaspoons sea salt, divided
2 carrots, coarsely chopped
2 celery ribs, diced
1 onion, coarsely chopped
3 tablespoons olive oil
5 cloves garlic, chopped
1 teaspoon Herbes de Provence (or 1 teaspoon any old dried herb mix + 1/4 teaspoon ground fennel seed)
1 cup raw seeds (I used 1/4 cup raw sunflower seeds + 3/4 cup raw pepitas)

For the breadcrumbs
1 slice whole wheat bread, processed in blender or food processor to make coarse crumbs
2 tablespoons non-dairy margarine

Place cauliflower in a large soup pot with 4 cups of the vegetable broth and 2 cups of water. Add the lemon zest and a teaspoon of salt. Bring to boil over medium-high heat. Lower the heat, cover, and let simmer for 15 minutes, at which time the cauliflower should be quite soft.

Meanwhile, in a skillet, heat the olive oil over medium heat until shimmering. Add the carrots, celery and onion, along with half a teaspoon salt. Sauté until the vegetables are soft, about 10 minutes. Add the garlic and dried herbs/spices, and sauté for 2 minutes more.

Add the sautéed vegetables to the cauliflower, and stir gently. If the cauliflower is quite tender, keep the burner on low. If not, you can turn the heat off and let the soup-in-progress cool a bit.

In a blender or food processor (if using the latter, be careful of spilling - have a cloth handy), mix your raw seeds and the remaining one cup of vegetable broth until it becomes a thick, smooth puree.

Melt 2 tablespoons of margarine in a skillet and add the breadcrumbs. Stir over medium-high heat until toasted - about 2-3 minutes.

Now that the cauliflower, vegetables and broth have cooled a bit, using an immersion blender or regular blender, puree the soup, in batches if necessary, until silky smooth. If using a blender, return the pureed soup to your large soup pot.

Gently pour the seed puree along with 1/4 cup of lemon juice into the soup. Taste and add salt and pepper or more lemon juice as you see fit.

Sprinkle a heaping spoonful of warm buttered breadcrumbs over each serving of soup at the last minute and garnish each bowl of soup with a pinch of sweet paprika, chopped parsley, or freshly grated nutmeg.

Do you think Alicia Silverstone and Paul Rudd ever get together for fair trade coffee and reminisce about the good old nineties?

Sunday, September 12, 2010

Ten Days of CSA: Day 5, Homemade Vegetable Broth

This is going to be a quick but useful post. Toward the end of each week, when we are frantically trying to make use of our remaining vegetables from the current share in order to make room for the upcoming share, we tend to make a lot of soups. I did that today and I made one of the best vegetable soups I've ever tasted. I can't wait to tell you about it tomorrow.

But tonight I am tired and my husband just returned from a mancation and we have a house guest and our baby is teething... so for now I am just going to talk about vegetable broth, which I made this weekend and which you should all make all the time, because it is cheap, resourceful, delicious, and cleansing.

Here's the deal with making vegetable broth: All you need are water, vegetables, herbs (fresh or dry or both), salt and peppercorns. You put it all in a big pot and let it stew for a while. Then you strain and - voila! - broth. So easy. I can't believe I don't make this every week.

Another good thing about vegetable broth is that there are v. few rules. I think anything goes, although stronger flavors are going to result from stronger vegetables, naturally, so garlic, onions, celery, and root vegetables are important ingredients, as are dried mushrooms and herbs if you want an especially earthy, potent broth. Things I didn't have but wish I did were carrots, parsnips, turnips, and more parsley.

vegetable broth

In my stock pot, I placed the following:

1 onion, peeled and quartered
1 head garlic, outer flesh removed, rinsed, and halved
1 potato, scrubbed and halved
1 small red pepper, halved
1 small green pepper, halved
1 big cucumber, cut into three large chunks
1 small head of lettuce, coarsely torn, including stem/heart
3 celery ribs, with leaves
handful each of fresh dill, basil, cilantro, parsley
2 bay leaves
1 teaspoon black peppercorns
1 tablespoon sea salt

I added to the stock pot enough water to just cover the vegetables - in my case, 3-4 quarts of water.

water plus veggies

I brought the water to a boil and let the vegetables simmer, covered, for 2 hours. (The vegetables will look all wilty and sad after 2 hours have passed.)

cooked broth

Then I removed and strained 5 cups of the broth to use in the soup I'll talk about tomorrow, which I thought would need a lighter-flavored broth.

broth strained

I left the rest of the broth and vegetables in the refrigerator for about 24 hours, then I strained it. I also ate the potato. It was v. good. The yield was about 12 cups of broth, total. That's a lot.

This is just a sample of what can be used to make your own vegetable broth. Really I think you could use anything. I once read that some people save all their stems and old bits from vegetables and fresh herbs and they rinse and freeze them and then use them for broth later. I don't have enough room in my tiny freezer to do that but if you do, I bet it's wonderful.

I'll see you tomorrow and we'll talk about SOUP!

Saturday, September 11, 2010

Ten Days of CSA: Day 4, Spiced Chocolate Zucchini Cake

There are a lot of chocolate zucchini cake recipes out there. Epicurious has a good one from a 1995 issue of Bon Appetit, which is similar to my recipe but has a little less going on in terms of spice. Sandra Lee has a semi-homemade one, naturally, using a chocolate cake mix. There's a Bundt cake that sounds pretty good, using real chocolate instead of cocoa, plus Bundts are quite attractive, in my humble opinion. So many options when you have a thousand pounds of zucchini (or yellow squash, presently) to make use of!

squash

The one I go back to over and over again, however, is from the ever-so-democratic Allrecipes website. It was submitted by someone named L. Dart in 2008, and once you make this cake you will be in love with and forever indebted to L. Dart. It's just excellent, particularly if you like the combination of chocolate and spices, which I do v. much, plus it's super moist and rich, and the chopped chocolate sprinkled on top makes it all dimply and cute to boot once it's baked and cooled.

before and after

It is sitting on my stove top right now, tantalizing me until this evening, when I'm having company for dinner. And I'm not even going to talk about how good it makes your house smell. On one of the first days of fall, a dreary, overcast day, one of those days when I'd be otherwise stressing about what exactly I'm supposed to be wearing for the next month or so and cursing the winter that it just around the corner waiting to make me homebound and stir-crazy, the smell of warmth, chocolate, and spices that welcomed my daughter and me as we returned from lunch at Grandma's was reminiscent of Christmas and the cookies that our moms make every holiday season and... well, I just can't wait to eat this cake. It's been about a year since I made it last. I should have invited my friends over for a 4 o'clock dinner. Seven is so overrated.

sifted dry ingredients

zucchini!

chopped chocolate

[Post-script, pre-post follow-up: Dinner went well. We had carnitas tacos and black bean soup and wine and, yes, finally, the cake. Did I mention its crumb is just absolutely unbelievably perfect? It was everything I'd remembered and I wanted seconds. But occasionally, particularly when I'm in the company of skinny women, like I was last night, I can practice self-restraint.]

big tasty slice

Spiced Chocolate Zucchini Cake
Adapted (but not much) from Allrecipes
Yield: one 13X9" cake; 12 huge servings

1/2 cup butter, softened
1/2 cup grapeseed oil or other mild oil
1 cup sugar
1/2 cup brown sugar
1/2 cup plain yogurt (or buttermilk)
2 eggs
2 teaspoons vanilla extract
2 cups flour (I used 1 cup all-purpose + 1 cup whole wheat pastry flour)
1/4 cup unsweetened cocoa powder
1 teaspoon baking soda
1/2 teaspoon salt
1 teaspoon cinnamon
1/2 teaspoon cloves
2 1/2 cups grated zucchini (or any summer squash)
8 ounces dark and milk chocolate bars, chopped - pretty, eh? - or 1 cup semi-sweet chocolate chips

Preheat oven to 350 degrees. Grease and flour a 13 X 9" cake pan.

Using a wooden spoon, cream together butter, oil, and sugars. Add yogurt or buttermilk, then the eggs one at a time, then the vanilla, stirring well after each addition.

In a separate bowl, sift together the flour and cocoa powder. Stir in the baking soda, salt and spices.

Gradually add wet ingredients to dry. Stir in grated zucchini.

Pour cake batter into prepared pan and smooth out using a rubber spatula. Evenly distribute the chocolate chunks or chips on top of cake. Bake for about 45 minutes, or until a knife in center comes out with only melted chocolate on it, and not uncooked cake batter. Allow to cool for at least 15 minutes before cutting and serving. (This isn't a must-be-served-warm cake. It's good on day three or four or seven, in fact.)

-------------

If, by the way, you find yourself still overwhelmed with zucchini after you make this fantastic cake, here are a few other tried-and-true recipes for you to add to your mix. The Paula Deen one is phenomenal.

Zucchini Salsa Verde - great as is, but wonder if roasting veggies first would be even better?
Summer Squash Enchiladas - super good homemade enchilada sauce; feels v. fancy!

These I have not tried but want to: Peanut-Soy Squash Pancakes. Hopefully I'll make them before my ten days are up. Heaven knows I have the squash for it.

Friday, September 10, 2010

Ten Days of CSA: Day 3, Watermelon-Cucumber Popsicles

These are so good! So refreshing! I am eating one as I type, and it's wonderful.

Which reminds me... I heard once that even though men's computer keyboards look way grosser than women's, women's computer keyboards have more germs/bacteria/whathaveyou because, perpetual multitaskers that we are, we eat at our desks more often than men. And eating can be kind of germy, I guess.

I invented these one afternoon because (1) it was 90 degrees and humid out and I really wanted a popsicle, (2) I had a lot of cucumbers in my refrigerator and had been inspired to try something sweet with them after my successful go of watermelon gazpacho, and (3) my really cute popsicle molds had never been used! It was time.

Here's how it's done:

1. Chop up about half a medium-sized watermelon and 1-2 peeled cucumbers into 1" chunks, so that you have a total of 4 cups of watermelon and 2 cups of cucumber. (I did not seed my cucumbers, but I have a VitaMix. If your blender is not of similar caliber, maybe seed your cucumbers.) (Also, you could use any kind of sweet, juicy melon, and any kind of cucumbers. Mine were lemon cucumbers. They're not often found at the grocery store but CSAs love 'em.)

cucumer and watermelon

2. Put the watermelon and cucumber into a blender. Add 1 cup vanilla yogurt. Or peach yogurt or strawberry yogurt or raspberry yogurt. Or plain yogurt + 1 teaspoon vanilla extract + 1/4 cup sugar. Blend everything on highest speed until smooth smooth smooth. (And it should end up smooth smooth smooth, and quite thin, because all the ingredients have such a high water content. Mine was the consistency of foamy milk.)

blended popsicle mix

3. Pour into your popsicle molds and place in freezer.

unfrozen pops

4. You will probably have extra. I poured mine into a jar and called it "homemade kefir" - albeit v. thin, cucumbery kefir. My 1-year-old loved it. Who knew?

homemade kefir

5. After a couple hours, check to see if they are frozen solid. (They probably will be, as popsicles are not terribly large, and freezers are rather cold places.) Once they are, enjoy! (Ideally on a hotter day than today.)

popsicle!

It is impossible to get a non-naughty-looking picture of a popsicle. Impossible. Impopsicle.

Thursday, September 9, 2010

Ten Days of CSA: Day 2, Vegetable Beef Stir Fry

I guess yesterday, when instead I talked about accents and Trainspotting and Flight of the Conchords, I should have given some sort of explanation for the "Ten Days of CSA" in the title of the post. Not that "Ten Days of CSA" is terribly confusing - you probably figured I was going to post recipes using my CSA vegetables for ten days, because you are a genius. So, I suppose all I need to add is my motivation: ten days in a row of posting is sort of a goal for me, as is ten days in a row of actually using my CSA vegetables, which at this point in the summer (or autumn, it seems) are driving me mad and ending up in the garbage more often than I'd like to admit. (Because, seriously, how many cucumbers can you eat in one week? NOT EIGHT.) Putting a public commitment out there is about as strong a motivation as I can create for myself these days, so I boldly wrote that into the title at the last second, a promise to you and a promise to myself and a promise to my poor rotting vegetables. Aren't we all lucky?

Hey, you know what makes vegetables taste even better than vegetables?

beef

Steak.

We eat red meat (by which I mean meat from a cow) about once every two weeks in this household, if that. That's why there aren't many meat recipes on this blog. (In fact, until today, there has been one. (CORRECTION, 9/14/10: two.)) I don't love meat, but I appreciate it every now and then, and I think when I make it my husband likes me a little more. (But, actually, as I recall, my husband made this dish. I just told him what to do. He is v. good at executing. And I think he still liked me more once it was made because it was super yummy and because I had done a good deed by simply buying the meat and finding the recipe and *BONUS* it used up a lot of veggies.)

Before we get to the recipe, let's talk about one of the vegetables I used: kohlrabi. I'd never heard of kohlrabi before I lived in Minnesota and was a member of a CSA farm. In fact, the first time a kohlrabi arrived in our big brown box, I thought it was a decorative item, like a gourd.

Maybe you are similarly unfamiliar with the kohlrabi plant. Well, allow me to introduce you.

sputnik

"Hi. I'm kohlrabi. I look like sputnik, can be green or purple, and my flesh is like a crunchy jicama, but less sweet."

Now you say, "Hi, kohlrabi. I'm [insert name]. Nice to meet you."

Some people like to peel kohlrabi (see above) and eat it raw, plain, sliced, like a celery stick. It's also a nice addition to a crudite platter. I tend to throw it in anything that calls for radish or carrot, like my sweet potato tacos. It's just crunchy and uncomplicated. Not a super strong flavor, but refreshing and earthy at the same time. My world got better once I met kohlrabi.

But when you get TONS of kohlrabi, you can only eat so many raw. (Like cucumbers!) So I've started to throw it into soups, casseroles, and this here stir-fry, with great success.

"Did I mention I'm versatile?"

beef marinating

stir fry vegetables

plated stir fry

As a final word before we get to the actual recipe, let me just say that this is a perfect, malleable, quick weeknight meal. Substitute chicken or tofu for the beef. Throw in some frozen stir-fry vegetables if you don't have a CSA or garden overflowing with summer squash, eggplant, and kohlrabi. (But if you do that, only cook them for a couple minutes.) Crank up the spice by throwing in some Sriracha or more red pepper flakes at the end. This is just a full-proof stir-fry. I think you're going to like it, especially when you're eating 30 minutes after you started cooking and you realize you only have one pan to clean once you're finished.

Vegetable Beef Stir-Fry
Adapted from Martha Stewart
Yield: 4 servings

3 tablespoons soy sauce
3 tablespoons apple juice
1 tablespoon cider vinegar
1 tablespoon honey or maple syrup
2-3 cloves garlic, minced
1 1/4 pounds flank steak, cut diagonally across the grain into 1/2-inch-by-3-inch strips
1 tablespoon plus 1 teaspoon olive oil
1 tablespoon cornstarch
1 1/2 pounds mixed fresh vegetables, chopped into 1" pieces (I used 1 kohlrabi + 2 summer squash)
1 teaspoon red pepper flakes
Salt and pepper

In a large bowl, mix soy sauce, apple juice, vinegar, honey or maple syrup, garlic, and a few grinds of fresh pepper. Add meat; toss to coat. Let marinate for 15 minutes. Transfer meat to a plate; reserve marinade.

Heat 1 tablespoon oil in a 12-inch nonstick skillet over high heat. In two batches, cook meat until lightly browned, turning once, about 2 minutes per batch. Remove meat. Add 1/2 cup water to pan; stir up browned bits with a wooden spoon. Pour into marinade; whisk in cornstarch.

In same skillet, saute vegetables in remaining teaspoon of oil over high heat until bright in color and al dente, tossing often, 2-5 minutes, depending on your combination of vegetables. Add 1/4 cup water and cook for 2 more minutes or so, until vegetables are slightly soft.

Give the marinade a good stir, add to pan with red pepper flakes, and bring to a boil. Cook, stirring, until thickened, 30 seconds. Return meat to pan; toss to coat. Season with salt and pepper. Serve hot, over rice or noodles.

Wednesday, September 8, 2010

Ten Days of CSA: Day 1, Grilled Vegetable Kebabs

But you have to say "kebab" like Flight of the Conchords and all non-American English speakers say it: keh-bab. With the v. pure "a" sound like the a in "bad". None of this kabob rubbish.

Okay, now you try it.

Close!

Just keep trying.

It's a fun exercise.

Another fun exercise is to read Trainspotting out loud, trying out all the accents that the book covers, which are several. Just be sure to do it in the privacy of your own bedroom. It can get ugly. But it's never not fun.

But about this recipe, which is what I'm here for and you're here for, because you probably don't love accents as much as I do, and I probably shouldn't be talking so publicly about my behind-closed-doors adventures, even if they are as innocent as reading a book out loud. This is a simple, nice little recipe, found on the wonderful internets through a little "marinated grilled vegetables" search. I got a lot of no-go's, but this one is good. I'll probably make these guys again, actually, because grilling vegetables (even on my cheap grill pan) is a tasty way to prepare and serve vegetables, especially of the squash variety, of which most of us might be tired at present. CSAs (and gardens, I hear) can really do that to you.

veggies to be grilled

Also I have a lot of skewers left.

I'm not doing a v. good job selling these, am I? I think it's because the fact that grilled vegetables are delicious is a given. Once you read how simple the marinade is, and you see the pictures, you'll be immediately sold regardless of what else I have to say in this post.

Especially if you have a CSA.

skewered

Note that the veggies listed are totally replaceable with any other vegetable that you think is grill-worthy. I tried an onion and it just broke into bits once I tried to skewer it. Just so you know. Probably whole shallots or pearl onions or something small like that would work better.

marinade

marinating

grilled

Grilled Vegetable Kebabs
Adapted from Guy Fieri
Yield: 4 skewers, for 2-4 people

For kebabs
1 bell pepper, trimmed, seeded, cut into 1" chunks
1 yellow summer squash, cut into 1" chunks
1 zucchini, cut into 1" chunks
1-2 eggplants (mine were small), cut into 1" chunks
4 metal or wooden skewers

For marinade
2 tablespoons olive oil
1/2 teaspoon salt
1 teaspoon freshly cracked black pepper
1 teaspoon ground cumin
1/4 teaspoon smoked paprika
1 teaspoon dried dill or 1 tablespoon fresh dill (I used the latter - excellent!)
2 tablespoons honey
2 tablespoons lemon or lime juice

Carefully arrange the prepared vegetables onto skewers, and put them on a baking sheet. Whisk together the olive oil, salt, pepper, cumin, paprika, dill, honey and lemon or lime juice in a small bowl. (Tip: if the honey is not quite liquid, microwave it for 10 seconds before adding the other ingredients to your measuring cup.) Brush the marinade on the kebabs and let marinate for 15 minutes. (I don't currently have a brush. I just drizzled the marinade on the kebabs and rotated them every couple of minutes so the excess marinade on the plate could coat them fully.)

Preheat a grill or grill pan (worked fine!) to medium heat. Put the skewers on the grill and cook on all sides, about 6-10 minutes total.

Finally, this is a really great little marinade. If you just wanted to pour it into a pie plate and let the veggies, unskewered, soak in it for a while before grilling them solo, they'd be just as delicious, albeit less beautiful, as they would be kebabified.