Tuesday, November 30, 2010

Ten Posts of Pumpkin: (6) Butternut Squash and Pinto Bean Enchiladas with Mole Sauce

This post has been hard to assemble because there are many parts, the pictures do not do the recipe justice, and, um, I can't seem to find my notes. I'll let you decide what to do with that little disclaimer.

But please note: these are as good and unique as they sound.

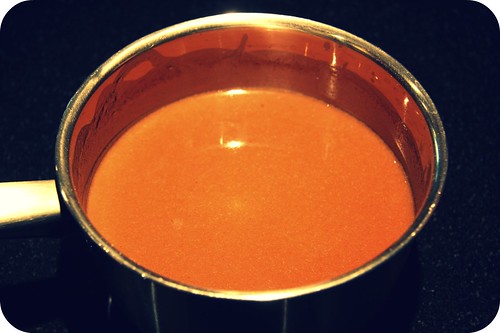
The best part is the mole sauce. If you aren't in a mood to make your own refried beans or peel and dice a butternut squash or grate an obscene amount of cheese, that's fine. But make the mole sauce. It's totally easy and it's the best mole sauce I've ever had and, while it involves a lot of ingredients, most of them are available at health food stores or co-ops or even some regular grocery stores in bulk and BULK IS CHEAP. Especially spices. The best part of my grocery shopping experience is when I pay 14 cents for fresh nutmeg. It's even more edifying when I happen to have caught a glimpse of the jars of nutmeg for sale three aisles down, which cost like $4+. Preposterous.

spice blend

Okay. So first I'll give you the mole recipe, adapted (to be made nut-free and slightly simplified, i.e. I don't peel the chiles or tomatoes and I just blend everything together) from a David Lebovitz blog post, and after that I'll elaborate on the enchiladas. But seriously, if you don't feel like assembling enchiladas, just use the mole sauce with chips or poured over some poached chicken breasts or drizzled on rice and beans or WHATEVER. Just make it and eat it. It's spectacular.

mole

Yum. I miss it.

Chocolate Mole Sauce
Adapted from David Lebovitz
Yield: about 2-3 cups

5 dried ancho chiles
1 tablespoon olive oil
1 onion, chopped
1 clove garlic, thinly sliced
2 tomatoes, seeds squeezed out
1/3 cup unsweetened shredded coconut
1/3 cup diced prunes (or raisins)
1 tablespoon toasted sesame seeds
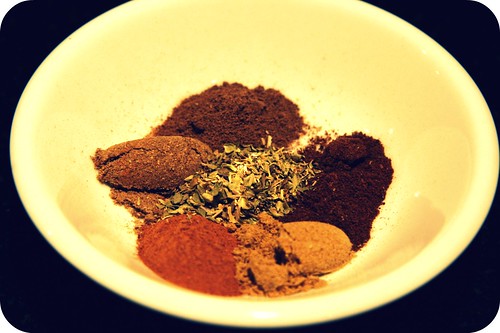
1/4 teaspoon each: cinnamon, cloves, oregano or epazote, cumin, coriander, allspice
1 teaspoon salt
1/8 teaspoon black pepper
1/8 teaspoon cayenne
1 cup warm water (or more, as needed, ideally reserved from soaking the ancho chiles)
1 ounce unsweetened chocolate, melted

Cover chiles with water in a saucepan and bring to boil. Turn off heat, submerge the chiles by setting a bowl on top of them, and let soak for 30 minutes or so.

Have all your spices and herbs ready to go in a small prep bowl.

In a skillet over medium heat, sauté the chopped onion in the olive oil until soft and translucent, about 5 minutes. Add garlic and sauté another minute. Add spices and herbs and cook, stirring constantly, for about 30 seconds. Remove from heat and allow to cool for a few minutes.

Meanwhile, drain the ancho chiles and reserve the cooking water. Remove the seeds and stems from the chiles.

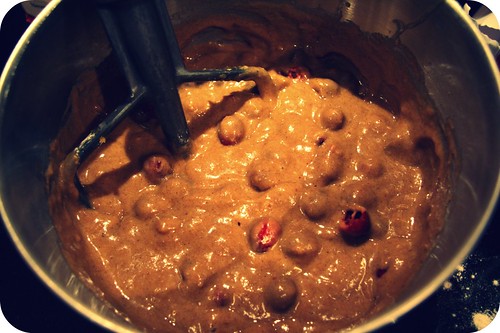
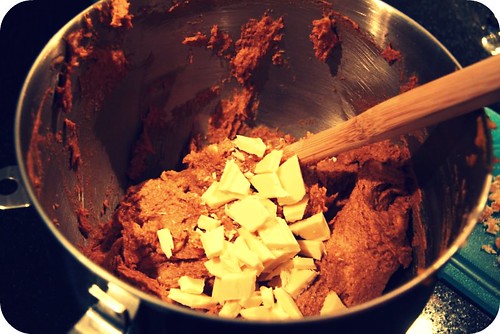
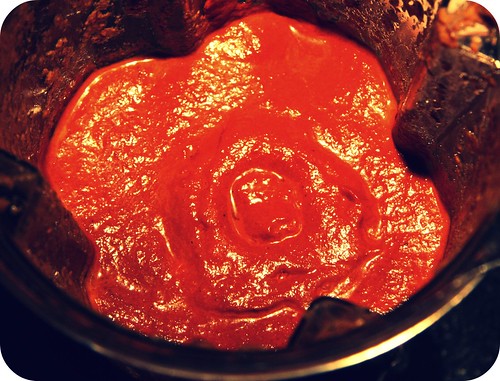
Using a food processor, or if you are lucky enough to have one, your Vita-Mix or another comparably awesome blender, purée the ancho chiles with the cooked onion-garlic-spice mixture, coconut, tomatoes, prunes (or raisins), sesame seeds, salt, and pepper, adding cooking water 1/4 cup at a time until the mixture is smooth. It might take a couple minutes and about 1 1/2 cups of water, but mine came together beautifully, and rather easily. Taste the mixture and add more salt or pepper as desired. Stir in the melted chocolate and add a little more water to obtain a smooth, saucy consistency. Store in the refrigerator until ready to use.

And now for the enchiladas...

super cheesy enchiladas

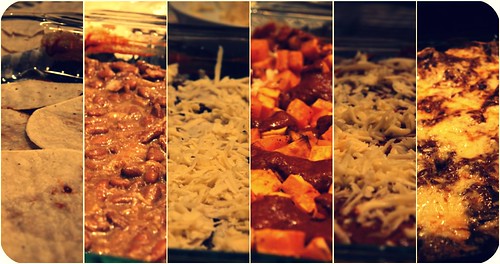
This makes kind of a weird quantity, because I was making it all up as I went along. I believe it would make one 15X9" pan's worth of either properly rolled enchiladas or enchiladas layered, casserole-style. But what I ended up with was a 9X9" pan of rolled enchiladas, and a 13X9" pan of "enchilada casserole".

roasted butternut squash
enchiladas in progress

Butternut Squash and Pinto Bean Enchiladas with Mole Sauce
From Yours Truly
Yield: about 8 servings (see above)

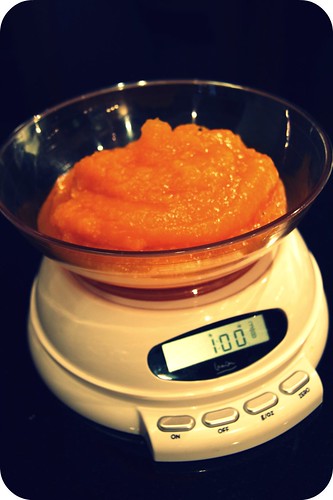
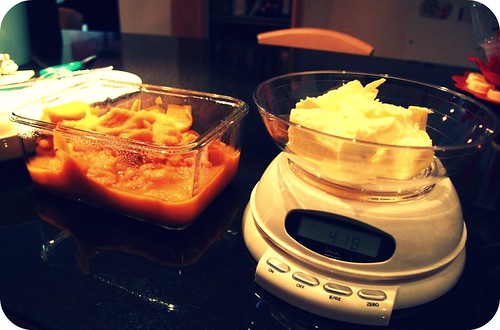
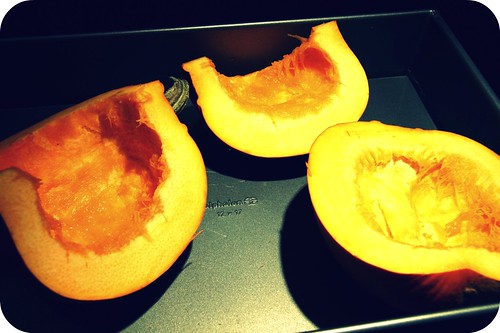
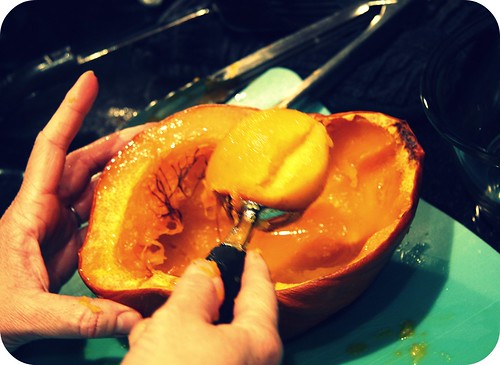
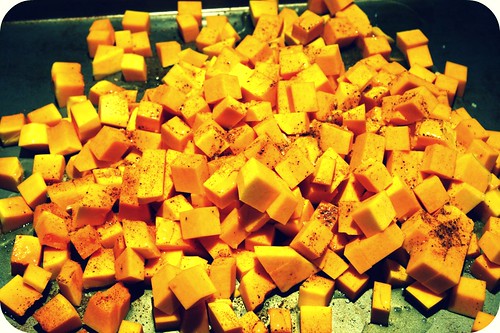
1 butternut squash or other winter squash, peeled and cut into 1/2" cubes (you'll want about 1.5 lbs flesh)
1 teaspoon chili powder
1 teaspoon cumin
1 teaspoon salt
2 tablespoons olive oil
12-16 small corn tortillas
2-3 cups Mexican Whole Beans or Refried Beans or some sort of canned equivalent (about two 15-oz cans)
1 recipe mole sauce
3 cups shredded monterey jack cheese

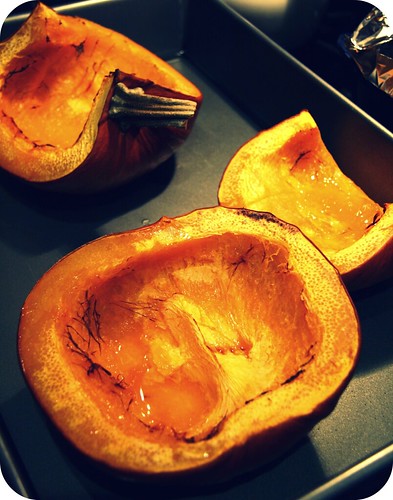
Preheat oven to 350 degrees. Whisk together chili powder, cumin and salt. Spread butternut squash onto baking sheet or roasting pan and toss with spice mixture and olive oil. Roast until starting to brown, about 20-30 minutes.

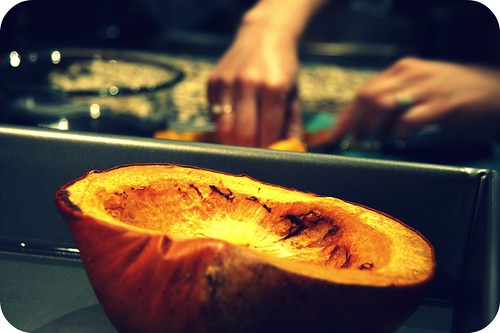
Once squash is cooked and cool enough to handle, assemble your enchiladas.

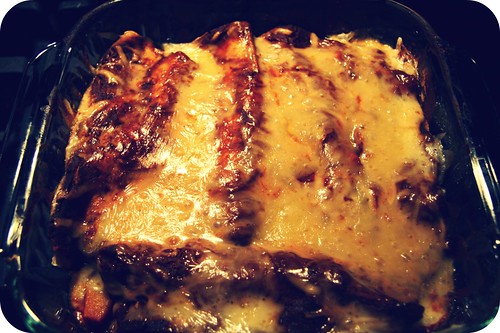
To make layered enchiladas (the easy thing to do), layer 4-6 tortillas in glass baking dish, followed by half the beans, half the squash, and a third of the cheese. Repeat layers again, starting with tortillas and ending with cheese. Add one more layer of tortillas, pour mole sauce evenly on top of tortillas, and finish with a sprinkling of the final third of cheese. Bake for 30-40 minutes, until everything is bubbling a bit and the cheese is starting to brown.

To make rolled enchiladas, first warm the tortillas in the microwave or on the stove so that they can be rolled without breaking. Fill each tortilla with about 1/4 cup beans and 1/4 cup squash, roll the tortilla tightly and place in pan, so that they are all side by side and there is very little space anywhere in the pan at the end. Pour the mole sauce evenly on top, followed by the cheese. Bake for 30-40 minutes, until everything is bubbling a bit and the cheese is starting to brown.

Enjoy!

Saturday, November 27, 2010

Ten Posts of Pumpkin: (5) Pumpkin Cranberry Muffins

I am so going to fail. I tried! But then I ended up on a plane. With a baby. And a nice helpful grandmother who cared for her while I added "stranger/grandmother" to my list of things to be thankful for. And then there were the friends! With their lasagnas and trips to the park and Starbucks beverages and nuptials. And I had a dance card to fill, a bride to dote on, a family-size portion of warm apple crostada to consume all by myself, a Hwy 5 to tackle, and a toddler to keep tabs of (sort of - as soon as we parted ways with stranger/grandmother we had aforementioned friends and subsequently a real grandmother to do my dirty work). Then there was Aptos and siblings and nephews and Thanksgiving and Scrabble and homemade brioche and cinnamon rolls and the best stuffing on earth and endless food, food, everywhere you turn, food! I have been too busy digesting to actually WRITE about food! Oh, also, I forgot my computer.

The worst part is that I actually made and documented all my pumpkins-a-plenty creations. I just haven't had an opportunity to sit down and put it all together into a useful, aesthetically acceptable format.

So about those muffins...

that I made like a month ago...

with my homemade pumpkin puree...

1 lb of pumpkin

after I ate a pumpkin-cranberry muffin at a coffee shop and fell in love with its moderate sugar content and bursts of juicy warm fresh cranberries...

and of course felt I had to make them myself...

and try out the mess-free-trick I'd read about elsewhere on the internets...

kitchenaid tip!

They're good. Really good. Not too sweet. Not too spicy. Just perfectly pumpkiny with a tart bite. I made muffins as well as a loaf and the loaf is in my freezer in Minneapolis and as I write and reflect on these little treasures, I mostly can't wait to get home, thaw the loaf, and dig in.

pumpkin cranberry loaf

Probably because I am wasting away here at the Lenz house, where it's just really hard to find something to eat.

pumpkin bread batter
before and after

Pumpkin Cranberry Muffins
From Bon Appétit, November 1995
Yield: 24 muffins or two regular-sized loaves (I made 12 muffins + 1 loaf)

2 cups all purpose flour
1 cup whole wheat pastry flour
2 teaspoons ground cinnamon
1 teaspoon ground cloves
1 teaspoon ground nutmeg
1 teaspoon baking soda
1/2 teaspoon salt
1/2 teaspoon baking powder
2 1/2 cups brown sugar
2/3 cup grapeseed or other mild oil
3 large eggs
1 pound pumpkin puree (equivalent of 16-ounce can solid pack pumpkin)
1 teaspoon vanilla
1 1/2 cups fresh cranberries (or an 8- or 10-ounce bag frozen cranberries)

Optional cinnamon sugar topping: 4 tablespoons sugar + 1 teaspoon cinnamon

Preheat oven to 350. Grease and flour loaf or muffin pans.

In a medium-sized bowl, whisk together dry ingredients, not including brown sugar. In a large mixing bowl, beat together brown sugar and oil. Add eggs, one at a time, then pumpkin puree and vanilla. Beat until incorporated. With electric mixer turned off if that's what you're using, carefully pour in the dry ingredients. Cover top of bowl and mixing attachment with a kitchen towel and mix on low speed until the messy puff of flour smoke has dissipated (about 20 seconds or so). Move the towel and mix on low until just combined. Stir in the cranberries. Pour batter into loaf pans or spoon into muffin tins (make muffin cups about two-thirds full). Top with cinnamon-sugar mixture, if using. Bake until tester inserted in center comes out clean, rotating about half way through, for a total of about 60-70 minutes for loaves and 18-22 minutes for muffins.*

*Confession about baking times: Because my oven does not cook especially evenly on the regular "bake" setting, I actually used the "convection bake" setting and baked the muffins at 325 degrees for 16 minutes, rotating pan halfway through. The loaf took about an hour with same setting and temp. The temp/time listed above are from Epicurious, a far more trustworthy site than my own. But then, they probably have more reliable ovens in their test kitchens.

Monday, November 15, 2010

Ten Posts of Pumpkin: (4) Gingery Lemony Pumpkin Soup

I just want to mention, before I get to the soup, that I made those pumpkin blondies again this weekend for a bridal shower and they were (a) even better than I remembered and (b) quite popular. I'm also going to go ahead and be a bit of a critic and advise you to not, under any circumstances, make this dessert. I read the sketchy comments and defied the warnings, because it sounded so interesting. Please learn from my mistake. Interesting doesn't cut it when you are trying to impress 20 semi-strangers. Comments are meaningful. I should have listened. I should have known that, when a recipe is followed by a slew of comments dotted with words like "weird" and "disappointing", it is not worthy of experimentation. Particularly right before a party. Particularly when it involves several expensive ingredients. Seriously. Three-quarters of that cake went in the rubbish bin, people. Thank heavens I had pumpkin blondies and a fabulous pear cake (with chunks of bittersweet chocolate) to offer as well.

And now: soup. This soup is so great and easy and simultaneously refreshing and fallesque! It's adapted from a recipe for carrot soup that Charlotte made for me and my family a month or two ago. The carrot soup was great but I had winter squash to use up when I next craved the soup... and an even swap worked beautifully. It was in fact even a little creamier and smoother than the carrot version, likely because winter squash is so much softer than carrots.

lemon ginger butternut squash soup collage

This is a forgiving recipe, as soup recipes often are. Fresh lemon zest is about the only super important, inflexible component. I used jarred ginger when I made this, a random assortment of onion-types that were on my counter, and I added a little curry because I love curry. I suspect that sweet potatoes would work just as nicely in this soup as the carrots and winter squash did.

bowl-o-butternut soup

We enjoyed it with some homemade seedy soda bread and a sprinkling of red salt. It's really a nice soup and it makes a manageable amount - something I appreciate as fall approaches, my freezer continues to be full, and my daughter fails to appreciate the wonders of soup. My husband and I ate it for dinner, had seconds, and had one lunch portion left over.

butternut squash soup close up

Gingery Lemony Pumpkin Soup
Yield: 4 servings

3 tablespoons butter or olive oil
1 1/2 cup chopped onion (any kind of onion)
1 tablespoon fresh minced ginger
3 cloves garlic, sliced
1 1/2 pounds pumpkin or other winter squash, peeled, seeded and cut into 1/2" pieces*
1 tablespoon tomato paste (or 1 or 2 fresh tomatoes)
1 teaspoon curry (optional; I used muchi curry, which is semi-sweet)
zest and juice of one lemon
3 cups vegetable or chicken broth

Melt butter or olive oil in heavy large pot over medium-high heat. Add onion; sauté 4 minutes. Add ginger and garlic; sauté 2 minutes. Add winter squash, tomato paste (or tomatoes), curry (if using), and lemon peel; sauté 1 minute. Add 3 cups broth and bring to boil. Reduce heat, cover partially and simmer until squash is very tender and flavors marry, about 12-15 minutes. Puree soup with immersion blender or in batches using a regular blender. (If doing the latter, allow the soup to cool slightly and return to pot after blending.) Gently stir in lemon juice. Season with salt and pepper. Add a bit of water or more broth if you want a thinner soup. Bring to a simmer again. Serve in big bowls and, if possible, devour slowly next to a warm fireplace while it is raining or snowing outside.

Can be made 1 or 2 days ahead. Cover and chill.

*The first time I made this, I used the long, tubular part of a medium-sized butternut squash and that equaled about 1.5 lbs. The second time, I used a delicata squash (unpeeled) and an acorn squash (peeled). Both times, the soup was great.

Thursday, November 11, 2010

Ten Posts of Pumpkin: (3) Ginger Pumpkin White Chocolate Blondies

WARNING! Another Re-Post!!! But oh-so-worthy of reposting. Believe me. This recipe shall redeem me from my pumpkin seed debacle. Forever. Not only is this recipe worthy of a FOOD BLOG, as opposed to what I often call "my Sadie blog" - but also, I'm super busy for the next few days. Mostly in the kitchen, though, which is good, right? So there will be two re-posts. Anyway, I apologize for any resulting formatting issues. Too busy to fix them. Just focus on the recipe, dudes.
---------------------------------------

11/27/2009

A while back, my friend Nicole solicited pumpkin recipes on her blog. She needed pumpkin recipes because she had pumpkins-a-plenty growing in her yard. Later, I needed pumpkin recipes because I had pumpkins-a-plenty growing in my yard. Just kidding. I don't have a yard. I did have a lot of pumpkins though; they were from - where else? - our CSA. So MC and I have been quite resourceful in our use of pumpkins in our little kitchen, and now I have a response for Nicole, four months later. (I think these recipes are worth the wait.)

The first recipe, featured below, is only barely adapted from this Ginger Pumpkin White Chocolate Blondies recipe. It was a fun one because we got to use two new kitchen gadgets: the VitaMix, to puree the pumpkin, and a kitchen scale, to, well, weigh things, like butter, which we wouldn't want to skimp on. (In case you were wondering, Sadie is just two pounds too big for the kitchen scale.)

Pumpkin and butter

I wasn't sure about the crystallized ginger in this recipe. Generally, crystallized ginger is only good in theory, you know? I find it to be prettier than it is tasty.

crystallized ginger

So I only put it into half the batter - the half that I made into cute mini-muffin-blondies - and they were good, but the half that I made into blondie bars (no picture - but they looked like the one pictured here) had the crystallized ginger in them (double the amount in fact, because I put all the ginger from the whole recipe into this half), and they were even better. And I wasn't sure if something with that much white chocolate could get better.

batter with white chocolate

But it could.

mini muffin blondies

NOTES: You could of course use canned pumpkin too. It might be better, actually, or at least more pumpkiny and denser. And, sadly, I don't recommend making the mini-muffin-blondies. The consistency of these is a perfect combination of crumbly and gooey. But this perfect consistency made them hard to get out of the muffin tin intact. So although they were cute, chunks of blondie or - horror! - white chocolate would stick in the pan, like so:

white chocolate fail

So stick with a 13X9" pan or two 8X8" pans. (Or maybe just regular cookies even.) Here's the recipe.

Pumpkin White Chocolate Blondies with Crystallized Ginger
Adapted from here
Yield: One 13X9" pan or two 8X8" pans' worth; about 24-30 ample servings

1 c all-purpose flour
1 c stoneground whole wheat flour (adds good texture)
1 1/4 c brown sugar
1 c pumpkin, pureed
1 c butter, softened
1 egg
1 T vanilla
1 t baking soda
1 t salt
1 t ground ginger
2 t cinnamon
1/2 t ground allspice
1/2 t ground cloves
1 1/2 c good quality white chocolate, chopped
1/4 - 1/2 c crystallized ginger, chopped

1. Preheat oven to 350 degrees, or "Betty Crocker temp", as sexy Michael Chiarello would say. Butter or spray pan(s). (If you are not lazy, you could also line pan(s) with parchment paper or aluminum foil and spray them, which makes for easiest blondie removal.)

2. In a medium bowl, stir together flour, baking soda, salt, and spices. Set aside.

3. In separate bowl, cream together the butter and brown sugar until fluffy. Add the pumpkin puree. (It might look kind of curdled, but it still turned out fine.) Add egg and vanilla and beat until combined.

4. Gently stir in flour mixture until just incorporated.

5. Stir in white chocolate and crystallized ginger chunks.

6. Spread into pan(s) and bake for 30-35 minutes (if in two pans) or 40-45 minutes (if one big pan).

7. Cool, cut, and enjoy the tasty bad boys.

Happy fall!

Michael Chiarello

Tuesday, November 9, 2010

Ten Posts of Pumpkin: (2) Chili Lime Roasted Pumpkin Seeds

I hate to do things I say I'll never do... but I'm going to talk about my featured food today in a v. "recommended with reservations" tone. I wanted to only write about the best foods ever on this blog. But I have mixed feelings about these badboys, am not willing to say they are among the best foods ever, and yet (and you'll see later why) I can't not recommend them.

So I'll just discuss the reservations - there are two of them - straight away:

1. Pumpkin seeds are harder to clean than I expected. In the big scheme of things, sure, they're not so bad. The bar exam and labor were harder. But, seriously, the pumpkin fibers don't just come right off once you've soaked your seeds. I had to do a fair amount of scrubbing and rinsing and they never ended up squeaky clean. So, yeah. There's that.

2. Way worse, however, was cleaning this:

pumpkin seed pan

Oh. My. Holy. [Expletives]

[Just kidding. I would never use expletives so freely. Never. Pumpkin seeds may not be squeaky clean but I sure am!]

[Except, you know, sometimes.]

Seriously, res ipso loquitor, right? That means the thing speaks for itself. In Latin. Or legal jargon anyway. The pan is liable for my reservations. Or maybe I'm liable, for being an idiot and not coating my pan with oil, like a normal, intelligent, non-baby-brained person would have done. Ugh. I already paid for it though and have some buffed arms to show for it. No amount of soaking helped. I scrubbed for probably over an hour. I scrubbed harder than I would have if I was the kind of person who owned a Dobie pad or steel wool or Comet. The kind of person I will likely be tomorrow.

I think the pumpkin seed washing process on the front end would have been fairly innocuous had the back end not involved hours of fruitlessly scrubbing a cheap pan. It just added up by the end and that's why I said yesterday that I'm still not certain pumpkin seeds are worth it. They might be worth it if you remember to grease your pan, or if you opt for an oil-coating on your pumpkin seeds rather than an egg wash.

I'm still learning.

If you are not pregnant and/or are more prone to greasing your pans on a regular basis and/or have successfully made pumpkin seeds before and are just looking for a new spice combo to play around with and/or ABSOLUTELY LOVE PUMPKIN SEEDS! AND WASHING THEM! AND BURNING PANS! AND WASHING BURNT PANS! then this recipe is for you.

You're SO welcome.

pumpkin seed collage

I should probably say something positive about these little somethings so that you can at least give me the benefit of the doubt and believe that I'm posting the recipe because the resulting product was actually tasty and not because I spent so much time cleaning on account of this project that I have to make all that work worthwhile by posting about it. (I appreciate the benefit of the doubt but concede that it's somewhere in the middle. They're good, and I'd probably post about them even if the process weren't a royal mess. But I could definitely not NOT write about them given the royal mess I had to clean up in order to enjoy them.)

The positives:

1. They are tasty.
2. They are crunchy.
3. They are pretty.

roasted pumpkin seeds

4. They are especially nice on the salad we ate for four days in a row after I made these: spinach, tossed with Chili Lime Roasted Pumpkin Seeds, dried cranberries, and torn mozzarella (which I made myself at a cheese-making class!) and dressed with 1 tablespoon flax seed oil and 1 tablespoon blackberry balsamic vinegar. Divine. And v. autumnal, yes?

pumpkin seed salad

5. Husbands really like them.

Let me know if you make them. And how your pan fares.

Chili Lime Roasted Pumpkin Seeds
Adapted from 101 Cookbooks
Yield: about 1 1/2 cups pumpkin seeds

1 - 1 1/2 cups pumpkin seeds (I used all the seeds from both a pumpkin and butternut squash)
1 egg white
1/2 teaspoon lime zest
1/4 teaspoon cumin
1/4 teaspoon chili powder
1/4 teaspoon salt
2 teaspoons honey
1 tablespoon lime juice

Soak pumpkin seeds in large bowl of water and scrub them with your hands to get all the pumpkin flesh/fibers off. You might have to rinse off the seeds and refill the bowl with water a couple times. Drain in a colander and allow them to dry in one layer on a large towel. (I let them dry over night, but this is probably not necessary.)

Preheat oven to 375 degrees.

In a small bowl or measuring cup, whisk together all the other ingredients. Place the pumpkin seeds in a large bowl, drizzle the egg white mixture over the top and toss well to coat. Drain off any excess egg white using a strainer. Place the coated pumpkin seeds in one layer on AN EXTREMELY WELL-GREASED baking sheet. Bake for about 12-15 minutes, until seeds are golden. Allow to cool a bit and dive in.

Monday, November 8, 2010

Ten Posts of Pumpkin: (1) Homemade Pumpkin "Purée"

Do you like "Ten Posts" rather than "Ten Days"? I just don't want to set myself up for failure and you for disappointment. The best I can do is this: plan to get them all posted during the month of November. Which means ten posts in just over twice as many days. Which is better than my usual. Which I think you'll really enjoy. Maybe almost as much as some of you (I won't name any names) enjoyed your recent batch of scones. (No judgment here, dude. I am first and foremost complimented. I am secondmost jealous. I want a scone. Or six. And I want to try them with berries! Maybe in December...)

Also, I like alliteration.

Okay. So, let's get down to business, folks. First things first: how to make your pumpkin edible. As a side note, I'd like to say that I wasn't planning on eating my pumpkin for a while. She was such a handsome pumpkin.

hi i am pumpkin

I didn't even do my usual photo-editing on her. Her color required no enhancement. She was perfect, and I feel that, sitting outside my door alongside a smaller pumpkin, she made my home a little more inviting than my boring grey-and-black door mat usually does, and I was prepared to allow her to continue doing just that through November.

And then we had our homeowner's association annual meeting.

And our property manager walked by my door.

And I was informed that I could not have my pumpkins outside the door, no matter how pretty they were, because they were "live" (by which I think she probably, more accurately, meant "real"). And, you know, they could rot and damage the hallway carpet. Or, worse yet, someone could be in the hallway - drunk! - and could kick the pumpkin and make a mess and - oh dear! - that would be just absolutely catastrophic.

So my pumpkins came inside and I was just about to roll my eyes at the whole thing when I noticed that, what do you know, my littler pumpkin was in fact molding in a place I couldn't see. There was no carpet damage though. And the big pumpkin was perfectly lovely still, so I, ever-so-humbled, roasted her and made some pumpkin "purée" which really isn't puréed at all, at least not the way I did it.

And now I am here to help you salvage your own pumpkin for the purpose of making baked goods, fancy fall hot beverages, and, I don't know, if we're lucky, maybe even pumpkin mac & cheese. It's really easy and less time-consuming than you'd expect, and you only need these tools: roasting pan (either one large or 2 small), really great knife, and ice cream scoop. If you have a grapefruit spoon, that is helpful but by no means necessary.

Okay. So, I'll just tell you what to do step by step.

Step 1: Cut pumpkin in half, using a super sharp knife. I read somewhere that it works to use a serrated knife like a saw. I tried that and learned that it would work to cut my hand in half, but not necessarily to cut my pumpkin in half. I ended up using my giant, recently sharpened chef's knife like an axe and that was great. Oh, and preheat oven to 350 degrees.

pumpkin halves

Step 2: Remove the seeds, using a fork or spoon or ice cream scoop or grapefruit spoon. This is the hardest part in my opinion. Try to get as much of the stringy fibers out as possible, but don't worry about having some left over. It will kind of burn in the oven and then you can pull it off with your fingers once the pumpkin has been roasted. (If you'd like, save the seeds by putting them in a large bowl of water for now.)

pumpkin pieces to be roasted

Step 3: Place the pumpkins, skin side down, in a large roasting pan. (I had to cut my pumpkin into three pieces in order to get it to fit. This is fine - better even, maybe, because then it cooks faster.) Add a cup or two of water to the pan so that it's about half an inch deep, or slightly less. Place the pan in the preheated oven (it's okay if it's not all the way hot yet) and roast for 45 minutes. I used the "convection roast" setting on my oven and was v. pleased with the results. If you have it, go for it.

(Meanwhile, you can scrub clean the seeds if you've saved them. Drain them in a colander and place them to dry on a clean towel, in one layer. You could also use paper towels but I think that's totally wasteful so if you do, don't tell me. I'll tell you what to do with them once dry in a later post.)

After 45 minutes, using a fork, check the pumpkin to see if it is malleable/scoopable. It will be v. soft and look like this when done:

roasted pumpkin

Step 4: Using tongs or your hands, covered with towels or something so as not to melt the skin off your fingers, remove the pumpkin halves/pieces from the roasting pan and allow them to dry and cool on a towel or plate. Mine had some condensation in the centers, which poured off quite easily.

close up roasted pumpkin

Step 5: Have a large container ready that you'd like to use to store your pumpkin. Using an ice cream scoop, carefully (the pumpkins are quite floppy at this point) scoop out the flesh from the pumpkin skins. This is the easiest and most fun part. You will have only the thinnest of skin remaining - like the peel of an apple or pear, but a bit firmer. Pour the pumpkin flesh into your container, ready to store.

pumpkin scoop

pumpkin "puree"

My pumpkin was pretty big, and I ended up with about 6 cups of pumpkin flesh. You can store it in your refrigerator for about a week, or in your freezer for a while longer. I used mine all up before needing to freeze any, but all my recipes called for about 2 cups of pumpkin purée, so if I do this again this season, I will place 2-cup portions into individual freezer bags.

Was that incredibly demystifying? I hope you'll try it. It's pretty fun. In my opinion, the much harder part is dealing with the seeds. Frankly, I still haven't decided if they're worth it.

Friday, November 5, 2010

Oatmeal Pancakes with Spiced Apple Cider Syrup

Short and sweet. That's what this post is. A short stack of delicious Swedishy buttermilky oatmealy pancakes topped with some sweet, spicy, seasonally-appropriate apple cider syrup. My mom used to make this apple cider syrup for us when we were kids. I'd forgotten about it until recently, when, while I was eating some apple butter and thinking it would be better with more spices, more sugar, more liquid, ideally on pancakes, I was like, "Hey! We used to have that apple cider syrup all the time! I miss it. How do I not have the recipe?" And within about four hours, I had called my mom, who is quite organized and has all her recipes tidily typed up and stored on her computer, and she had promptly emailed me the recipe. Within about 24 hours, I'd made the syrup.

It was even better than I remembered. (Actually, I was a frightfully, frustratingly picky eater when I was a kid, so mostly I was surprised I liked it then. I guess I've never had a problem with large amounts of sugar and a decent dose of spice, so long as the spice was cinnamon.)

A note on the pancakes: We've had these twice in our household recently. The first time, my friend Charlotte made them for us and they were delicious. We didn't wait for the batter to soak for two hours before cooking them, because we were hungry. They turned out excellent (hence my own go at them shortly thereafter). The second time, I decided to make them during my daughter's midday nap, and I was curious about what would happen to the batter when set aside for a bit, so I had both the time and inclination to let the batter rest in the refrigerator for a couple of hours before dinner. (Yes, both times we've had these pancakes it was for dinner. Brinner.) What I learned: the resting period makes for thicker pancakes. The flavor was not noticeably different, and flatter pancakes are lovely in their own way - a French way, perhaps. But if you prefer your pancakes thick and doughy, the two-hour wait is the way to go.

oatmeal pancake batter

plated oatmeal pancakes

Oatmeal Pancakes
Adapted from Epicurious
Yield: about 6-10 pancakes, depending on how much you "heap" your measuring cup

1 cup oats
1/4 cup whole wheat flour
1/2 teaspoon baking powder
1/2 teaspoon baking soda
1/2 teaspoon salt
1/2 teaspoon cinnamon
1 1/4 cup buttermilk
1 egg
2 tablespoons melted butter
1 tablespoon maple syrup*
1 teaspoon vanilla

Whisk together oats, whole wheat flour, baking powder, baking soda, salt, and cinnamon.

In a separate bowl or large measuring cup, whisk together buttermilk, egg, melted butter, maple syrup, and vanilla.

Pour wet ingredients into dry and mix until just incorporated. Some lumps are okay. Place batter in refrigerator and allow to thicken for two hours. (Or more - up to 24 hours. Just make sure it's covered.)

When ready to make the pancakes, heat a skillet or griddle over medium heat. Melt a little butter on the griddle and, using a 1/4 cup measuring cup, spoon a heapful of batter onto griddle. Cook for about 2 minutes, or until bottom is golden brown (watch them carefully - they go from golden brown to espresso brown in like thirty seconds!) and there are some bubbles forming on top (my mom's rule of thumb was to flip when you'd seen 12 bubbles). Flip and cook on the other side for a minute or two. Eat promptly, or allow to cool and freeze them. Can be reheated in the microwave or in oven, wrapped in foil, whether thawed or still frozen. (But they are best fresh.)

*Instead of maple syrup, you could substitute 2 tablespoons of regular or brown sugar. Whisk the sugar into the dry ingredients, rather than the wet.

spiced apple cider syrup

Spiced Apple Cider Syrup
Yield: about 1 1/2 cups

1/2 cup sugar (I used maple sugar, my new favorite thing, but regular or brown sugar would be fine)
1 teaspoon cornstarch
1/2 teaspoon cinnamon
1/4 teaspoon nutmeg
1 cup apple cider
1 tablespoon lemon juice
2 tablespoons butter

In a small saucepan, stir together the sugar, cornstarch, and spices. Add the apple cider. Cook over medium heat, stirring constantly, until mixture thickens and boils. Continue boiling for one minute. Remove from heat and stir in lemon juice and butter. Serve piping hot over pancakes or waffles or, heck, vanilla ice cream and gingersnaps. SO GOOD.