Saturday, April 27, 2013

Five-Minute Gems! Featuring: (1) Cherry Coconut Smoothie and (2) Herbed Feta Guacamole

Yesterday I was doing my usual throwing-everything-I-need-to-use-up-in-[Vitamix/food processor/bowl and mashing with a fork], and I ended up with some surprisingly ab-fab delicious concoctions: a cherry smoothie and some guacamole with sheep's milk feta, mint, cilantro, and purple spring onions. They went down far too easily and probably deserve their own individual posts, but I can only do what I can do, right? So I'm giving you two super easy, lovely recipes that you'll be able to make in five minutes if your pantry and freezer are stocked similarly to mine (and sometimes I like to think they are and that's why you're here).

Ready? Oh, you'd like some pictures to further entice you? Well, the pictures don't really do these bad boys justice, but I'll show you what I've got anyway.

Food duhFood duhFood duh

Cherry Coconut Smoothie
Serves approximately 2 children + 2 adults

8-10 oz frozen cherries
1 banana
1/2 cup plain coconut yogurt or other yogurt of choice, sweetened or not (most coconut yogurts are sweetened)
Juice of 1 orange (about 1/3-1/2 cup; optional)
1 teaspoon maca powder (optional)
1/4 - 1/2 teaspoon cinnamon or galangal powder (optional)
Boosters of choice: 3 tablespoons hemp seeds (I used this) or chia seeds or flax seeds; 2 tablespoons flax seed oil (I used this); 3 tablespoons protein powder of choice; 1 tablespoon ground psyllium husk (for fiber)
Flavor enhancers of choice: dash of Himalayan sea salt (I used this); 1 tablespoon honey or maple syrup, especially nice if you're skipping juice and/or your yogurt is unsweetened
1-2 cups water, to get desired thickness

Blend everything. Drink. To health!

Untitled

Feta-Herb Guacamole
Serves: um... I don't want to talk about it

1 ripe avocado
1-2 tablespoons each: minced cilantro, shredded mint leaves, thinly sliced spring onion (purple!)
2 ounces crumbled sheep's milk feta
1/4 teaspoon cumin
1/4 teaspoon coriander
1/2 a jalapeƱo, seeds and veins removed, minced (optional)
Juice of 1/2 lime (or whole if it's not a v. juicy lime)

Mash everything together. If you're going to eat this with chips, don't bother with salt. If you're eating it with some beans and rice, taste and add a little salt if you'd like.

Tuesday, April 23, 2013

Recommendations from elsewhere, including: Thai Coconut Soup, Teff Banana Bread, and Parsnip Fries

Well hello! I've wanted to share some good recipes I've tackled from other sources in the last week. So here you go!

(Lisa: The Closer is on Sesame Street right now. She is singing (quite nicely - who knew?) and it makes the resemblance between you two even stronger. Resemblance as in she could be your mother.)

(1) My New Roots' Best Ever Coconut Soup. The recipe is HERE.

UntitledUntitledUntitledUntitled

Follow it as written; it is perfectly delightful. I made it for my family last week and then again Sunday night for a baby shower. Everyone wants the recipe because it's amazing. Complex, layered - all these exotic yet strangely familiar flavors making you increasingly excited for every next spoonful. The flavor culprits: lemongrass, galangal (like ginger but better), kaffir lime leaves, cilantro, jalapeƱos (Thai chilies are ideal but there weren't any at my grocery store), fish sauce, coconut palm sugar. I'm told that all these ingredients are available at Asian markets, but I am quite intimidated by international food markets, generally, and cautious because of our allergies (food labeling in different languages can be scary for us). I got fresh galangal and dried kaffir lime leaves at Whole Foods (the one by Lake Calhoun) and fresh lemongrass stalks at the Wedge (Franklin and Lyndale). (Lunds and Whole Foods and the Wedge sell small packages of lemongrass with their fresh herbs - Jacob's Farms brand, I believe - and they are great but the long stalks are much more economical, if you can find them. Also, dried galangal is available at Penzey's on Hennepin.) I followed the recipe precisely as written, except that I used half the amount of chili the second time, as the first batch was a little spicy for us (but we are spice lightweights, so go with your gut). I garnished it with thinly sliced red spring onions. (Spring? What is spring?)

Untitled

(2) Teff Banana Bread. This has no dairy, egg, or wheat, and it is only slightly sweetened with molasses. To make it sweeter, use honey or maple syrup or agave nectar or brown rice syrup or sorghum... et cetera... in place of all or part of the molasses. I used half honey, half molasses. I really liked it that way and so did my children.

Untitled

Teff is a delicious grain that we've been messing around with since Beckett's allergies were first diagnosed. Our first encounter with it was in Peter Reinhart's recipe for injera bread, which is a v. sour Ethiopian flatbread. I thought teff was sour because of how I made its acquaintance, but it's not. The sourness comes from the fermentation of injera (it is a yeasted bread that requires a sourdough-like starter). Teff itself is mild but unique in flavor, sort of malty and almost sweet. My understanding is that  it has some gluten in it, but either it is such a different form of the protein or it has such a small amount of gluten in it that it is still safe for most people who cannot tolerate gluten (even celiacs, according to a few sources). Bobs Red Mill's version is even labeled gluten free. 

UntitledFood duhFood duhFood duh

This bread is super moist. Like, almost underdone moist. Or maybe mine was underdone, despite baking it for over an hour. I'm still going to make it again. I might add another tablespoon or two of teff flour or something, or I might just eat it slightly gooey next time too. As my friend Christine mentioned yesterday, sometimes her traditional wheat + eggs banana bread doesn't quite cook all the way through. We've all been there, right? Anyway - the recipe is HERE - scroll down a little.

(3) Oh She Glows! Nut-Butter Parsnip Fries. (That's a link.) We used half sweet potatoes and half parsnips. And we are a no-nut household so we used sunflower seed butter. So good.

UntitledUntitledUntitled

A tip from a teacher: try to space out your fries as much as you can on your baking sheets (like, more than I did in picture above). They "sweat" a little while cooking, which makes steam, which cuts against the crispiness that we all like in our fries, baked or otherwise.

You're welcome! And godspeed! xoxo 

Monday, April 15, 2013

I'm Already Behind. At Least I Have Cookies...
Peas and Thank You's Gluten Free, Vegan Oatmeal Chocolate Chip Cookies.

(Did anybody see this on my other blog? That was an accident. Sometimes there are accidents when you put a 10-minute timer on to leave for preschool and then you decide to write a blog post before heading out.)

I mean to do several gluten-free baking posts this week, sort of preparing myself for next weekend's (sold out) Gluten Free 101 class at Local D'Lish. 

First up: COOKIES. Naturally.

These cookies are perfect. Perfect! So easy. So delightful. Thank you, Alton Brown! Thank you, Peas and Thank You!

The oats give them a British biscuity flavor. I used overpriced superfine brown rice flour and went with the vegan variations (Earth Balance butter sticks + flax eggs - not even my labor-intensive flax eggs, just the old school shortcut whisking method described in recipe, which seems to work well in cookies and muffins). I'm going to give them a go with sorghum flour (I have an excess of it and it's way cheaper than the aforementioned option) and coconut oil later this week (for YOU, Lisa!) and I'll let you know how they go.

Untitled

I have a bag of about thirty of these (thirty-six yesterday) in the freezer and I just keep taking one out at a time, eating it frozen, reminiscing about Nesha's mom's frozen cookies from high school. These are almost as good. Almost.

I didn't alter the recipe at all. I just confirmed that the flax eggs work and made mine a little smaller (so that I made about three dozen cookies, versus recipe-recommended two dozen). Adjust the cooking time to about 8-10 minutes if you want 36 one-tablespoon-of-batter-sized cookies. 

Recipe HERE. No wait - it's not anymore! See below....

UPDATE as of 4/20/13: I made these using sorghum flour (7 oz) + ground oats (4 oz) and coconut oil  (~3/4 cup) + grapeseed oil (~3 tablespoons to 1/4 cup to compensate for the coconut oil I'd run out of). They are delicious and beautiful, but different.

UPDATE as of 4/27/14: The original website source for the recipe has been shutdown (I couldn't even find an archived version). Fortunately, somebody else saved the recipe so I'm reprinting it here:

The Best Gluten-Free Chocolate Chip Cookies Ever
Makes 24 large cookies
Adapted from this Alton Brown recipe

1 cup organic butter or non-dairy margarine, melted
1 cup brown rice flour
1 cup gluten-free oat flour (finely ground in a food processor or blender)
1/4 cup + 1 tablespoon cornstarch
1 teaspoon xanthan gum
1 teaspoon salt
1 teaspoon baking soda
1/4 cup organic sugar
3/4 cup brown sugar
1 organic egg + 1 organic egg yolk or 2 flax “eggs” (2 T. ground flax + 6 T. water, whisked and allowed to thicken)
2 tablespoons organic or non-dairy milk
1 1/2 teaspoons vanilla
1 1/2 cup semi-sweet chocolate chips

In a medium bowl, combine the rice flour, oat flour, cornstarch, xantham gum, salt and baking soda. Set aside.

Using an electric or stand mixer, cream together melted butter and both sugars. Add the egg and egg yolk (or flax “eggs”), milk and vanilla and mix well. Slowly incorporate the flour mixture until thoroughly combined. Add the chocolate chips and stir to combine.

Chill the dough in the refrigerator until firm, about an 1 hour. Scoop big spoonfuls of dough and shape them into cookies on a baking sheet.

Preheat oven to 375 degrees.

Bake for 11-13 minutes, until edges of cookies are starting to brown. The cookies will not look set, but will continue to cook on the pan. Remove from the oven and cool the cookies on the pans for 2 minutes. Move the cookies to a wire rack and cool completely before eating or storing in an airtight container.

Cookie

The oil made them spread more than the Earth Balance, so they are larger and thinner, crispier around the edges while still pillowy soft in the middle on day 1, evenly semi-crispy on day 2 (mine were stored in a plastic air-tight container, which softens them a little). Sorghum flour has an earthier, slightly fruitier flavor than wheat or brown rice flour. Like many gluten-free grains, this unique flavor becomes more pronounced on day 2. Fresh out of the oven, these taste like delightful Tollhouse treats. The second day they are equally lovely but, for those of us who associate Tollhouse treats with our childhood, might make you stop and think, "hmm... oddly fruity, but good." They have stored beautifully in my Tupperware for three days and the rest are in the freezer, looking good but as of now untouched.

Wednesday, April 10, 2013

Last Hurrah: Maple-Millet-Flax Multigrain Bread
(vegan, but certainly not gluten free)

So. I can't remember if I mentioned it here or not (and evidently I'm too lazy to bother checking for myself), but: I've (fairly) officially gone (mostly) wheat-free. Annoying, right? You don't have to tell me. The title of this blog was once upon a time meaningful - cakes! tarts! cookies! OMG cookies! treats galore! (And waffles, which I pretended were not a treat, and which, quite frankly, I miss more than any old cake or cookie.)

But things happen. And I did an elimination diet. And I have wheat issues. Not major wheat issues. But issues that I've been in denial about for about six years (or maybe since childhood, actually, but we'll never know). Issues that are getting worse as time goes on. Itchy issues that would definitely get in the way of me sporting shorts or even modest, mommy-appropriate capris in the summer. Nobody wants to read about dermatitis on a food blog, I realize that, but food is loaded - we discuss that a lot in my classes. We come to food with baggage - regional, financial, medical, etc. I've just got some new, decidedly unsexy baggage now. It is what it is. An American Standard Diet portion of wheat causes eczema on my shins. So for now, I can only really tolerate a little bit of wheat on occasion, and I intend to reserve that bit for Chef Shack Indian-spiced doughnuts this summer.

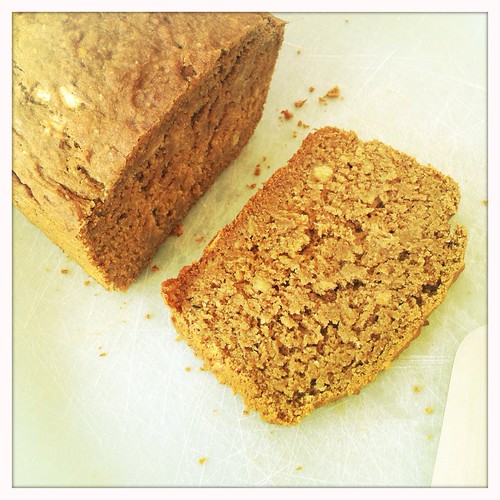
All in all it's not that bad. We're used to eating mostly wheat-free because of Beckett's allergies. It's just something more for me to think about when I go out. And it's kind of cramping MC's style, as he is our resident bread artisan. And it means I won't be making the one kind of bread that I know how to make, which I'm posting about here as a sort of glutenous last hurrah before I embark on a series of gluten-free, vegan baking posts (for Charlotte).

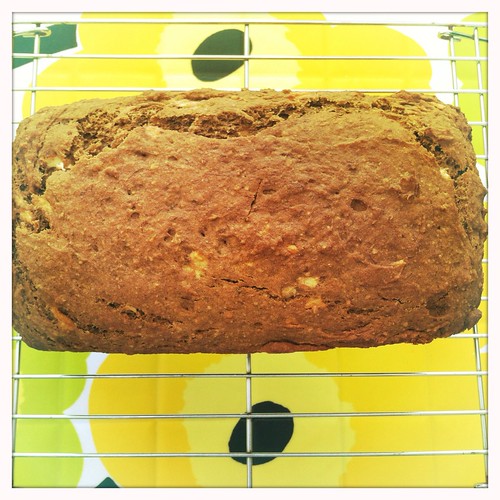
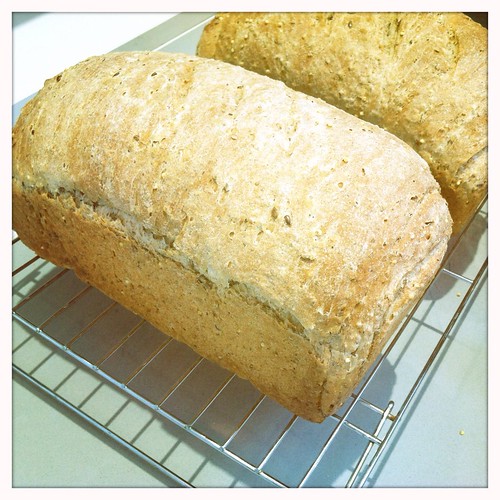
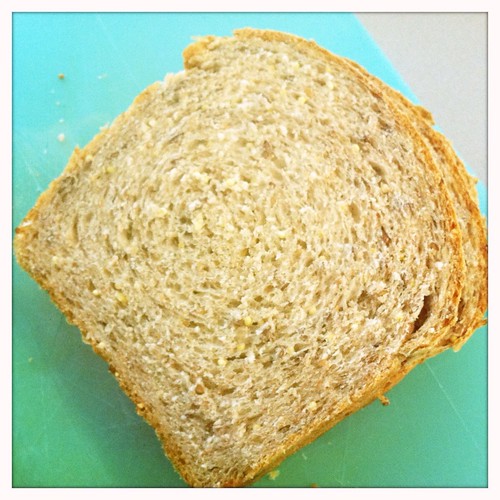
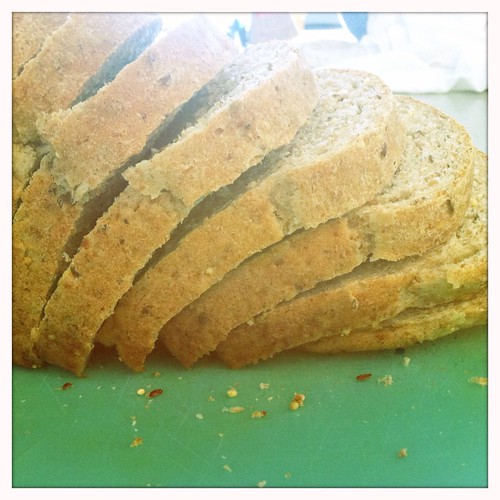
It's the perfect sandwich bread. Perfect toast. Easy to make (barely any kneading if you use a mixer with a dough hook), easy to store (slice and freeze), easy to slice (so please let the knife do the work). If you are wheat-eaters, you should make this. It's based on the America's Test Kitchen recipe for Multigrain Bread, but I've modified it to make it (a) vegan, and (b) maple-millet-flax-y. The latter modification was inspired by my favorite bread from Lucia's, one of the best restaurants/bakeries in Minneapolis, conveniently located 2.5 blocks from my house. They sell loaves of millet-flax multigrain bread and they also serve their tuna melts and breakfast sandwiches on it. It's crunchier, denser, and more rustic than the super soft sandwich bread pictured below, but has a comparable flavor. So if you're in Minneapolis, not into making bread, into eating bread, and interested in trying some millet-flax multigrain, you'll have to check out Lucia's. I gave my last loaf to my friends as a happy-end-of-Passover-bring-on-the-leavened-bread gift.

UntitledUntitledUntitledUntitledUntitledUntitled

Notes!

1. My perfectionist, artisan breadmaking husband has convinced me that you need the following tools to make bread: a kitchen scale, a probe thermometer. I have had minimal success making bread without a mixer (I am no good at kneading). How I've written the recipe will reflect my reliance on these items.

2. This makes two large loaves. You could probably halve the recipe, but I wouldn't. It's cheap and easy to make and it's time-consuming, so you might as well end up with extra for freezing or sharing.

3. I said in my blah-blah-blah above that you should let the knife do the work when you cut. That recommendation is not to be taken lightly. This is amazingly soft bread, similar to the non-natural-and-organic kind you buy from the grocery store. Wonder Bread texture. Seriously. But also vulnerable. You'll squish it if you put too much back into your slicing. Slow and steady wins the race, friends.

4. I would not recommend using 100% whole wheat flour (i.e. swapping more whole wheat flour  in for white flour). Just find a different recipe for whole wheat bread if that's what you're after.

5. I did an experiment for you! America's Test Kitchen uses cooking spray as a pan release, evidently, and I do not own that. The last time I made this bread, however, I used olive oil to grease one pan and Spectrum Hypoallergenic Shortening (that's not what it's really called, that's just what we call it in our hypoallergenic home - the soy free/mostly palm oil one) to grease the other. The shortening was WAY better. The olive oil one came out fine, but it was stressful. Now you know.

Untitled

Maple-Millet-Flax Multigrain Bread
Adapted from America's Test Kitchen/Cooks' Illustrated
Yield: 2 standard-sized loaves; about 24 slices
Time: From start to finish, this will take about three-four hours, with about 30-40 minutes of periodic active work.

6 1/4 ounces 7-grain (or 6-grain) hot cereal mix (1 1/4 cups)(I used this one)
20 ounces boiling water (2 1/2 cups)
15 ounces unbleached white (all-purpose) flour (3 cups)
7 1/2 ounces whole wheat flour (1 1/2 cups), plus extra for dusting surface/hands
1/4 cup maple syrup
1/4 cup olive oil, plus more for greasing pans and coating
2 1/4 teaspoons (1 envelope) instant yeast (this is same as "rapid rise" yeast)
1 tablespoon fine-grain sea salt
1/3 cup whole flax seeds
1/3 cup uncooked millet

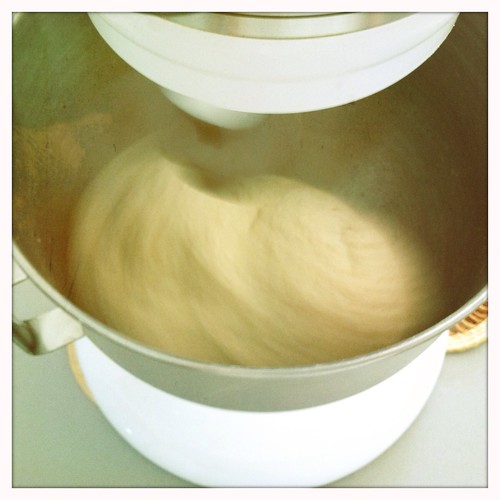
Place X-grain cereal mix in bowl of standing mixer and pour boiling water over it; let stand, stirring occasionally, until mixture cools to 100 degrees and thickens, about an hour. Meanwhile, whisk flours in another bowl.

Once grain mixture has reached the temperature of a nice bath, add maple syrup, olive oil, and yeast and stir. Attach bowl to standing mixer with dough hook. Turn mixer on low speed and add flours gradually, half cup at a time. Once all the flour is incorporated, continue kneading on low speed for about two minutes. Dough will form a ball. Turn mixer off and cover bowl with plastic wrap. Allow dough to rest for 20 minutes. Uncover, add salt and knead on medium-low speed until dough clears sides of bowl, 3 to 4 minutes (if it does not clear sides, add 2 to 3 tablespoons additional all-purpose flour and continue mixing; ATK says this but I've made this many times and it always clears the sides on time (perhaps because I use a kitchen scale (hint, hint))); then continue kneading for 5 more minutes. Add flax and millet and knead for another few seconds, until they are incorporated into dough.

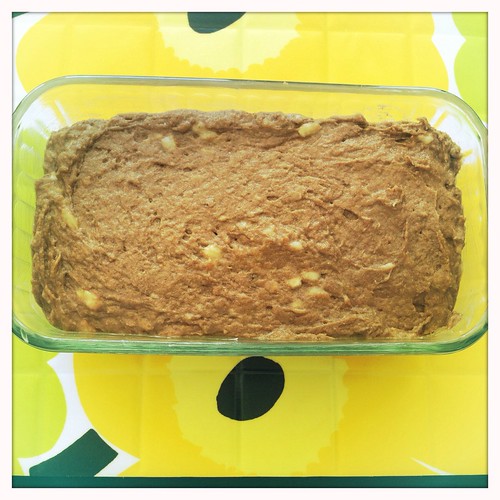
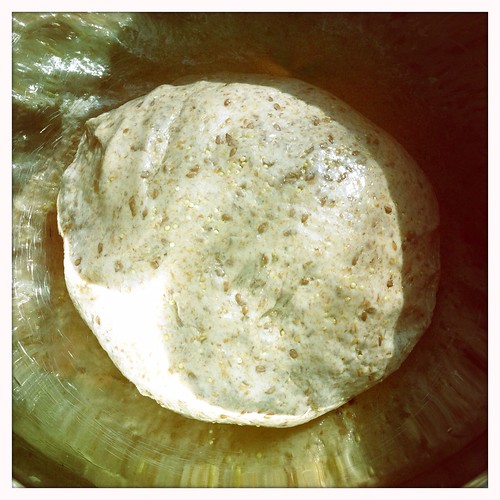
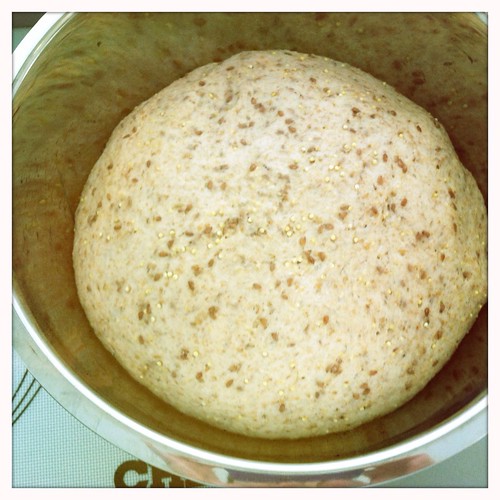
Transfer dough to floured work surface and knead by hand until seeds are dispersed evenly and dough forms smooth, taut ball (this takes me about 2 minutes, and I suck at kneading - remember, your mixer has done most of the work for you). Drizzle 2 to 3 tablespoons of olive oil into a large bowl/container with 4-quart capacity. Place dough into container and roll it around so it's coated lightly in the oil. (This prevents a "skin" from forming while it rises.) Cover with plastic wrap and allow to rise until doubled, 45 to 60 minutes. Go for a jog. You could easily make it around Lake Calhoun at least once.

Grease two 9 by 5" loaf pans (with cooking spray or shortening, see note above) and preheat oven to 375 degrees. Transfer dough to lightly floured work surface and pat into 12 by 9" rectangle; cut dough in half crosswise with knife or bench scraper. Shape your loaves.* Place each loaf in a pan, spray or brush with a little oil. Cover lightly with plastic wrap and let rise until almost doubled in size, 30 to 40 minutes. (Dough should barely spring back when poked with knuckle.) Bake until internal temperature registers 200 degrees on instant-read thermometer, 35 to 40 minutes. I rotate my loaves in oven after 20 minutes. Remove loaves from pans and cool on wire rack before slicing, about 3 hours.

* Did you think I was going to tell you how to shape your loaves? Sorry. Heck no. That's what the youtubes are for. Start here; note that your bread will be denser and less sticky than the white bread loaf. But this is pretty much how I do it.