Monday, August 29, 2011

How To Make a Super Fresh Tuna Melt, in Outline Form

I. Fresh is Best.

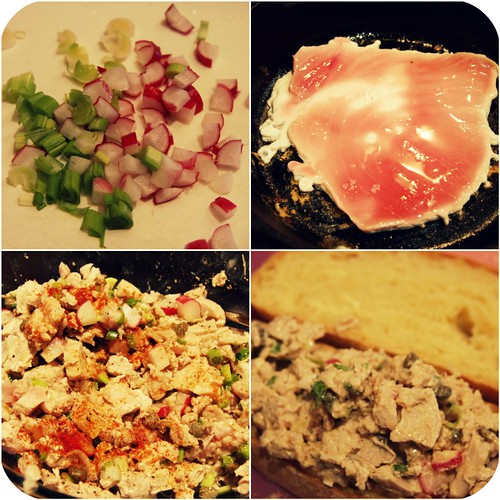
A. Well. It's true. So opt for fresh tuna if you can swing it. This eliminates both fishiness and tinniness from your tuna salad. Just cook it for a couple minutes on each side in a dry or lightly sprayed pan, put it on a plate to cool a bit, then use two forks to shred it into bite-sized chunks. You probably want at least an 8-ounce piece of tuna to feed your average-sized family.

Fresh Tuna Salad collage

II. Next: chop chop chop!

A. Your efforts will pay off. Chop well.

B. Some key things to chop:

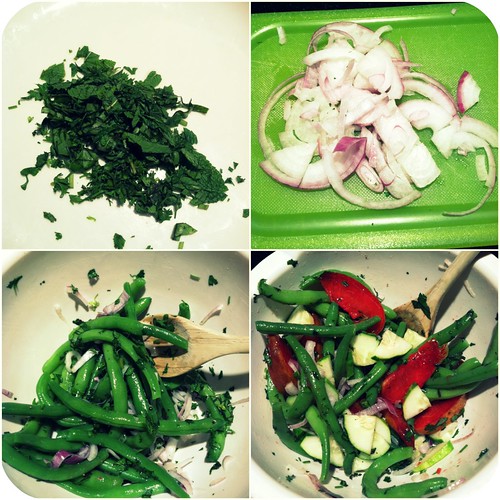
1. Onions of some sort: red onion, shallot, scallion, green garlic, etc.; ideally young if it's the season, minced if you have the energy (but at the v. least "finely chopped")

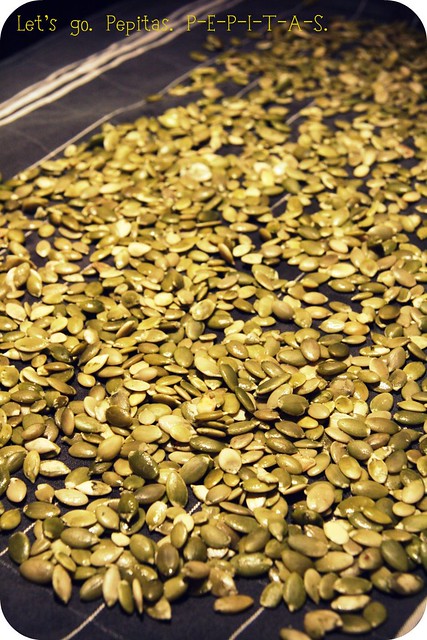
2. Something crunchy, perhaps one or two of the following: celery, kohlrabi, radish, jicama, Granny Smith apple, pumpkin seeds or almonds, carrot; diced small (see top left photo)

3. Something to accentuate freshness of tuna salad: could overlap with items from one and two, but other possibilities might include cucumber, parsley, chives, basil, tarragon, some hot pepper, or even a little cilantro

III. Pick a flavor profile and go big or go home

A. Umami-style

1. Heaping tablespoonful of one or all of the following:

a) capers
b) chopped cornichons
c) chopped sun-dried tomatoes

2. Accentuated with about a teaspoon of one or all of the following:

a) lemon zest
b) lemon juice
c) red or white wine vinegar
d) dijon
e) finely grated parmesan

B. What I will call California-cuisine-style for lack of better phrase

1. The formula = sweet + tart

2. Sweet

a) Dried fruit of some sort, chopped if not already small, e.g. raisins, craisins, currants
b) Fresh fruit of some sort, e.g. halved grapes, finely chopped figs, apples or apricots
c) A tiny bit of honey

3. Tart

a) Lemon zest or juice or - if you really are going for it - quarter of a lemon, skin and all, seeded and finely minced (or sliced ultra thin and placed directly in sandwich, on top of tuna salad, underneath cheese)
b) Diced cornichons or a spoonful of pickle relish
c) Dash of red wine vinegar or white balsamic vinegar

C. Spice it up, regardless of profile: salt, pepper, red pepper flakes, sweet or hot paprika, a little dried dill or bouquet garni, lemon pepper... a little goes a long way

IV. Consistency is everything

A. No one likes a soupy tuna salad. Go easy on the mayo or mayo alternative.

1. CakeandEdith's favorite mayo alternative: 2 tablespoons plain yogurt + 1 tablespoon olive oil. This should be just enough to keep it all together

2. Special occasion alternative: cream cheese. Seriously. DE-LI-CIOUS.

B. I like a flavorful tuna salad. So I go for a 1:1 ratio of tuna to veggies.

C. Stir everything in a bowl with a fork. Taste and add salt or more seasonings for flavor and a little more oil or yogurt or mayo to get the consistency you like.

V. Bread is the first part of a sandwich that touches your mouth. Choose wisely. Better yet: make it yourself.

VI. Cheese is what makes a melt a melt.

A. So choose something melty.

B. But also flavorful.

C. Suggestions: sharp cheddar, emmentaler, gouda, Jarlsberg, Dubliner

D. Easy does it.

super fresh

VII. Assembly and preparation

A. On a cutting board, line up bread slices. Lightly butter one side of each slice.

B. Place mound of tuna salad in center of non-buttered-side of half of bread slices.

C. Gently flatten tuna salad with back of spoon, so it's almost reaching edges of bread but not quite.

1. Add lemon slices now, if that's your thing.

2. Or tomato slices.

3. Or avocado slices.

D. Layer thin slices of cheese on top of tuna salad (or lemon slices or tomato slices or avocado slices).

E. Top with remaining slices of bread, buttered sides out.

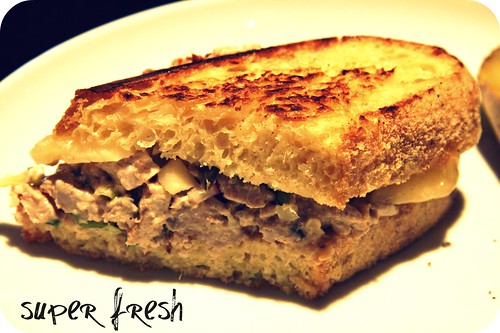
F. Heat cast-iron skillet or whatever you've got over medium heat. Add sandwich and cook for about 3 minutes, or until cheese starts to melt and bread smells toasty. Carefully flip over (I awkwardly use two spatulas for this) and cook for 1-2 minutes more. Cut in half and serve.

VIII. You're so welcome.

IX. I love you too.

Tuesday, August 9, 2011

A Quickie for Nicole: Homemade Lara Bars

Hi! This is going to be so fast! Because I'm only blogging in the fifteen minutes I have while both my babies are sleeping and both my daytime houseguests are on a sandwich run to Be'wiched, the best deli on earth. I really wanted to post this before I go on my vacation and I go on vacation tomorrow.

Yay!

So here's the deal: Homemade Lara Bars. On the interwebs, a lot of people talk about making homemade versions because the real deal ones are pricey. That's really noble and all, but I spend a lot of money on food and have no problems with that in fact, I feel it is the morally responsible thing to do because I think cheap food is cheap for reasons that are not sustainable or possibly inhumane to either animals or migrant workers or the hard-working farmer next door who gets sued - oh wait you don't care about any of this because food is the most important thing to me besides family and friends. I wanted to make a homemade version because the whole tree nut allergy thing limits the selection of Lara bars available to me for purchase. There are tons of recipes online. You can find a list HERE. Mine were adapted from this recipe because they use cocoa and, as a byproduct of my King Arthur's Flour addiction, I have a lot of cocoa.

I used pepitas (a/k/a hulled pumpkin seeds) instead of nuts. They are allegedly a super food.

Pepitas

I also used those coconut-date rolls that you can buy at co-ops and Whole Foods and Trader Joe's because they require a little less of a work-out from your food processor than regular dates do, plus they don't require pitting.

date rolls

These ended up absolutely delicious - loved by the whole family, perfect for a toddler pre- or post-swim class snack or perhaps an airplane ride. The cocoa does present some stain risks though. Don't say I didn't warn you.

finished product

No-Nut Cocoa Lara Bars
Inspired by my man Christian and adapted kind of from this recipe
Yield: 10 bars (about the same size and shape as the brand-name ones)

Note: I used a scale, but am sharing my approximations in case you don't have one. It's a forgiving recipe, just eyeball it.

1. The night before, if you want: soak 200 grams (about 1.5 cups) pepitas in cold, filtered water in refrigerator for 8 hours. Rinse and allow to dry on a towel in a single layer.

2. Pulse the pepitas in a food processor until finely chopped.

3. Add the following and pulse until sticky and mixed:

400 grams (about 2-3 cups) coconut-date rolls
4 tablespoons cocoa powder
1/4 teaspoon cinnamon
1/8 teaspoon salt
Water, one teaspoon at a time, if necessary

4. Line a 9X9" pan with foil.

5. With wet hands, press the mixture into pan.

6. Place in freezer for at least an hour.

7. Carefully remove whole concoction from pan, put on cutting board, and peel off foil. Cut into rectangles, wrap individually in plastic wrap, store in freezer.

8. Yum!

Friday, August 5, 2011

Green Beans and Pluots! Why not?

[I am either reminded of or inspired by (or both) the poster in Murray's office on Flight of the Conchords that says: "New Zealand! Why not?" So funny.]

So we're up to our ears in green beans lately.

[TANGENT: I wish I could have said "we're up to our ears in corn" instead because that would have been really punny. But we're not. No corn yet from our farm, although I did have a nice cob all to myself at the downtown Minneapolis National Night Out celebration on Tuesday. I always think I don't really like corn until I eat it. It's tasty and gets me to floss my teeth.]

But alas.

Green beans. Not corn.

I always think I do really like green beans and then I eat them and I am right. They take a few more steps to make than I usually remember - I always clean and trim and blanch and ice-bathe them (okay, wait, actually this time I didn't ice-bathe them) - and in the middle I'm like, "ugh, green beans, I hope they are still worth all this" and then they are. Such rewarding little skinny green things. Mild enough to go with pretty much anything, yet flavorful enough to hold their own. Maybe you should try them with pluots. They make an attractive pair, even when I only have an iPhone with which to document their union.

iphone green beansgreen bean salad

Green Bean Salad with Herbs, Cucumbers, and Pluots
Yield: 2-3 servings; easily doubled
Adapted a lot from Williams-Sonoma Essentials of Healthful Cooking (which is a really great cookbook, FYI)

1/2 pound fresh green beans, rinsed and trimmed
1/3 cup minced fresh herbs: mint, cilantro, basil, chives, tarragon (the mint really makes this wonderful! might be imperative!)
1/2 sweet onion or whole shallot, thinly sliced (ideally a young onion like the kind at farmer's market this time of year)
1 tablespoon olive oil
1/2 teaspoon salt, divided
Freshly ground pepper
1 cucumber, halved and thinly sliced
1 pluot or other stone fruit, pitted and sliced thin
1 teaspoon red wine or balsamic vinegar

Fill a 2-quart saucepan half full with water, add 1/4 teaspoon salt, and bring to boil. Add the beans to the boiling water and cook until tender, about 5 minutes. Drain.

In a serving bowl, combine the hot beans with your fresh herbs, olive oil, sliced onion, and 1/4 teaspoon of salt. Season with some pepper. Set aside to cool for 15-20 minutes.

Meanwhile, prepare your cucumber and pluot. Just before serving, add them to the green beans mixture, drizzle with the vinegar, and toss gently. Taste and add more salt and pepper and vinegar if desired. Serve at room temp, or chill and eat cold.

Monday, August 1, 2011

Granola-Crusted Banana Pancakes

Hi! This is kind of a random post - and the single afterthought-of/excuse-for a picture is way lame -

banana pancake

and I don't have anything deep, meaningful, clever, or amusing to say about the recipe I'm sharing.

And yet.

It's SO worth sharing.

Picture it. Sunday morning: Whole family's hungry. Lunch plans are in place for noon. It's 9 a.m. I am aching to try out the whole wheat granola waffles recipe from Marion Cunningham's The Breakfast Book. I pull out my ingredients. MC plugs in the waffle iron. I skim the recipe. There is soaking of granola involved - I hadn't noticed that before. My tummy grumbles. MC reminds me of our timeline. My toddler screams: "Pancakes!"

Good idea, little one.

And thus were born some of the tastiest pancakes that have ever graced our kitchen, taste buds, and bellies. Notwithstanding haphazard presentation (see "afterthought" shot above), we're talking oh-dang tasty. With a delectably uncommon crunch. Blog-worthy indeed. Get to it, kids. These are fo-sure crowd-pleasers.

Granola-Crusted Banana Pancakes
Adapted from here
Yield: 3 servings (could be easily doubled or tripled)

1 cup whole wheat pastry flour (spelt, kamut, all-purpose, barley flours would all work here too)
3 teaspoons baking powder
1 teaspoon cinnamon
1/4 teaspoon ground nutmeg or ginger or both (optional)
1/4 teaspoon salt
3/4 cup vanilla soy milk (or any kind of milk + 1 teaspoon vanilla + 2 teaspoons sugar, honey, or maple syrup)
2 tablespoons olive oil or melted, cooled butter
1 egg
1 banana, thinly sliced (grated apples or sliced peaches would prob be good too)
1/3 cup granola (ideally without dried fruit)
1 tablespoon butter or oil for griddle

Whisk together dry ingredients. Add the milk, oil or butter, and egg and stir with a spoon or fork until just combined, a few lumps are okay. (If the mixture is too thick for you, add a tablespoon or two of water or milk. I like thick pancakes.) Heat 2 teaspoons butter in cast iron skillet (or whatever you use to make pancakes) over medium heat. Once bubbling a little, drop 1/4-cup scoops of batter into the pan. Working quickly but carefully, drop 3-4 slices of banana on each pancake and then top with about 2 teaspoons granola. Flip once 12 bubbles form (my mom's tip) (about 2-3 minutes), cook on other side for another 2 minutes. Once finished with first batch, add another teaspoon butter or oil to pan and repeat. Add a third teaspoon of butter if you need a third round.

Serve with maple syrup and more butter. (Or eat plain if you are starving and are on Weight Watchers, like me. Which reminds me: 9 points per serving, counting butter on griddle but not on cooked pancakes.)