Saturday, December 15, 2012

A slaw, really, but we call it Mom's Pico de Gallo

This morning, I bring to you an accoutrement. A slaw, really, given the inclusion of cabbage and involvement of steps such as "shred as thinly as possible" and "toss well". But for some reason we call it pico de gallo in my house, even though the cabbage part sort of takes it out of your usual pico de gallo realm. We play with words in our family.

We use this pico de slaw most often as a garnish to Mom's White Chili, i.e. my all-time favorite comfort food en el mundo. [Tangent: I've realized that I haven't posted on thishereblog several of my top foods/recipes and am in the process of remedying that. Stat!] I will be posting a recipe for Mom's White Chili soon (the Beckett-friendly, brown rice, low sodium version - I did it, Mom! and it was super good!), but I thought I'd share the slaw de gallo recipe with you now because while, yes, it's delicious on chili or any other cumin-spiced soup, it can also be enjoyed a thousand other ways too - on nachos or tacos, mixed with rice and beans, in a salad, tossed with a colorful blend of citrus segments (they're in season!), et cetera. Also in its favor: its super cheap and simple to make, lasts a few days in the refrigerator, and, particularly when made with purple cabbage, is quite pretty.

toss well!

I think you'll like it v. much.

Purple cabbagehalf a tomatolots of cilantrowhite chili ready to be devoured

Mom's Pico de Gallo
Yield: about 3 cups
From Mom (duh)

1/2 head of cabbage
1 small, or part of a large, tomato
1 jalapeno, seeds and veins removed (optional)
About half a bunch of cilantro (big handful)
Juice of one lime
1/2 teaspoon salt (or, better yet, Penzey's 4/S Special Seasoned Sea Salt)

Shred cabbage as thinly as possible. Finely chop tomato, jalapeno, and cilantro. Place everything in a bowl, top with lime juice and salt and toss well. Let sit for 10 minutes or so before serving. Enjoy!

Wednesday, December 12, 2012

Cooking By The Seat Of Your Pants! - featuring Roasted Spaghetti Squash with Mediterranean-Spiced Tomato Sauce

I've talked before here about how I feel my greatest asset in the kitchen is my resourcefulness. It really is, and I take great pride in it when I remember to, but most of the time, when food merely gets on the table but it's not necessarily anything to shout (or post) about, I don't think much about it.

But sometimes - the best times, really - after a long snowy cabin-feverish day, a day when my under-the-weather children spend half of it crying or whining to be in my arms and the other half actually in my arms (my arms can only handle half a day), and I really just want to order take-out because being in the kitchen sounds awful and potentially dangerous (see above: children in arms), but I'm conflicted - maybe I've just looked over the bills and am horrified by the amount of money we've spent dining out recently, maybe I weighed myself this morning (and that's enough about that), or maybe I'm just in need of that sense of accomplishment I get from making a great dinner against all odds (refrigerator is bare, pantry is uninspiring, produce on my counter falls in the "too hard" category, it's mighty close to dinner time). When this happens, I rally. I take inventory - spice cupboard looks good, that lemon has potential, I bought those jarred tomatoes for exactly this kind of evening, hey! Beckett's not allergic to spaghetti squash!

spaghetti squash 005spaghetti squash 009spaghetti squash 010

And then, with the help of Thomas the Train, via streamable Netflix, I get to it. Roast the squash, zest the lemon, chop some aromatics, settle on a spice profile. It comes together. I expected it to come together. What I didn't expect was for it to be the most delicious thing I've eaten at home since I can remember. Definitely our best (not to mention healthiest) meal in weeks.

spaghetti squash 013

And so I pat myself on the back and then go back for seconds. 

Oh my gosh, spaghetti squash. You did NOT let me down!

spaghetti squash 012

And you make a wonderful compost container.

Roasted Spaghetti Squash with Mediterranean-Spiced Tomato Sauce
Yield: 4-5 servings
From me

1 large spaghetti squash
Olive oil
Salt and pepper

Half an onion, chopped
1 carrot, chopped
3+ cloves garlic, minced
Zest of 1 lemon
1 24- to 28-oz jar tomato sauce or tomatoes
1 cube vegetable bouillon (or a teaspoon of Herbamare or sea salt)
1 teaspoon sweet paprika
1 teaspoon aleppo pepper (optional - could use 1/2 tsp red pepper flakes instead too)
1/2 teaspoon oregano
2 teaspoons honey or sugar
1 tablespoon of butter or olive oil (optional)
Large handful or two of baby spinach 

Other additions: garbanzo or other white beans, feta or parmesan cheese, fresh herbs (oregano, basil, tarragon, marjoram)

Preheat oven to 400°F. Prepare the spaghetti squash by cutting it in half lengthwise, removing the seeds, rubbing the inside of each half with a drizzle of olive oil, then seasoning with salt and pepper. Place face down on a lined baking tray and place in the oven – cook for about 45 minutes. Once it's done, remove it from oven and allow it to cool for a few minutes until it's manageable.

Once squash has been in the oven for about a half hour, start on the sauce. In a skillet over medium heat, heat a little oil and add onion and carrot to pan. Saute, stirring every couple minutes, until soft, maybe browning a little, about 7 minutes. Add garlic and lemon zest and cook, stirring constantly, for a minute or so. Add the tomatoes (with juices) or sauce, bouillon cube, paprika, aleppo pepper, and oregano. Bring to simmer and then reduce heat to low. Cook for about ten minutes, allowing flavors to marry.

Meanwhile, using two forks, shred the flesh of the spaghetti squash and place it in a bowl. Add a little more salt and pepper.

Back to the sauce: stir in honey or sugar and butter or olive oil, if using. Throw in the spinach and incorporate into sauce, stirring until just wilted. Pour sauce over spaghetti squash, add any of the optional additions above or others you can think of, and serve. Babies love this! Three year olds not so much... but the one in my house only really eats bread and cheese, so perhaps she's not a good representative.

Monday, December 10, 2012

Coming Back With A Bang! Yeah, a salad's a bang, didn't you know? - Cranberry-Miso Vinaigrette and an Autumn Salad

Oh heavens. Remember when October happened? And then November? And then a third of December? Yeah. I'm really sorry about that. I mean, I didn't have anything to do with the general passage of time, but I did fail to post for approximately 75 days and that is just rude. I consider this thing we've got going on a relationship. An important one. Not hearing from me for coming-on-three months? Unforgivable. Not to mention - totally not my style. Generally on the relationship front I embrace stalking over silence. This approach scored me a husband a few years back, so, obviously it works. I should have stuck with it. I should have bombarded you with documentation of my mad skills at work and run-on sentences and trying-too-hard jokes.

There are no good excuses. I was traveling and then I was lazy.

I am sorry.

So sorry that I am coming back with a bang - something to WOW you and WOO you back. But it's not an overt bang like a brownie or cinnamon roll. I wouldn't want to seem desperate - talk about mixed signals.

And so I bring you, humbly, contritely, a little excitedly: a salad. But not a boring salad! A decidedly fall salad with a creamy, heavenly cranberry dressing. And this dressing. Oh this dressing! Friends! It is something special - fragrant, tart and tangy, a tiny bit sweet. Plus it's fuschia. And if fuschia doesn't say bang, I don't know what does. So go pop that cranberry already.

Pile of cranberry goodness!Heavenly Cranberry Goodness

Cranberry-Miso Vinaigrette
Yield: 1.5-2 cups

1 teaspoon oil (I used sunflower for this part)
3 green onions, thinly sliced
2 teaspoons fresh ginger
1 cup fresh or frozen cranberries
Juice of one large orange or 2 small ones (I used 2 clementines)(~1/4 cup total)
1/4 cup olive oil
1/4 cup maple syrup (or any liquid sweetener)
2 tablespoons balsamic vinegar
1-2 heaping tablespoon(s) light miso
1 teaspoon orange zest (from whole clementine or half an orange) (optional)

In a small sauce pan, heat oil over low heat and add green onions and ginger. Stir for a minute or so and then add the cranberries. Stir for a couple minutes (just a minute or so if using fresh cranberries), then add a tablespoon or two of water to mixture. Reduce heat to lowest possible setting and cover with led, allowing cranberries to pop open from the steam.

Meanwhile, put all the other ingredients in a food processor or blender. Once the cranberries are soft and have "popped" (this will take like 5 minutes or so - they kind of crack open a bit and look v. plump and juicy), pour sauce pan contents into food processor or blender, using a spatula to get all that ginger-cranberry gooey goodness, and process until smooth. Add a tablespoon or two of water if you want it thinner (I did not).

Eat on salad (see below) or use it as a dip with vegetables (picture below - toddler crudité) or sweet potato fries or drizzle some over a block of cream cheese or warm brie and serve with crackers. So good!!!

Some salad with my dressingCrudite, toddler style

Autumn Salad with Cranberry-Miso Vinaigrette
Serves 2-4

1 head or bag of lettuce of choice
1 pear or apple or orange, diced or segmented, respectively
1 avocado, diced
1 carrot, finely chopped
Handful of something crunchy like seeds or nuts or cacao nibs

Toss all ingredients in a bowl with 1/4 cup cranberry-miso dressing. Enjoy!

Thursday, September 27, 2012

More than meets the eye (mostly because my photography skills are lacking): Fennel-Roasted Red Pepper Soup

I couldn't even get a good picture of this using the wonder that is Hipstamatic - probably because by using I mean shaking my iPhone to get the next random lens-whatever combo and taking pictures from several angles until I get a photo that actually includes the desired subject (as opposed to my messy counter in the background, for instance) and is at least semi-in-focus.

Fennel Roasted Red Pepper Soup

Regardless of lackluster photo though, this soup is WONDERFUL, so I had to post about it so you could all make it asap. The acidity of the tomatoes and lemon juice, sweetness of the red peppers, creaminess of the coconut milk, and super flavorful combination of fennel and basil all give this soup an unexpected complexity, stepping it up from your run-of-the-mill red pepper "bisque". And I didn't even roast my own peppers. (But you can if you want. How-to is at the end of this post, from Simply Recipes.)

Fennel and Roasted Red Pepper Soup
Yield: 6 servings

2 tablespoons oil or butter (I used coconut oil)
1 small bulb fennel, or half a large one (or a whole large one if you LOVE fennel), finely chopped
4 cloves garlic, sliced thin
1 teaspoon aleppo pepper flakes (optional)
1 teaspoon ground ginger (optional)
1 teaspoon salt, divided
1 15-oz jar roasted red peppers, coarsely chopped (or 4-5 red bell peppers, roasted)
1 28-oz can tomatoes, with juices (or 2 lbs fresh tomatoes, coarsely chopped)
2 14.5-oz cans coconut milk (not "lite" kind)
2 cups vegetable broth or chicken broth
2 cups water
1/2 cup minced fresh basil
Juice from half a lemon (~2 tablespoons)

In a large soup pot, heat oil, then add fennel and 1/4 teaspoon salt and sauté until just tender. Add garlic, aleppo pepper, ginger and 1/4 teaspoon salt and sauté until fragrant, about 1-2 minutes more. Add coconut milk, broth, water, red peppers, tomatoes, and remaining 1/2 teaspoon salt. Bring to boil, lower heat and simmer for 20-25 minutes, covered, stirring occasionally. Remove from heat. Using an immersion blender (or using an upright blender, doing 2 cups at a time), purée the soup to get as smooth a consistency as you can. Stir in basil, return pot to burner and cook over low heat for 2-3 minutes. Stir in lemon juice. Taste and add salt and pepper if desired.

How to Roast Red Peppers

1. If you are canning for shelf storage (and not just chilling in the refrigerator), place a steaming rack at the bottom of a large (12-qt) pot, fill half way with water, bring to a boil. It takes a while to get a large pot of water to boil, so while the water is heating, proceed with the recipe.

2a. Broiler Method Position rack in oven so that the top surface of bell peppers placed in the oven will be 4-5 inches from the broiler heat element. Rub the surface of the peppers with a little olive oil (this will help them blister faster). Preheat broiler on high. Place peppers either directly on the top oven rack, with a pan to catch the drippings on a rack beneath, or place on a aluminum-foil or Silpat lined broiler pan (a cookie sheet will warp). As the surface of the peppers blister and blacken, turn them with tongs so that they will blacken on all sides.

2b. Stovetop Method If you have a gas range (or grill) you can place the peppers directly on the range top so that the flames lick the peppers. Work carefully so that as soon as one section of a pepper is blackened, you turn it to work on a fresh side. If you have an electric stove, heat a cast iron pan on high and place the peppers in the pan, allowing the peel to blister and blacken, turning so that all sides get blackened.

3. When the peppers are all well blistered and blackened, place in a non-reactive bowl and cover, or put them in a paper bag and roll the bag shut. (The steam from the hot peppers will help dislodge the skins.) Once the peppers have cooled enough to handle, work with them one by one over a plate, gently peel off the blackened skins. Cut the peppers in half and remove and discard the seed pods, stems and all seeds.

Saturday, September 22, 2012

Not Just For Birds! Lemon Dill Millet Fritters

Let's talk about millet! If you're not gluten-free, into alternative grains, or just plain C-H-E-A-P, you probably haven't eaten it. You might have purchased some in a large bag however, and poured it into a big dish on your deck for the enjoyment of the birds in your neck of the woods. Because millet is bird food. BUT OH SO MUCH MORE!

Close-up with yogurt

Seriously, while I can't go on and on about how tasty millet is, because to me it doesn't taste like much, it has definitely become a versatile and useful ingredient in our household, mostly since I became a parent. Where once upon a time it only appeared in Sadie's Super Baby Porridge, however, now it makes its way into our granola (I just throw in a handful of raw millet to add some crunch), it's often the primary grain in our alterna-bread and vegan/GF pancake recipes, and most recently it's presented itself in veggie-burger form. And that's why we're here. Because millet makes quite a nice little patty. But I rather dislike the word patty, and even though these are delicious they're not sturdy enough to accurately be called "burgers" - I don't want to mislead anyone here - so I've settled on fritters. But, you know, the kind of fritters that don't have any eggs or flour and aren't deep fried. Healthy fritters. Made with bird food millet.

I made these earlier in the summer when there were beautiful, fragrant young leeks available and dill was growing like a weed everywhere. Depending on where you live, you could still probably get some fresh local leeks and dill (and summer squash) to make these happen, but you'd better hurry. In Minneapolis, it's gotten super cold super fast. Pumpkins and apples were taking over the whole farmer's market this morning.

leeks!dill!in which your food processor may come in handycast iron skillet GOfry 'em updinner is served

You'll probably need a food processor to make the actual fritters. Some fine chopping might do the job, but I'm not sure they'd hold up with a less smooth texture. If you don't have a food processor and are still interested in this combination of ingredients, however, the cooked millet + sautéed vegetable mixture is delicious and could be served as is (i.e. not pattied, not frittered), hot or lukewarm. Beckett loved it.

Lemon-Dill Millet Fritters
Adapted from The Whole Life Nutrition Cookbook
Yield: 4 servings

1 cup millet
2 cups water
1/8 teaspoon salt

3 small leeks, or 1 large one (1 lb), thinly sliced and well-rinsed
2-3 zucchini or other summer squash (1.5 lbs), finely chopped
Large handful dill (~half a grocery store bunch, or 1/2 cup loosely packed), chopped
Zest and juice of 2 lemons
1/4 teaspoon salt, divided
4 tablespoons coconut oil (or butter), divided

Rinse millet in a fine mesh strainer before placing it in a medium pot. Cover with 2 cups water and add 1/8 teaspoon salt. Bring to boil over medium-high heat, then turn down heat, cover, and allow to simmer for 30 minutes. 

Meanwhile, melt 1 tablespoon coconut oil or butter in a skillet. Add leeks, 1/8 teaspoon salt, and sauté over medium heat, stirring every couple minutes, until soft and fragrant, about 5-8 minutes. Add zucchini and lemon zest and remaining 1/8 teaspoon salt, and continue cooking, stirring occasionally, until soft. Remove from heat. Stir in dill and lemon juice. Wipe down the skillet but keep it out for frying the fritters. 

Put vegetable mixture into food processor and pulse a few times. Add cooked millet and pulse until just mixed - it will have the consistency of thick hummus. Form mixture into patties. Heat oil in the skillet - 1 tablespoon at a time - over medium heat and lightly sauté patties for about 3-4 minutes per side. As I mentioned before getting to the recipe, these aren't the sturdiest, so flip and remove from pan gingerly. (They will be worth the care, as they are as attractive as they are pretty when they're intact!)

I topped mine with some plain yogurt and garnished them with some more dill.

Thursday, September 6, 2012

Upcoming Classes at Local D'Lish

Hello! Fall/winter classes have started at Local D'Lish! It's so fun! I'll be teaching most Thursday evenings, plus one Sunday and one Wednesday afternoon per month. Classes are for beginners who need help getting started in the kitchen, or more advanced home cooks looking for some new basics to add to their repertoire. We aren't fancy. We simply believe that good, local, seasonal food and a few basic but versatile skills are all you need to make delicious homemade meals. We also believe that food builds community! I think that's why our classes are so fun.

The classes I'll be teaching in the next few months are listed below. They are mostly vegetarian and often if they are not gluten-free and/or vegan, I will provide information on how to adapt them to suit those diets. Conversely, I always tell my class participants how fish and meat can be incorporated into our veggie-centric dishes. (Noteworthy exception: my Brunch for a Crowd class is not vegetarian or gluten-free. Like not even close. It's not an alternative or hypoallergenic brunch class. It's a class about pleasing a large group of people with wheat and eggs and mimosas.)

Fall
Sunday, Sept. 9, 1-3:30 pm: Quick Weeknight Meals
Thursday, Sept. 13, 6-8:30 pm: Brunch for a Crowd (my most fun class)
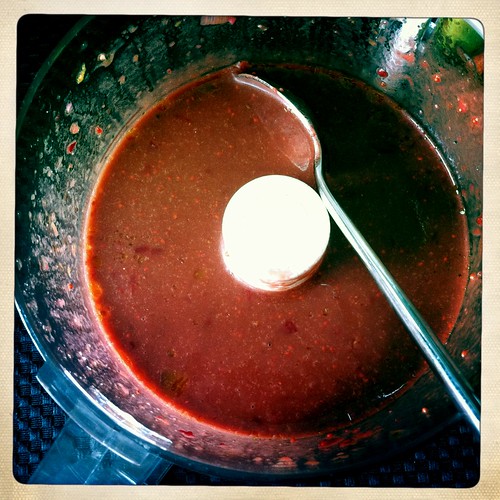
Wednesday, Sept. 19, 1-3:30 pm: Culinary Basics: Pasta Sauces 101
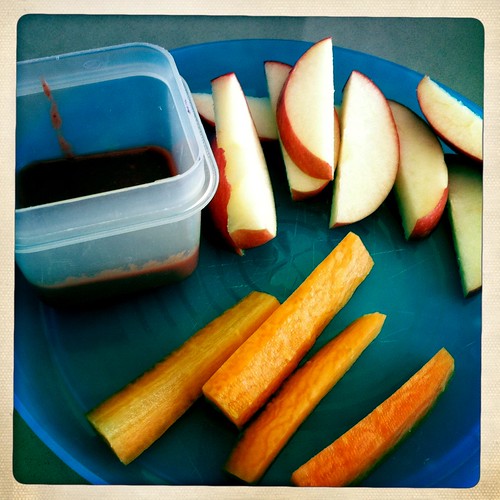
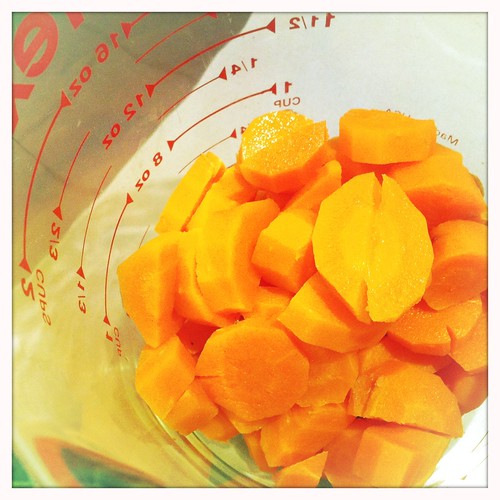
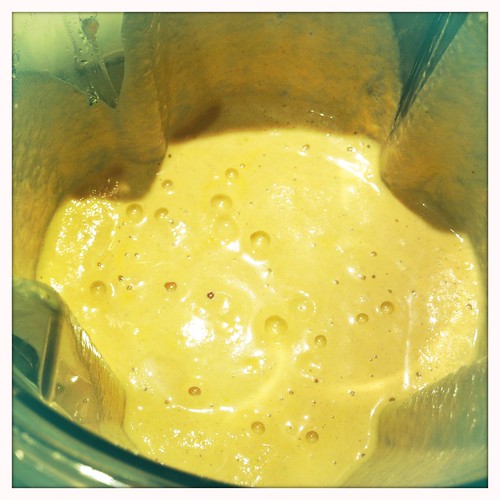
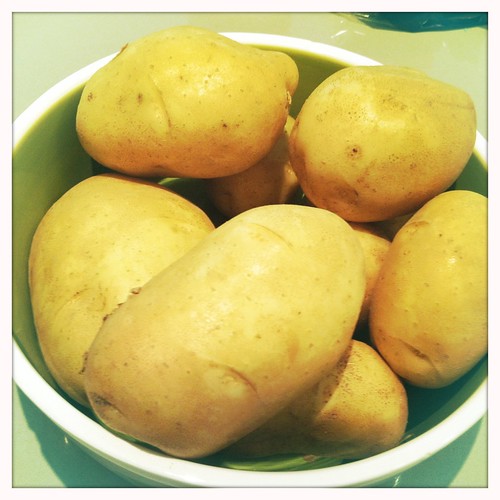
Thursday, Sept. 20, 6-8:30 pm: Culinary Basics: Root Vegetables (way more fun than it sounds!)
Sunday, Sept. 23, 1-3:30 pm: Quick Weeknight Meals
Sunday, Oct. 21, 1-3:30 pm: Culinary Basics: Root Vegetables
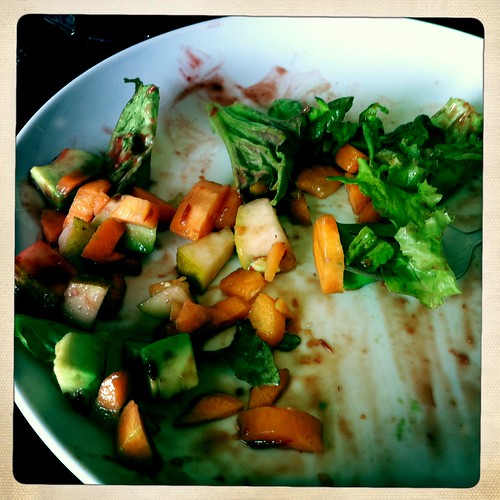
Thursday, Oct. 25, 6-8:30 pm: Autumn Salads (gluten-free and vegan)
Thursday, Nov. 1, 6-8:30 pm: Quick Weeknight Meals
Thursday, Nov. 8, 6-8:30 pm: Culinary Basics: Root Vegetables
Wednesday, Nov. 14, 1-3:30 pm: Culinary Basics: Holiday Side Dishes
Thursday, Nov. 15, 6-8:30 pm: Quick Weeknight Meals
Sunday, Nov. 18, 1-3:30 pm: Seasonal Side Dishes
Thursday, Nov. 29, 6-8:30 pm: Eating Local Through Winter

Winter
Thursday, Dec. 6, 6-8:30 pm: Quick Weeknight Meals
Wednesday, Dec. 12, 1-3:30 pm: Eating Local Through Winter
Thursday, Dec. 13, 6-8:30 pm: Winter Salads (gluten-free and vegan)
Sunday, Dec. 16, 1-3:30 pm: Quick Weeknight Meals through the Holidays
Thursday, Dec. 20, 6-8:30 pm: Culinary Basics: Holiday Side Dishes
Thursday, Jan. 3, 6-8:30 pm: Quick Weeknight Meals
Sunday, Jan. 6, 1-3:30 pm: Eating Local Through Winter
Thursday, Jan 10, 6-8:30 pm: Culinary Basics: Root Vegetables
Wednesday, Jan. 16, 1-3:30 pm: Cook for the Week (a super fun, useful class!)
Thursday, Jan. 17, 6-8:30 pm: Quick Weeknight Meals
Thursday, Jan. 24, 6-8:30 pm: Brunch for a Crowd
Thursday, Jan. 31, 6-8:30 pm: Quick Weeknight Meals
Sunday, Feb. 3, 1-3:30 pm: Quick Weeknight Meals
Thursday, Feb. 7, 6-8:30 pm: Simple Vegan Dinners
Thursday, Feb. 14, 6-8:30 pm: Brunch for a Crowd
Thursday, Feb. 21, 6-8:30 pm: Quick Weeknight Meals
Wednesday, Feb. 27, 1-3:30 pm: Cook for the Week
Thursday, Feb. 28, 6-8:30 pm: Winter Salads (gluten-free and vegan)

The whole schedule is posted on Local D'Lish's website. Come spring, I am hoping to incorporate a lot more of the gluten-free / egg-free / allergy-friendly stuff I'm learning into my classes and perhaps even offer specific classes geared towards families working through food sensitivities. I'm still learning - I'll be learning forever - but come spring I think I'll have a class or two's worth of knowledge and practice to share with people in a similar boat. I also intend to pitch class ideas to some of the food co-ops and natural foods markets in the area. I will keep you posted on that; it probably won't happen until spring, if at all. I have other ideas too and am working on being less scattered and more purposeful about making them happen... baby steps.

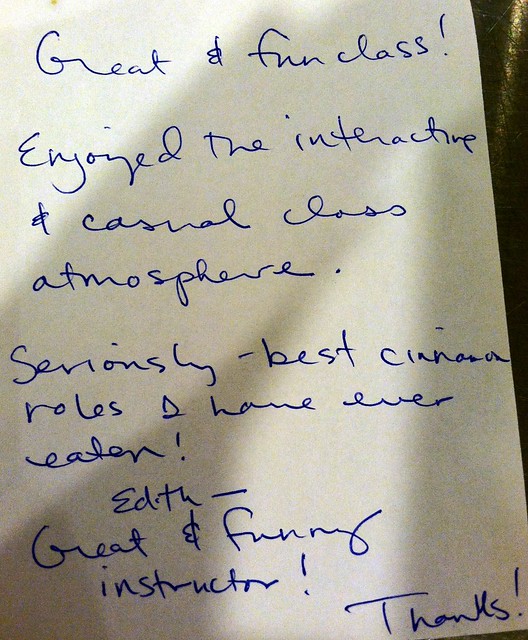
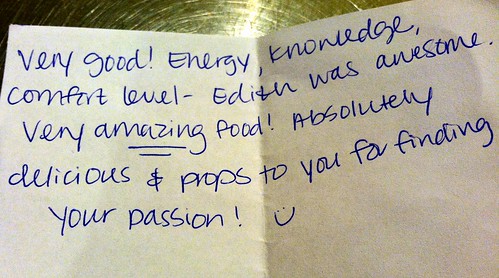
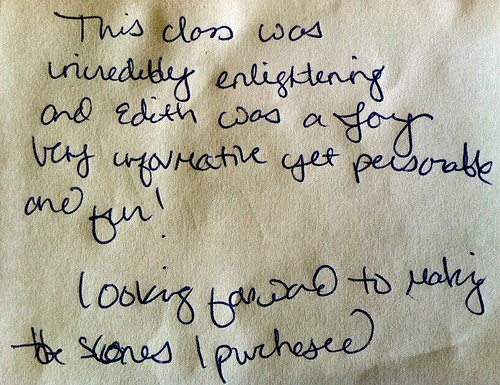
Here are some nice things people have said about me after taking one of my cooking classes:

Commentary 2Commentary 1Commentary 4

(More here. I photograph these badboys because they are the best affirmation/ motivation ever! Nobody left me thank-you notes at the Family Justice Center. It would have made all the difference.)

(Oh! Note: aforementioned cinnamon rolls are from brunch class, fyi. So sign up! Cinnamon rolls included! Now you can't resist!)

Please feel free to email me with any questions about the classes: cakeandedith at gmail dot com. I take all feedback seriously - not just the compliments, so if you've attended a class and have ideas about how I can improve things, please let me know. To register for classes, sign up through Local D'Lish.

I love love LOVE teaching - almost as much as I love eating. I am committed to getting better and better at teaching all the time. And while I have already mastered the fine art of eating - not one to resist yet another advanced degree - I intend to obtain the equivalent of a Ph.D. in said art in just a few weeks. Italy, baby, YEAH!

xoxo

Monday, August 20, 2012

Carrot Cake Pancakes (Featuring My New Favorite Method of Gluten-Free Baking)

Hello!

First of all - for those of you who have ended up here because you are seeking allergy-friendly food, this post is especially for YOU! Because it's hard, isn't it? I never intended this blog to be a space for complaining about food preparation - making food for those I love (and even for those I've never met before) is one of life's truest pleasures for me. I love eating. I love helping others do things they love. The best means I've come up with so far are to feed people and, recently, to teach them how to feed themselves. A culinary student I once knew, when asked what she liked to make most, responded, "anything that's well-received." She, like me, needed a great deal of affirmation in her life and was self-aware enough to know that one of the best parts of feeding people is to have them enjoy it so much that they tell you - or show you, by going back for thirds. The gratification I feel from pleasing someone with a meal or treat is huge. Whether it's my husband, class participants, old friends, new friends, or my children - pleasure on their part means a job well done on my own, so it's a win-win. 

The complaining started when the win-wins at home were harder to come by as the following foods were eliminated from our meals:

eggs
wheat
peanuts
chickpeas
shell fish / other fish
sesame seeds
lentils
strawberries
some lunch meats

Eggs and wheat are essential to mainstream baking. Chickpeas and lentils were staples in our home before Beckett's allergies were diagnosed. Strawberries are like the world's healthiest treat (when they don't cause hives). And the other foods aren't really big losses for us, but any additional restrictions on top of the aforementioned ones were just more to work around, you know?

So. Anyway. It's taken me a while to find foods that truly make Beckett happy. I mean, he likes cheese and meat and avocado and tomatoes, which is great, but I rarely have much of an impact on their preparation - although I am a champion avocado slicer. And, while it's not all about me, and mostly I'm just grateful that we know what he can safely eat and have learned how to feed him several times a day without seeing a reaction, sometimes a mama just wants her baby to chow down on a homemade baked good! So sue me.

At a first-birthday-party we were at the other day, the carrot cake my friend made for her daughter was delicious. Super moist, just enough spice, pretty darn healthy as far as cakes go, and really pretty! The birthday girl was in HEAVEN devouring her first taste of treat, and it was really fun to watch. Beckett couldn't have any because it had flour and eggs in it, but I knew the flavors would appeal to him and promptly decided to make a pancake version for him when I got home from the party.

Guess what? They are perfect!

Pancake Interior Close-Up

The method I used for the pancake batter requires a VitaMix or other high-powered blender, and was introduced to me by Kim Wilson, who has self-published several books and blogs about wholesome eating on her website, WHOLEmade. Her basic pancake recipe is here and it's great - my mom told me that my 6-year-old nephew who does not have food allergies actually preferred some frozen, reheated  ones over the mainstream delicious fluffy buttermilk pancakes she made for him! (I have used her soaked-blended grain batter approach to make her "slicing bread" (for which I cannot find the link at the moment) and this flat bread, the former seeing moderate success and the latter being absolutely amazing. (She also has a banana muffin recipe using the same approach; it sounds good but I haven't tried it.))

If you are into soaking grains and incorporating vegetables into your baked goods and using a VitaMix several times a day, you will have fun with these. If you like carrot cake or pancakes, you will like these. If you are navigating food allergies and are eager to find a good egg-free, gluten-free, dairy-free pancake recipe, you will LOVE these almost as much as your allergic child! (Although, since we're not dairy free in our house, I can't wait to make a cream cheese glaze to accompany these next time around.) 

Here are photos of the pancakes-in-progress. The recipe will elucidate any pictures that are weird and/or at odds with your current pancake-making experience.

Soaked Grains1 cup cooked carrotsVita Mix Pancake Batter2 T batter = 4" pancakesBubbles forming...Flipped (and quite perfect)Carrot Pancake TowerHalf-devoured
Carrot Cake Pancakes (Gluten-Free and Vegan)
Hybrid of inspiration from this and this
Yield: about 40-50 four-inch pancakes

1 1/4 cup brown rice
3/4 cup raw buckwheat groats or millet*
2 tablespoons apple cider vinegar, whey, or lemon juice
--------------
1 cup chopped, cooked carrots
1 1/4 cups water (to start)
2 tablespoons ground flax seed
2 tablespoons oil
2 tablespoons maple syrup or honey
2 teaspoons vanilla extract
1 teaspoon apple cider vinegar
1 teaspoon salt
1 teaspoon cinnamon
2 teaspoons baking powder
--------------
Coconut oil or butter for frying

In a large bowl or measuring cup, cover brown rice and buckwheat groats with water by about 2 inches. Add 2 tablespoons apple cider vinegar, whey, or lemon juice and soak for 8-24 hours. Drain the grains, rinse them in a fine sieve, and pour them into your blender. Add the remaining ingredients, except for the baking powder, and blend until smooth. Add a little more water, 1-2 tablespoons at a time if you'd like a thinner batter. Add the baking powder and blend briefly.

Heat coconut oil or butter in a skillet or griddle over medium-high heat. Add pancake batter in 2-tablespoon increments (my batter was thin and spread considerably to make perfect 4" pancakes). Cook for a couple minutes over medium heat and once bubbles begin to form (see picture above), carefully flip and cook another minute or two.

* I think the buckwheat has a nicer, milder flavor than the millet.
Freezer Ready!
These freeze BEAUTIFULLY - both taste and texture are maintained for several weeks, which I've found isn't always the case when working with gluten-free grains. I let them cool on racks and then place them in a freezer bag with aluminum foil or waxed paper in between layers. I bring them in tupperware containers to thaw at room temp when we're going to be out, or I reheat them in the microwave for 20-30 seconds if we're home. Beckett likes them either way.

Friday, August 17, 2012

Finally, For My Summer Squash Class Participants: Farmer's Market Empanada Filling (here featured in some delicious quesadillas!)

You've waited so long. Here it is! This filling shows up in the empanadas I historically make to impress people at parties. (I've only ever used this recipe from Epicurious for my empanada dough and see no need to mess with it - what with 51 reviews and 100% of reviewers saying they'd make it again, why would I?) It ended up inside some quesadillas we made at a Summer Squash class a few weeks ago sort of randomly. I'd decided to make the menu entirely vegetarian, had all the ingredients on hand for some variation or other of this, and on a whim cooked and mashed it up before people arrived. Because it was thrown together on the spot, a recipe for this comfort-food-esque Mexican-spiced mish-mash of vegetables was not provided to those in attendance that night. I promised I'd post it on the blog within two weeks. It's been more like four, but it took me that long (and a visit (read: help) from my sister-in-law) to get it made in my own kitchen again and documented in a blogworthy manner. The flavors and aromas of this remind me of the Colombian stew called sancocho. There are many suggestions and substitutions in the recipe below, included not to complicate things but merely to prove that this recipe is endlessly adaptable. I mean, really, it's just glorified mashed potatoes. But really really really yummy mashed potatoes that are great in a quesadilla. (Also vegan and gluten-free.)

Now here are NINE pictures to entice you.

1.5 lbs PotatoesOur farmer's market bountyMise en placeVegetarian FunfettiMashing!Mashed!Platter-o-Quesadillas!Filling Close-upThis makes me hungry.

Farmer's Market Vegetarian Empanada/Quesadilla Filling
Yield: about 3-4 cups; enough for at least a dozen empanadas or quesadillas; easily doubled

1.5 lbs potatoes (or sweet potatoes - keep reading!), scrubbed and cut into a 1/2" dice (all or a portion of this could be sweet potatoes or yuca; up to half the mixture could be plantains or winter squash, but I've never gone beyond that and am not sure how it would hold up texturally if it were 100% either of those - all of them add a nice sweetness and creaminess)
1 purple onion (or any onion, but purple is pretty), chopped*
1 red bell pepper or spicy pepper of choice, chopped**
1 zucchini, summer squash, or carrot, chopped 
2 cloves garlic, finely chopped
1 tablespoon grated fresh ginger (optional)
2 tablespoons Mexican or taco seasoning***
1 teaspoon salt (use less if Mexican or taco seasoning has salt in it)
Juice and zest of 1 lime
Oil

Cover potatoes with water in a saucepan, add a pinch of salt, and bring to boil on stove. Cook for 8-10 minutes, until v. tender. Drain and put in a large mixing bowl.

Meanwhile, heat 1-2 tablespoons oil in a large skillet over medium heat. Add onion, bell pepper, and garlic and cook, stirring occasionally so garlic doesn't burn, until onion is softened, about 3-4 minutes. Add zucchini and cook for 3-4 minutes more. Add ginger if using, lime zest, and spices and cook for 2 minutes, until fragrant. Turn off heat and pour in half the lime juice. This will deglaze the pan and make it easy to scrape up any bits of toasted spices that might have stuck to the pan.

Pour vegetable mixture into bowl with potatoes and mash everything together as best you can. Taste and add salt, more Mexican spices, and/or the remaining lime juice to your liking. Enjoy!

* I think I mean "finely chopped" here. So don't be lazy.

** You could use a hot pepper too. The three pictured above look hot but aren't, and they are small so that's why there are three versus the one mentioned in recipe. The salsa we served alongside the quesadillas was fairly spicy, so I wanted the mixture to be mild.

*** Instead of Mexican or taco seasoning, you could use (and I did in version pictured): 2 teaspoons cumin (whole or ground) + 2 teaspoons ground coriander (if you have it) + 2 teaspoons chili powder + dash or more of cayenne and/or black pepper.

Sunday, August 12, 2012

A few things, and Berry Jam (before it's too late!)

1. Dear Local D'Lish Class Participants: I love you. Truly. My Thursday nights for the last several months have been so wonderful. And not only because they're the only nights I've been eating well. No indeed. It's primarily because you're all so lovely and fun and inquisitive and interested and interesting and I learn so much from you. Talk about the community-building power of food! Specifically to last week's Summer Squash folks - I promised you the quesadilla/empanada filling recipe and I intend to deliver by tomorrow. I have all the produce but am low on my spices. I intend to prep the veggies tonight, stop by my neighborhood spice store (yep! I have a neighborhood spice store!) tomorrow, and cook up, document, and post about it during nap time.

2. I'm working on letting time do the work lately and you should too. It's helping me feel a little more balanced as I juggle parenting two busy children, writing, cooking, teaching, getting settled into our new home, watching Downtown Abbey, being present to those I love, and prioritizing (for the first time in a long time) self-care. This afternoon, while my children napped, I soaked beans and some overnight wheat- and egg-free pancake batter (the base recipe is here, and everyone here likes it, but I'm still in test-kitchen mode as I work at perfecting a version for my own family (and ultimately you)); I got my cold-press brewing in the refrigerator; I roasted five bulbs of garlic. All together it was probably 15 minutes of "active time" in the kitchen, all spent talking to my sister on the phone, but it felt super productive. And tomorrow we'll have pancakes for breakfast and white bean and roasted garlic soup for dinner, and I can start my morning with an iced latte that costs just a fraction of what I'd pay for it at a coffee shop. When I taught my "Cook for the Week" class in the winter (for some reason it seems like a more enticing class in the winter, when having three burners and your oven running at once is actually a good thing), I had been really good about prepping and soaking and slow-cooking and it made life so much simpler and our meals so much better. The allergy thing and my son's becoming mobile (danger!) and a lot of traveling and all the transitions we've gone through recently got me super disorganized and I don't think I've ever in my adult life been as bad at planning our family's meals as I've been in the last few months. Our meals, accordingly, have suffered. (Said the food blogger/cooking class instructor.) Now that I'm getting used to my new kitchen and after being reminded this afternoon of how good and rewarding it feels to be a little more on top of things, I'm motivated to be better. I think the blog will benefit too.

3. Jam! I made this at home and then also at a Summer Fruits class a couple months ago. It's fabulous, easy, delicious, versatile (note the variations at the bottom of the recipe) and especially good for novice jam-makers who are intimidated by words like pectin and preserving. It also requires an Ove-Glove or something comparable to protect your hand as you stir and stir and stir hot hot hot beautiful beautiful beautiful berries on your stovetop. The transformation of these hot beautiful berries from regular berry color to the most vibrant, royal berry color you've ever seen is just plain magical. I figured I'd better get the recipe to you before the berries are all gone. (They've certainly gone up in price already. Boo.)

California + Food 177California + Food 179California + Food 187California + Food 191

Simple Berry Jam
Adapted from Kim Boyce's Good to the Grain (excellent, beautiful cookbook)
Yield: about 4 cups (easily halved)

3 pounds berries (e.g. strawberries, raspberries, blueberries, blackberries)*
3/4 to 1 cup sugar
1/2 cup water
1-2 ounces crystallized ginger (optional)

Optional flavorings:
Zest of 1 orange, lemon, or 2 limes
1 tablespoon high-quality balsamic vinegar
Bunch of fresh herbs, e.g. lavender, oregano, mint, basil, lemon balm, rosemary
2 tablespoons honey or maple syrup

Before you get started: (1) Make an ice bath for cooling the preserves in a large bowl; have a medium-sized bowl nearby. (2) Have your longest wooden spoon and a good pair of heat-proof gloves/oven mitts on hand. (3) Hull your strawberries, if using, and halve any large fruit (you want 1/2-1” pieces of fruit).

Place water and sugar into a 5-quart or larger pot. Let mixture sit for a minute. Place pot on stove over high heat and cook, without stirring, until the syrup is gently bubbling all across the surface (5-7 minutes). (The bubbles will start out small, around the circumference of the pot, but then will get big and extend into the middle, slowly but surely.) If sugar darkens at all, add fruit immediately. (But ideally it won't caramelize.)

Add berries and ginger, if using, and stir with a wooden spoon. With heat on medium-high, cook the berries for 15-20 minutes, until syrup thickens to a jammy consistency and fruit has broken down a bit. Much like making candy, there is a chemical reaction that happens at some point that makes the evolution from syrupy berry mix to JAM not gradual, but sort of sudden. You'll feel the resistance and see the gelling as you stir. Once you do, just keep stirring for another minute or two.

When jam is done, i.e. thick and jammy and all kinds of crazy aromatic and your arm is super hot, move pot to a cool burner. Pour the jam, carefully, into the medium-sized bowl you set aside. Place the bowl of jam into the ice bath. Stir gently to allow some heat to escape. Leave as is (super fruity, shiny, fruit-forward preserves, you will have!) or try adding one of the optional flavorings like so:

If using zest, balsamic vinegar, or an additional sweetener, just stir it in carefully while still hot.

If using the following herbs - lavender, oregano, rosemary, thyme - carefully dip the bunch of herbs into the hot preserves until half immersed. Still holding the stems in your hand, stir the bouquet around in the jam about 10 circles. More than a minute of infusion will result in a very strong herby flavor. If using these herbs instead - mint, basil, lemon balm, fresh stevia leaves - mince a handful of herbs as finely as possible so that you end up with about 1-2 tablespoons. Stir them into the jam while still hot.

STORING: Keeps in refrigerator for a good week. Can be frozen as well, just allow to cool completely before storing it.

--------------------------------------

The jam pictured above was about 2 lbs strawberries + 1 lb blackberries, with orange zest and crystallized ginger. It was DELIGHTFUL.

Other good combo ideas off the top of my head:

Raspberries + mint + lemon zest
Strawberries + basil + balsamic vinegar
Blueberries + lime zest + crystallized ginger + maple syrup
Mixed berries + lavender + honey

--------------------------------------

* Maybe I was a little dramatic with the "before it's too late" title. Because, truly, frozen berries would work fine here too. No need to thaw.

Friday, August 3, 2012

Sweet Beet Salad with Peaches, Carrots, and Honey Vinaigrette

Man I've been a bad blogger lately. Like, remember when July happened? And ZERO posts?! I'm so sorry. Really. Sorry to you, sorry to me, sorry to my students and employer who count on me to live and write about the locavore life.

In the last three months, I've spent five weeks out of town.

In the last three weeks, my husband and I sold a condo and bought and moved into a new single-family dwelling.

Amidst all this, my children suddenly developed v. clear agendas re: what they expect their days to look like, and evidently napping simultaneously and/or self-entertaining safely and calmly nearby while I cook and/or write are not on their to-do lists. I know. So selfish of them!

I've been teaching more often and - as is often the case in life - as I've devoted more time and energy to teaching, and gotten better and more methodical and increasingly enjoyed myself and my students, other projects have been less tended to, e.g. feeding my own family, working harder on the allergy navigating, and regularly posting on cakeandedith.com. (Unpacking has also been on hold for like a week now. It's humbling how little stuff we really need, isn't it?)

What I've got for you today, however, is truly lovely in a simple, seasonal, nourishing way, and while the pictures don't do it quite the justice it deserves, they'll do the job for now. ("For now" being an indefinite period of time during which my camera remains hidden in an unopened box somewhere and I continue my thus-far-unsatisfactory search for a good, affordable photo-editing service in the wake of Picnik's (sad, sad) closure.)


Sweet Beet Salad with Peaches, Carrots and Fresh Herbs
Yield: 1 mega salad (I ate the whole thing) or 2 decent-sized salads

1 small head of lettuce, torn into bite-sized pieces, or 3-4 large handfuls of baby spinach or other mixed greens
2 yellow beets, trimmed, peeled and shredded*
2 carrots, trimmed, washed and shredded*
Small handful each: cilantro, mint, basil (optional)
1 peach, pitted and diced
1/4 cup sunflower seeds or other seed or nut (I used raw sunflower seeds, as I just wanted some crunch, not saltiness or toastiness)
Honey Vinaigrette (recipe below)

*You can use a box grater to shred your veggies, but a little food processor is made for this sort of thing!

Place greens on plate(s). Top with shredded beets and carrots, fresh herbs, peach, and sunflower seeds. Drizzle with 2 tablespoons dressing to start with; add more if you like a more generously dressed salad.


Honey Vinaigrette - I used some fancy oil and vinegar but that's totally unnecessary
Yield: ~ 1 cup

1/3 cup olive oil (a citrus-infused olive oil here is great)
1/2 cup balsamic vinegar (a fruity or maple vinegar here is also great)
2 tablespoons honey (microwaved for 10 seconds)
1/4 teaspoon salt
1/4 teaspoon pepper

Shake everything in a jar; adjust acid, sweetness, salt, pepper as you wish. Lasts at room temp for up to a week.