Saturday, February 14, 2015

Sweet Potato and Black Bean Tacos with Plantain Tortillas and Spicy Cilantro Sauce, SOME EXCITING NEWS (!!!), and...
How to Peel Plantains (my first video tutorial!)

I know. This is totally a mega post. But I have so much to tell you!

First things first: some mega news! After teaching nearly two hundred classes over the last three and a half years... having now shared my love of cooking local foods with over 1,500 wonderful guests at Local D'Lish... and with generous help, advice, and encouragement from beloved friends and family members... (wait for it)... I am finally spreading my (chicken) wings. As of last week, I am teaching cooking classes from my home. Hooray! Life is short and I think I've finally got my groove on, so I'm striking while the oven's hot (and this time, it's a real oven!) - embracing this time of transition in my life to leverage contacts and build community through food in the place where I can be most welcoming - my v. own little kitchen.

Last Wednesday, eight women (and the cutest infant ever) gathered around my kitchen island to experience a more intimate version of my popular Mambo Italiano class. It was one of the most fun evenings I've ever spent teaching (could've been the prosecco...), and I learned a ton about teaching in a new space in record time. Teaching in my own kitchen is going to have its challenges - I don't have staff (yet?) and I don't have the kitchen theater/presentation-style set-up to which I've grown accustomed at Local D'Lish. I had to be someone different on Wednesday than the teacher I've become in a store setting. Which is weird, because I feel like I'm just myself in the store, but I guess we are many selves and some of those selves make sense onstage but not so much four feet away from your guests. My mom filmed a few minutes of me in action and watching her footage has been valuable (and humbling). On the plus side, I think I seem pretty natural and informed, despite being quite nervous, and my ass doesn't look nearly as bad as I'd feared it would when I'm facing stove versus guests. On the minus side, I totally don't smile enough! I'm hoping that was just aforementioned nerves. At any rate, it will be on my mind henceforth. I intend to only get better. Specifics, including pricing, dates, menus, and what you can expect to learn in my kitchen, will be on my website by the end of the month. I plan to offer two public classes in March, details forthcoming, so please come and spread the word! Private, custom events are also in the works. Email me to get the ball rolling.

To clarify: I will still be teaching at Local D'Lish! It's the best job I've ever had and we definitely aren't ready to part ways. Through March I'll be teaching public classes at the store on Thursdays and Sundays. Beginning in April, I'm tapering back a little bit and will be teaching about once a week.

And now for today's recipe: Plantain Tortillas. These are awesome because they are super delicious, super easy, and they make a super good party trick. You will need a food processor or a high-powered blender. I've made them in both and prefer my VitaMix to get the smoothest batter. That said, the slightly more textured batter that my food processor produced baked up into just-as-good tasting tortillas. (But a smooth batter makes you feel more confident.)
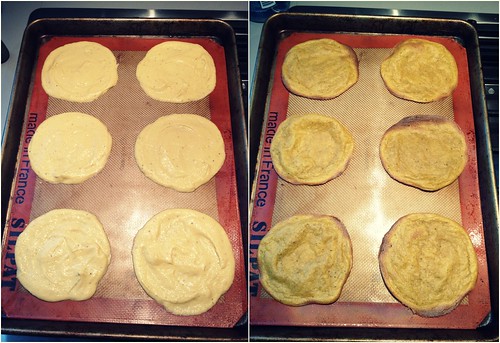
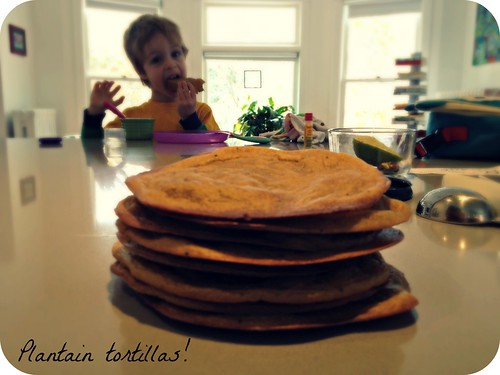
Before and after bakingplantain tortillas

This recipe is just barely adapted from local food blogger/photographer/cooking instructor/author Stephanie Meyer at Fresh Tart. My adaptations are as follows:

1. I got a little more precise about my ingredient weights and a little more detailed about how to coax your batter if necessary (e.g. start with water before adding more oil - I learned this lesson the greasy (but no less delicious) way).

2. Lime zest. Yes please. 

Eat these with carnitas or my favorite vegetarian taco filling: Sweet Potato and Black Beans with Garlicky-Cilantro Dressing. Top with some slaw and queso fresco. The whole family will love you forever!
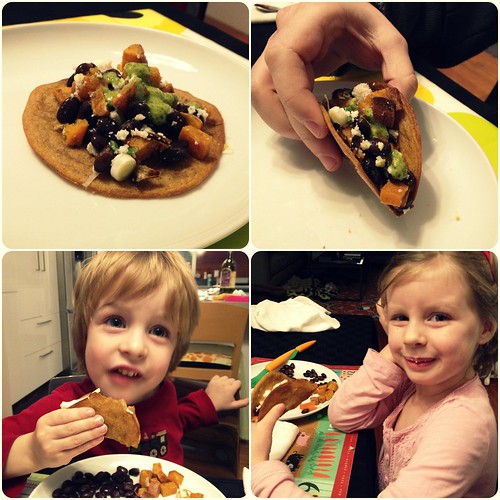
Taco night!

And also... here's how to peel a plantain (and a glance into my kitchen, to maybe entice you to sign up for a class?... What's with my overuse of ellipses today?...)


Plantain Tortillas
Adapted from Fresh Tart
Yields 12 tortillas

3 large green plantains, peeled and cut into 1" or smaller chunks (check out video above for how to peel green plantains) - note: you should have ~1 pound after peeling, 1.5 lbs pre-peeling
1/3 cup + 1 tablespoon avocado, grapeseed, or olive oil
1/3 cup + 1 tablespoon water, plus more if necessary
Zest of half a lime (about 1/2 - 3/4 teaspoon using a microplane grater)
1 teaspoon salt
1 teaspoon baking powder

Preheat oven to 400 degrees. Arrange racks in the middle of the oven. Line two baking sheets with parchment paper or Silpats.

Add all ingredients to the bowl of a blender or a food processor. Add water to the blender, cover, and puree on lowest setting for a minute or two. Gradually turn speed up, using a tamper if needed to keep the puree moving around, adding a bit more water, one tablespoon at a time, if absolutely needed, to form a thick, very smooth puree. (You are halfway there when you've got a hummus texture.)

With a spoon, smooth batter into 12 equal circles of thin batter onto the two baking sheets. The rounds should be about 5-6 inches in diameter, and "thin" (about 1/4" thick), but not translucently thin (meaning you don't want to see the baking surface underneath); you need these guys to be thick enough to (a) not burn, and/or (b) not break when you use them for tacos. Bake for 10 minutes, switch racks, and bake for another 10-15 minutes, until just browning in spots.

Cool for 5 minutes before serving. These last okay cooled and stored in an airtight container for a day or so, but you probably won't have any leftover. They go down WAY too easily.

Wednesday, January 7, 2015

Perfect for Inclement Weather: Pretty Phenomenal Pumpkin (and so much more) Muffins

You guys. Do you know what these really are but just cannot be nominally? These are gluten-free spiced-pumpkin-teff-maple-flax muffins with an optional (over)dose of chocolate chips. These are also f^&#ing fantastic. I mean really. Sometimes - not that often anymore though - I even impress myself. And today was one of those times. Oh happy "inclement weather" day! This all came from a craving for something sweet (three cravings actually), a need for a thermostat reading greater than what my radiators could muster (hello oven), and my favorite thing about my kitchen self: some v. noteworthy resourcefulness (so noted).

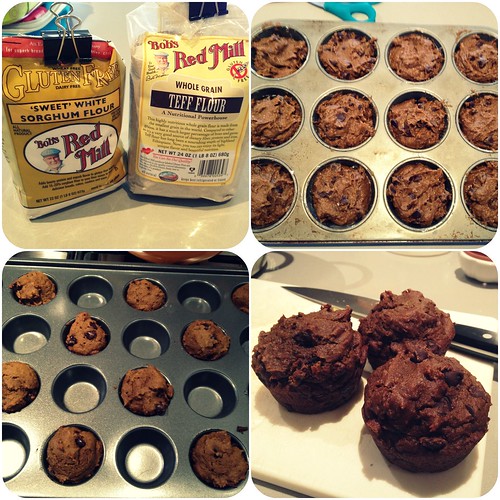
Pumpkin muffin collage

Speaking of notes - I'm putting them up here to keep the recipe tidy - several of them, bolded for your reading pleasure.

1. I really really like the teff in these. Teff has a malty, nutty, sweet flavor that's great in muffins, pancakes, quick breads, and cookies. The Bob's Red Mill teff flour is v. finely milled as well, so it bakes up without any sandiness.

2. Sorghum's been my go-to base flour for gluten-free baking for a while; I prefer it to most rice flours.  It's mild in flavor (unlike quinoa), it doesn't go rancid overnight (unlike millet).

3. Teff? Sorghum? What are you on about? If you want to make them with wheat flour or a gluten-free mix, just use your flour of choice in place of the blend I used - ideally by weight (12 ounces), or measure 2 1/2 cups using a light hand. Omit xanthan gum if you're using wheat or a gf mix that has a gum in it.

4. Eggs vs. flax. Today, I used 2 eggs and 1/3 cup flax (as indicated in recipe). This was because I only had 1/3 cup flax meal, and I had some eggs, and we can all eat eggs these days. If I were making these with all eggs, I'd use 3 eggs. You need some good binders with all these gluten free grains and all this liquid. If I were making these with all flax, I'd use 3/4 cup flax, plus 2-4 tablespoons water. Start with 2 tablespoons, add more if the batter is too thick. You want a regular thick muffin batter. (See upper right picture.)

5. The truth about gluten-free baked goods: the tinier, the better. I made about a quarter of the batter into mini muffins. They're the best.

6. The other truth about gluten-free baked goods: they are way more perishable than wheat ones. So I'm going to keep a few of these in a tupperware for tomorrow, and I froze the rest. Reheat in microwave 30 seconds.

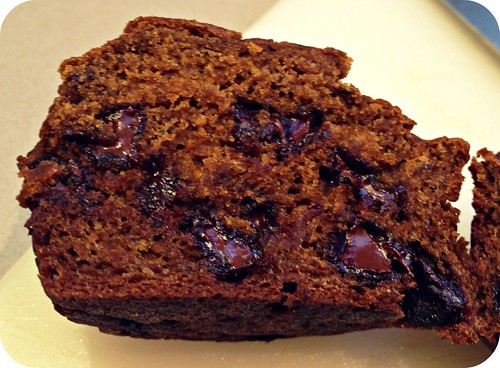
I know you want to see what the crumb is like. I sure did...

Crumb

... pretty dang good for gluten-free (if a bit blurry). Dense but not chewy. (And I dumped a whole bunch of chocolate chips into the mix, probably way more than stated single cup.)

Like what you see? It's basically a riff on these banana-date muffins. Check 'em out.

Want a more traditional pumpkin muffin? Here you go.

Enjoy! Stay warm out there. xoxo

Pumpkin Chocolate Chip Muffins (gluten-free, vegan options)
Yield: 15-18 muffins, ~48 mini muffins, or v. precisely: 12 muffins + 10 mini muffins

4 ounces (about 3/4 cup) teff flour*
4 ounces (about 3/4 cup) sorghum flour*
4 ounces (about 1 cup) potato, arrowroot, tapioca, or corn starch (I used 2 oz potato + 2 oz tapioca)*
1 1/2 teaspoons baking soda
1/2 teaspoon xanthan gum
1/2 teaspoon salt
1 teaspoon cinnamon
1 teaspoon pumpkin pie spice
1/4 cup mild-flavored oil (I used melted coconut oil)
3/4 cup + 2 tablespoons maple syrup
2 tablespoons molasses
1 15-oz can pumpkin puree (or 1 1/2 cups packed roasted pumpkin)
2 tablespoons apple cider vinegar 
2 eggs (or total 3/4 cup flax seeds + 2 tablespoons water - see note above recipe)
1/3 cup ground flax seeds (flax meal) (or one more egg (totaling 3) - see note above recipe)
1 - 1 1/2 cups chocolate chips

* 2 1/2 cups gluten-free all-purpose flour blend (I recommend Trader Josef's) 

Preheat oven to 350 degrees.

Whisk together dry ingredients in a small bowl and set aside.

In the bowl of a stand mixer, combine oil, molasses, maple syrup, and pumpkin puree, and mix until well combined, about a minute or two. Add eggs, if using, ground flax (see note above and add 2 tablespoons or more water with flax if you aren't using eggs), and apple cider vinegar. Mix on low-medium for 30 more seconds. Add dry ingredients and mix on low speed until everything is well combined. Fold in chocolate chips with a spatula. Allow batter to rest for about 15 minutes. (This allows sorghum and teff time to hydrate a little more before baking, making for a better texture.) 

Grease your muffins tins. Measure out 1/3-cupfuls of batter into the muffin tin cups. Keep adding spoonfuls of any left over batter until they are all evenly filled. (They can be a bit more filled than regular egg-and-wheat muffins. Mine were pretty full.) Even out tops with the back of a wet spoon if you want them to look smooth on top.

For muffins: Bake for 15 minutes. Rotate muffin tin 180 degrees and bake 10 minutes more. 
For mini-muffins: Bake for 7 minutes. Rotate muffin tin 180 degrees and bake 5 minutes.

Allow to cool on a rack for about ten minutes before eating. They are good warm and just as good at room temp. They are sturdy yet moist (ew!), perfect for freezing. Enjoy!

Thursday, January 1, 2015

We wish you some Salted Brownies and a Happy New Year!

Happy 2015, friends! I hope you killed it at the gym this morning, and now let's talk about brownies.

Welcome to my website. I wonder who you are (other than Alicia) and how you got here (presumably by googling "no mayo tartar sauce" according to my analytics). For the first time in a long time, I just looked over my analytics this morning and they are fascinating. Lots of links from Russian porn sites (wtf?) and did anybody visit this blog before Pinterest (besides Lisa)? Despite the fact that commenting here has never been super popular (except to Nicole) (and seriously, it's okay, I get constant, ongoing feedback on my food and everything else I do and say all day long from my son and daughter), I've got some hits yo. My no-rise babka, sweet potato-black bean-cilantro stew, farmer's market quesadillas, burgers de Paris, pineapple-St. Germaine martini, best-ever nachos, and bacon fat + chocolate chip cookies recipes are evidently the most loved. But, strangely enough, Catfish Sandwiches with No-Mayo Tartar Sauce takes the cake (and Edith) by a long shot. I guess there are a lot of mayo haters out there. Happy to help.

I'm also happy to give you a recipe for these rich and salty brownies. They are adapted from my favorite cookbook, In the Kitchen with a Good Appetite, by my favorite NY Times columnist, Melissa Clark. Her recipe is called "Kate's Impossibly Fudgy Brownies with Chile and Sea Salt". My recipe is called "Edith's Version of Melissa Clark's Kate's Impossibly Fudgy Brownies with Cinnamon, Chili and Chocolate Salt." Quite a mouthful, I know. Say it five times fast. With a mouth full of brownie. (Also, I like to spell chili with an i because it is a pepper, not a country. But both spellings are technically permissible.)

Here's the deal: I use less sugar and more salt than Ms. Clark. She's got a sweet tooth - check out her rhubarb cake (it's crazy good, and craaaaaaaaazy sweet) - and I do too, but I like my brownies dark and deeply chocolaty and a little more grown-up than my crumb cake, so by considerably reducing the sweetness, we considerably accentuate the richness of the chocolate. (Note: use good chocolate.) (Also note: sugar + eggs is what gives your brownies that shiny, just-crisp top, so I don't recommend reducing sugar any more than I've done. But if you ignore this unrecommendation, let me know how it goes, because I am curious but not curious enough to potentially ruin a pan of brownies.) And, with respect to the salt, I just think using double the salt in baked goods is almost invariably advisable.

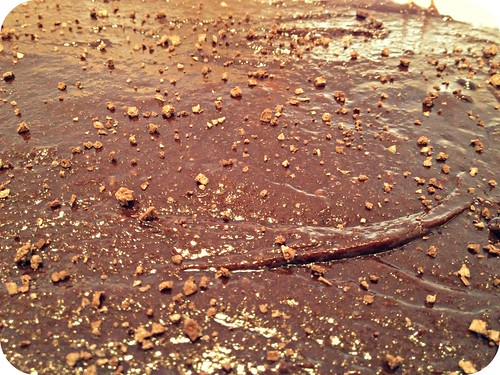
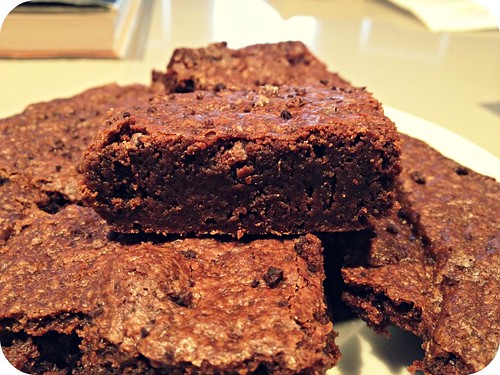
sprinkled with chocolate salt

Featured ingredient: Golden Fig Chocolate Salt. Buy some. Or make your own. Or just use another fancy flaky salt, but maybe halve the amount.

And finally, here are some pictures and the recipe.

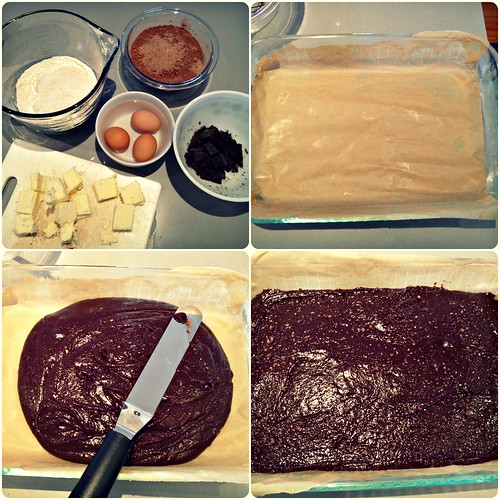
brownie collagegooey perfection

Edith's Version of Melissa Clark's Kate's Impossibly Fudgy Brownies with Cinnamon, Chili and Chocolate Salt
Yields one 9X13" pan of brownies

2 sticks unsalted butter, softened
3 ounces unsweetened or super dark (75% or greater) chocolate, chopped
2 tablespoons oil
1 1/2 cups flour
1 teaspoon kosher salt or 1/2 teaspoon table salt
1/4 teaspoon cinnamon
1/8 teaspoon cayene
1/2 cup cocoa powder
2 cups sugar
3 large eggs, lightly beaten
1 tablespoon vanilla extract (or 2 teaspoons vanilla + 2 teaspoons cardamom extract)
1 teaspoon chocolate salt or 1/2 teaspoon other fancy flaky salt (Melissa Clark uses Maldon salt)

Preheat oven to 350 degrees. Line a 9X13" baking dish with parchment paper. (This is theoretically optional, but you will thank yourself later for doing it. Alternatively, grease your pan well.)

In a microwave, melt together the butter and chocolate, checking after 30-45 second intervals, stirring until smooth. Stir in the oil. Allow mixture to cool for a few minutes.

In a separate bowl, combine flour, salt, and spices.

Transfer chocolate to a large mixing bowl and whisk in the cocoa powder and sugar until there are no chunks of cocoa left and everything is well combined. Add the eggs and vanilla (and cardamom extract, if using); whisk until smooth. Fold in dry ingredients and gently stir until no lumps remain.

Scrape batter into lined pan and smooth the top with a spatula. Sprinkle all over with the finishing salt. Bake for 25 minutes, rotating pan after 15. The top should be just barely set and shiny. (For impossibly gooey brownies, err on the side of under-baking!)

Allow brownies to cool completely in the pan before cutting. Enjoy.

P.S. Alicia, in case you have any extra pears, maybe your next baked good should be this Pear Crumb Cake.

Monday, December 15, 2014

Business Cards (finally) and Saveur's Icelandic Rye Bread

Check it out!

Untitled

I got even cuter!

But more importantly, this.

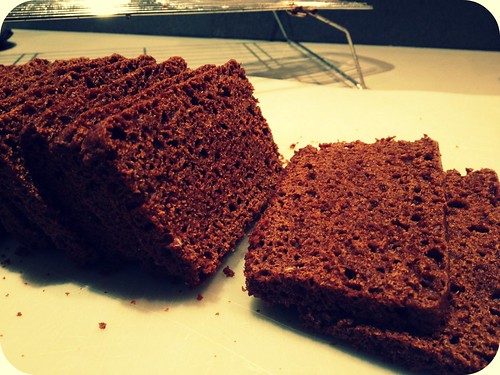
Brown Bread - sliced

I fear its appearance isn't doing it justice. But I also think it's really beautiful. (I am nothing if not conflicted.) Or maybe I can taste it in my mouth right now and the depth and aroma I'm conjuring are so so so lovely, especially warm from the oven and slathered with some good butter - I just know this bread is not as photogenic as it is delicious. It's something new, you know? At least for me. Similar in texture to a British steamed pudding, but different in that it's not all that sweet (cup of Lyle's notwithstanding).

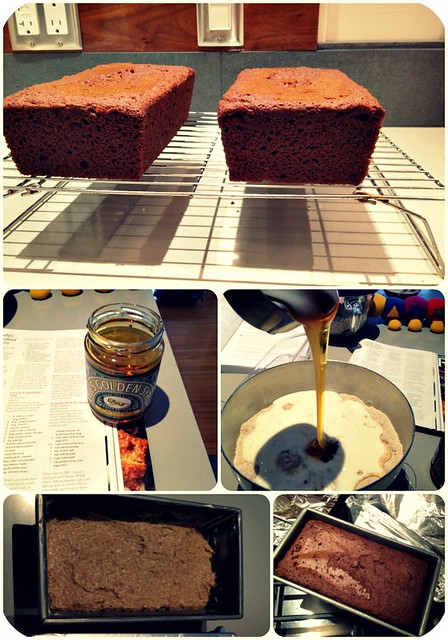
brown bread collage

So there it is. Just a really delicious brown bread. With an incredible chew and a little bit of caramel in every bite. Handsome byproduct: since it bakes at a low temperature for 8 hours, it conveniently gives your radiators a little break. 

The recipe is here, on the Saveur website.