Thursday, September 30, 2010

Fig-Orange Shortbread Bars

These bars made me famous in the neighborhood. They also made me a little fatter than I was before I made them. Halfway through eating the whole pan on my own is when I decided to go on a walk and share them with the locals.

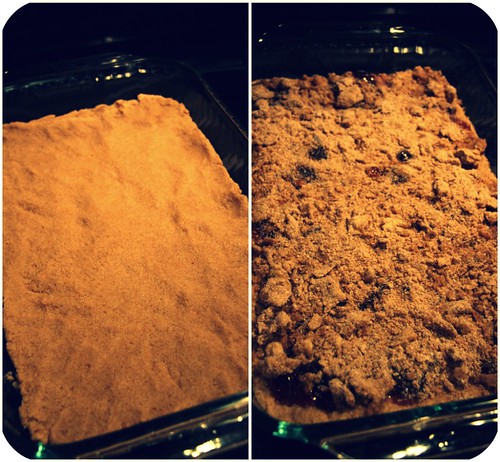
Here's the best part: I invented them myself! (Yes. Worthy of an exclamation point!) And while the crumbly topping didn't do exactly what I'd envisioned - I think only even more butter would have accomplished what I was going for - the finer, not-super-sweet crumble that resulted, marbling into the gooey baked fig preserves, was just perfect. Far better, in fact, than what I envisioned.

I've been wanting to make something combining fig and orange for a while now. "Figgy pudding" is sort of a mythical British dessert with dried fruit and orange and lemon flavorings. And by mythical I simply mean that, yes, obviously, I'm sure it at one point it existed and was popular enough to make an appearance in a Christmas song, but it doesn't really exist now. Nevertheless, this American gal who opened a cupcake shop in London, either wanting to bring it back or maybe unaware of the treat's extinction, offered a "figgy orange" cupcake when I visited a few years back, and it was excellent. So for three years now I've been keeping my eye out for some kind of figgy orange recipe with zero success. And you know, when things don't come to you readily is when you get creative - Anne Bogart taught me that. So true. Hence, my little, luscious, delicious concoction.

butter

(When starting from scratch, the use of massive amounts of butter helps to guarantee something wonderful.)

Fig shortbread in process

baked bars

My favorite part was when I took the pan out of the oven and the fig preserves were all shiny and magical and aromatic. I couldn't wait for them to be cool enough to handle.

bite sized figgy orange bars

And then my patience paid off; they were as good as they smelled and looked and I was v. pleased with myself. So pleased that I felt it was okay to eat half of them. That's the trouble with "bite-sized pieces" - TOO MANY BITES.

Figgy Orange Shortbread Bars
From Yours Truly
Yield: 1 serving. Just kidding. About 50 or 60 bite-sized bars.

For shortbread
2 cups flour (I used whole wheat - it tasted good)
1/2 cup brown, turbinado, or muscovado sugar
1 tablespoon orange zest (from one whole orange)
1 cup butter, cold and cut into 1/2" cubes (that's 2 sticks, baby, and it's what makes shortbread wonderful)

For filling
1 cup fig preserves, heated on stove so that it's easy to spread

For crumble topping
1/2 cup flour
1/2 cup brown, turbinado, or muscovado sugar
1/4 cup butter, cold and cut into 1/2" cubes
1/2 teaspoon cinnamon
1/8 teaspoon nutmeg (optional, but nice)
1/8 teaspoon cardamom (also optional, but nice)

Preheat oven to 350 degrees.

Whisk together flour, sugar, and orange zest. Place in food processor or stand mixer (or use your hands), add 1 cup butter, and pulse until a thick, crumbly dough forms. Knead with your hands a couple of times and then flatten into an ungreased 13 X 9" pan. Bake for 10-12 minutes, until dough is dry and perhaps darkening slightly around edges.

Meanwhile, make your crumble: either pulse all the ingredients together in the food processor until fine crumbs form, or just mix it all with your hands in a large bowl. The mixture will be quite sandy but should have some larger, buttery chunks as well.

Remove shortbread from oven and drizzle fig preserves on top, evenly distributing the preserves as well as you can. Sprinkle sandy crumble mixture evenly over the top of preserves. Bake for 20-25 minutes, until fig preserves are shiny, gooey, and bubbling around the edges, and the crumbs are starting to brown a bit.

Allow to cool completely before cutting and consuming them.

Wednesday, September 29, 2010

Salsa Verde

This is just a quick little post to remind you that I'm alive and tell you I'm back from California, where I spent the last week celebrating the nuptials of two v. dear friends, whose legal union was of particular poignance to my husband and me. (They met at our wedding, six years ago.) The wedding was fairy-tale-perfect, the weather was amazing, and the food was spectacular: buttery, melt-in-your-mouth steak, salty-sweet scallops, a stack of creamy scalloped potatoes, and two kinds of cake - white cake studded with Schaffenburg chocolate and key lime with something else delicious in between its three layers. I've been craving it all ever since. (I'm pregnant so I'm allowed to say I crave things.)

The only thing missing from this trip was Mexican food. So this post is my little Minnesota shout out to California Mexican food. What's Minnesotan about it? It's mild. If you want some more spice, double (or triple) the peppers.

tomatillos

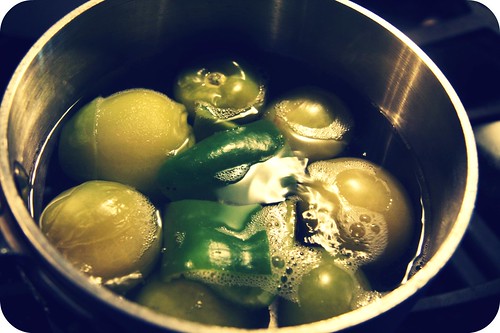
tomatillos on stove

Salsa Verde
Only slightly adapted from The Art of Simple Food, a v. inspiring cookbook indeed
Yield: 2-3 cups

1 pound tomatillos, papery skins removed (about 10-15, depending on size)
1 jalapeño, seeded and sliced (I used just one and it was v. mild - use 2 or 3 for a spicier salsa)
1 large handful cilantro, leaves and stems, rinsed
2 garlic cloves, sliced
1 tablespoon freshly squeezed lemon or lime juice
1/2 teaspoon salt, to start (plus more to taste)

Rinse tomatillos and put them in a saucepan with water barely covering. Add a pinch of salt and bring to boil. Lower heat, simmer for 4-5 minutes. Drain, reserving cooking liquid.

Place tomatillos in blender with 1/2 cup cooking liquid, jalapeño(s), cilantro, garlic, and 1/2 teaspoon of salt. Blend briefly, until you have a semi-chunky salsa. Add more salt and more cooking liquid to acquire the taste and consistency you like best. Let the sauce sit for a few hours at least so that the flavors marry and the salsa gets a bit bolder.

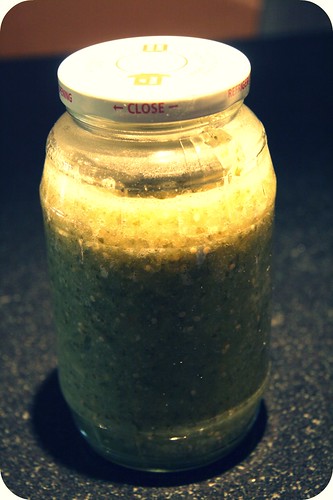
Stores nicely (and quite attractively) in a jar in the refrigerator for at least a week. To make a nice, mild guacamole, mash one or two avocados with 1 cup of salsa verde.

tomatillos salsa

Wait. What do I do with all this lovely salsa verde? you are probably wondering.

Well, here are some ideas...

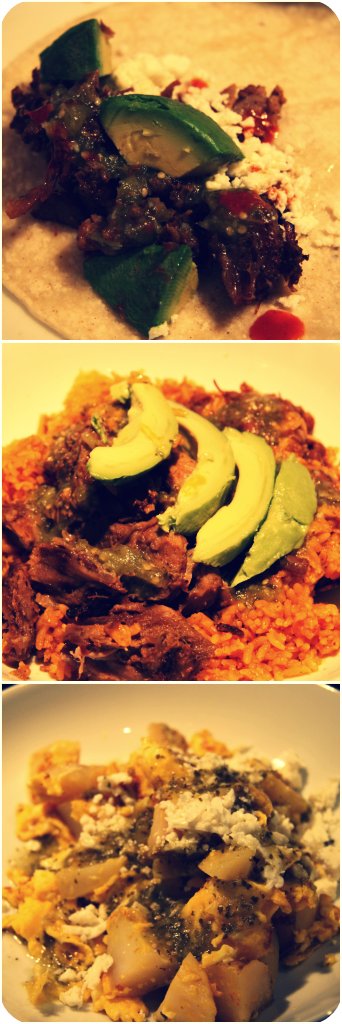
tomatillo salsa collage

... from top to bottom: drizzle it on a taco for dinner, serve it with rice and beans and carnitas* for lunch, add to your eggs and potatoes for breakfast. It's also nice with tortilla chips.

* I really did make those carnitas and, despite learning how much saturated fat is in carnitas (ah, the things you discover when you cook decadent food for yourself!), I enjoyed them thoroughly and so did everyone else who happened to try them at my home. If you have a day at home to cook and if you like carnitas, this is a cheap, delicious way to have them in the comfort of your own dining room. But if you're not keen on having your house smell like pork for a few days, you could just order take-out, especially if you live in California and probably have like fifty Mexican-food options within a mile of your home.

Monday, September 20, 2010

Ten Days of CSA: Day 10, Sunchoke and Celery Root Soup

Sorry I'm late. Again. Life gets busy, you know? And our CSA share this week was not terribly overwhelming, so we felt quite alright dining out a few times over the weekend. And then Charlotte, our lovely visitor, made us Carrot Soup and Seeded Soda Bread and Brown Butter Shortbread, all of which, by the way, were utterly and absolutely lick-smacking delicious. And so, basically, I wasn't in the kitchen quite as much this weekend as I usually am.

But I did make another soup. And I wasn't sure if another soup was worth posting about, especially after the Cauliflower Bisque, which I didn't want to compete with, intentionally or otherwise. Yet, on the other hand, I had a bunch of dirty, fall root vegetables and all that vegetable broth to use up before we catch a plane in less than 48 hours, so I just ignored my insecurities, went for it, and am grateful that I did.

About those dirty fall root vegetables...

Two years ago, for the first time, we got sunchokes, alternatively known as Jerusalem artichokes, in our CSA box. I did not know what they were. I did not know how to clean them, prepare them, or store them. They went bad quickly on our counter, where I'd left them as I would a potato or other root vegetable, and so I threw them out.

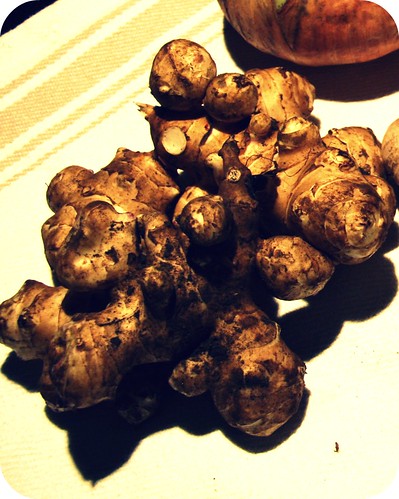
sunchoke

The following summer, we received them again. But this time, they weren't just a one-off and we actually received them several weeks in a row. Also, I had just had a baby and my mother was spending a few weeks with us, and she found it quite exciting that we received vegetables that she'd never seen or heard of before, and took it upon herself to do some research. She thought ginger or turmeric at first, but then, on some website about "tubers" found photos like the one above and solved the mystery. Sunchokes! Also known as Jerusalem artichokes, I suspect because they taste faintly of artichoke, and perhaps are related. They are good cooked up any way that you'd cook a potato. Roasted, boiled, mashed, and, of course, pureed into a soup with leeks. (I'm also convinced - though I haven't tried it - that they'd make an excellent pureed, warm cheesy dip, like regular artichoke dip.) Since August 2009, we've never not eaten our sunchokes. They're good, and interesting, and you just need to give them a good scrub to clean them - no need to remove peel - and they store best in a plastic bag in the refrigerator, like a carrot rather than a potato.

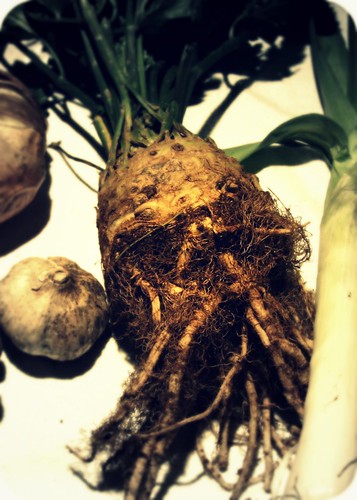
Next on our list of dirties is celery root (a.k.a. celeriac - a word I don't care for). This vegetable was tricky for me because, like kohlrabi, if you slice off the peel you are left with far less flesh than seems worth cooking. But, also like kohlrabi, if you carefully, patiently use a vegetable peeler, you end up with a lot more vegetable left at the end, and celery root is indeed worth cooking. It's like celery, but more satisfying and less stringy.

celery root

So, using little more than these bad boys and a bunch of onion/garlic types, a pretty awesome soup can be crafted. I looked to David Lebovitz for some initial guidance - and I learned that, at least in pureed soups, slicing garlic is best because it results in nicer, more even cooking (as opposed to those little brown bits of minced garlic that develop after about 2 minutes over a medium flame) and thus better flavor and aroma - but I ultimately ended up making my own thing. The soup was healthy, low-cal, used up a lot of vegetables, but didn't produce a daunting amount of soup, which can happen easily in a household of two (plus our little mini girl, who doesn't eat soup v. well yet). Most importantly - and I sure hope this is a given to you all since I wouldn't bother posting it otherwise - it's v. tasty. The ingredients I used are all interesting and intense, and combining them resulted in something perfect for a dreary fall evening, and even better for lunch on the following dreary fall afternoon.

If you manage to get your hands on sunchokes and celery root, I hope you'll try it.

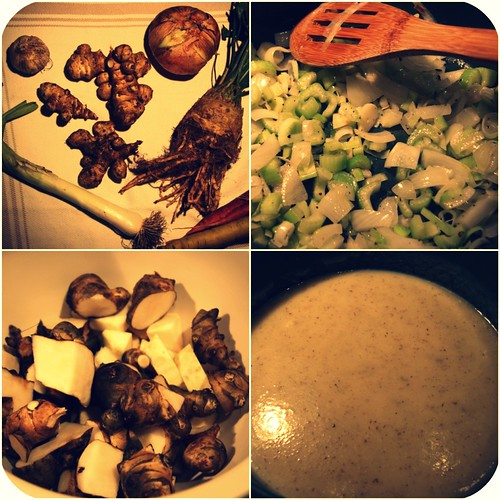
celery soup collage

cuppa soup

Sunchoke and Celery Root Soup
From yours truly
Yield: 4 servings

2 tablespoons olive oil
2 cups chopped onions, shallots, and/or leeks (I used one large onion + one small leek = 2 cups)
4 celery ribs, diced
4 garlic cloves, thinly sliced
1/2 teaspoon ground fennel seed
1-2 celery roots, peeled and cut into 1" cubes (about 2 cups)
3 handfuls sunchokes, scrubbed clean and chopped into 1" pieces (about 2 cups)
4 cups vegetable stock
1 cup water (or more, as you see fit)

Cream or crème fraiche, coarse salt, freshly ground pepper, and nutmeg or paprika, for serving

In a stockpot or dutch oven, heat the oil over medium heat. Add the onion mixture and diced celery, with a generous pinch or two of salt, and cook, stirring occasionally, for about 5 minutes. Add the garlic and ground fennel seed, lower heat a bit, and cook for 2 minutes, until garlic is super fragrant. Add the celery root, sunchokes, vegetable stock, and water. Bring to boil, then lower heat and simmer, with lid ajar, until the vegetables are quite soft, about 40 minutes. Once the vegetables are soft, allow the soup to cool for a few minutes and then puree all or a portion of the soup, whatever you prefer, using an immersion blender or a regular blender. Taste and adjust seasonings to suit your liking. Serve immediately, drizzling 1 tablespoon of heavy whipping cream or crème fraiche into each cup or bowl, and sprinkling coarse salt, pepper, and paprika or nutmeg on top. Enjoy with some dense, crusty bread - like the seedy soda bread Charlotte made last night.

Friday, September 17, 2010

Ten Days of CSA: Day 9, Everyday Sesame Stir-Fry with Greens and Tofu

This post will probably be the least impressive-looking post of the Ten Days of CSA to which you've been privy, but if you like the basic ingredients in the featured recipe, I bet it will be one of the most useful posts.

Here's why: The sauce described below goes well with pretty much every summer vegetable you can think of or buy or grow, and the flavors are simultaneously light and complex and nourishing, and, in no uncertain terms, it is really [expletive] yummy.

It's from my historically favorite cookbook, Vegan with a Vengeance, which might be demoted to second place since the recent addition of the America's Test Kitchen Cookbook to my collection. Thanks, Amber! (Tangent: Every single thing in the America's Test Kitchen Cookbook is the best version of that particular single thing that I've ever made/eaten. It's unbelievable. Evidently testing is worthwhile.)

Anyway, we eat this about once a week during the early summer, when we're getting asparagus and beans and leafy greens and all those delicious veggies whose freshness shines best when they're just barely cooked and paired with an Asian-style, semi-salty sauce. It's a good, light summer meal. And it's really versatile. And did I mention [expletive] yummy? Yeah. It is.

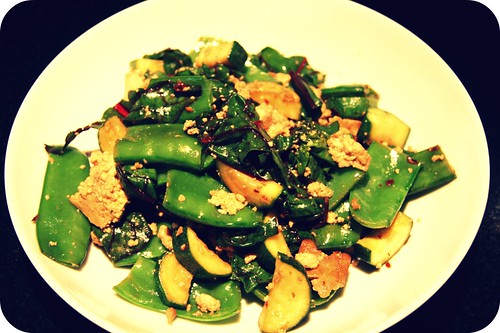
Everyday Stir Fry

Everyday Sesame Stir-Fry
Yield: 2-4 servings

2 tablespoons toasted sesame oil (one of the tastiest ingredients of all time)
4 cloves garlic, finely chopped

3 tablespoons soy sauce
3 tablespoons rice vinegar or mirin or sake
1 tablespoon honey or agave nectar (optional)
2 teaspoons red pepper flakes

1 pound crunchy vegetables cut into bite-sized pieces (e.g. zucchini, asparagus, carrots, green beans, snow peas, kohlrabi)
Bunch or two of leafy greens, coarsely chopped, stems removed (e.g. kale, chard, watercress, spinach, cabbage) (optional)
1 pound sesame or teriyaki tofu (homemade or purchased - Wildwood is good and Trader Joe's has a good, cheap, organic teriyaki tofu block - it's perfect for this recipe), cut into 1/2" inch cubes or crumbled

2 tablespoons toasted sesame seeds

In a small bowl or measuring cup, mix together the soy sauce, vinegar or mirin or sake, red pepper flakes, and honey or agave nectar, if using. In a skillet, sauté the garlic in the sesame oil over medium heat for a minute or two. Pour in the soy sauce mixture and give it all a good stir. Add your crunchy vegetables and sauté for 5 minutes or so, until al dente. Add your leafy greens, if using, and tofu and cook, stirring occasionally, until the greens are softened and the tofu is warmed through. Serve the stir-fry by itself or over some brown rice, and sprinkle with the toasted sesame seeds.