Saturday, October 30, 2010

Mexican Whole Beans

This post is part of a handful of posts that I'm working on in preparation for my upcoming Ten Days series. It is going to be Ten Days of Pumpkin, but you'll have to be flexible with me because a handful of the posts will feature other winter squash, and I didn't like the sound of "Ten Days of Winter Squash."

The dried beans I used to make the soupy, Mexican-restaurant-style ones described below were from an Iowa heirloom bean grower/vendor called Seed Savers Exchange. I'd had a Rancho Gordo sample box on my Christmas list for a couple years now, but apparently nobody took that request seriously, so I decided to buy them for myself. After doing a bit of research, however, I found Seed Savers Exchange, for which I opted over Rancho Gordo because it's nearer to Minnesota and has a comparable (or maybe even greater) selection of heirloom beans. I bought about ten pounds of various beans. They arrived within two days of ordering online and they are all beautiful and unique. I'd been working through them slowly until I read recently that beans should be used within a year of harvest, and that's galvanized more bean-making in our home lately. I shouldn't need an expiration date to motivate me, though. I love beans, and they are so simple to make, and you can do so many things with them. My experience with Seed Savers Exchange was awesome, so if you are interested in ordering heirloom beans, I highly recommend the company.

Seed Savers beans

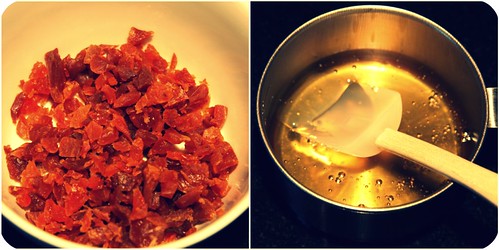
I used Tiger's Eye beans, which are beautiful when dry. When cooked, they look and taste like oversized, creamy pinto beans. They were a good choice, if I do say so myself.

Tiger's Eye

The recipe I played with to make these beans is an Emeril recipe from Foodnetwork.com. Emeril mashes them and makes them "refried" style, and you can too, but I did not.

Pot-o-beans

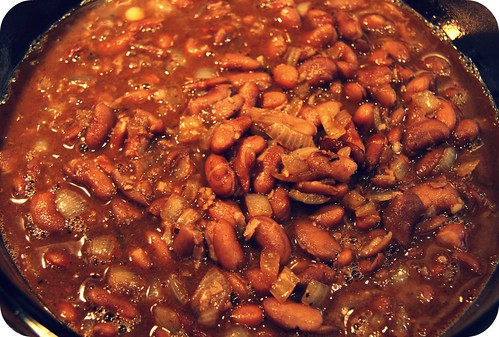
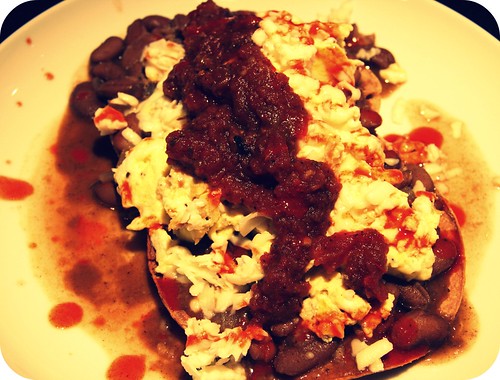
I love whole beans in all their soupy, salty glory. Good thing, since the recipe makes a lot of them, so beans made an appearance in several dinners the week I made them. They shine best in simple dishes: arroz con pollo or weeknight huevos rancheros (bonus recipe following the bean recipe). But you'll read about a fancier way of using them when I finally get to my Ten Days of Pumpkin...

Mexican Whole Beans
Adapted from Emeril Lagasse
Yield: 4-5 cups

1 pound dried pinto (or pinto-like) beans, soaked overnight in a large bowl with water to cover by 2-inches, and drained*
1 bay leaf
1 quart chicken or vegetable broth
2 tablespoons bacon drippings (or lard or butter or olive oil)
2 tablespoons butter or olive oil
1 large onion, chopped
5 cloves garlic, chopped
1 tablespoon chili powder
2 teaspoons ground cumin
1 teaspoon ground coriander
1 teaspoon dried oregano or epazote
1 teaspoon salt
1/2 teaspoon cayenne

In a medium, heavy pot or dutch oven, combine the beans, bay leaf, and enough broth to cover by about one inch (about 4 cups). Bring to a boil. Lower the heat and simmer uncovered, stirring occasionally, until the beans are very tender, about 1 1/2 to 2 hours, adding more broth or water as necessary to keep the beans always covered. When the beans are soft, remove pot from heat.

In a large, heavy skillet, melt the bacon drippings and butter (or whatever combination of fat you choose to use) over medium-high heat. Add the onions and cook, stirring occasionally, until soft, about 3 minutes. Add the garlic, spices, and salt, and, stirring constantly, cook until fragrant, about 1 minute.

Remove the bay leaf from the beans. Pour the onion-garlic mixture into the beans and stir to combine. Cook on low, stirring occasionally, until the flavors combine and the mixture thickens, about 5 to 10 minutes. If needed, add a tablespoon of water at a time to keep the beans from getting dry. (I didn't have to do that.)

*A soaking shortcut is to cover the beans with water, bring to boil, boil for 2 minutes, turn off the burner, cover, and let them soak for 2 hours. Drain, rinse, and then start recipe.

huevos rancheros

Weeknight Huevos Rancheros
From yours truly
Serves 2

4 corn tortillas
4 eggs
1 cup (or more) Mexican Whole Beans
1 cup shredded cheese or crumbled queso fresco
olive oil (in a spray bottle is best)

Toppings: salsa, hot sauce, sour cream, guacamole, cilantro

Preheat oven on broil setting. Spray or brush olive oil on both sides of each tortilla. Place tortillas on baking sheet and broil for 2 minutes on each side, until firm and toasty.

In a nonstick skillet, cook your eggs however you like them best. Season with salt and pepper. Reheat Mexican Whole Beans if necessary.

When tortillas are done baking, place one egg on each tortilla and, using a slotted spoon, top with 1/4 cup whole beans, followed by 1/4 cup cheese. If you like your cheese melty, place under broiler again for another minute. Otherwise, top with fixings of your choice and dig in.

Wednesday, October 27, 2010

Apricot Honey Cookies

"These cookies taste like Christmas."

That's what my husband said when he first tried them, and he's right. And if stores can be reminding us that Christmas is on its way, then I suppose my kitchen is allowed to as well. Especially because cookies are probably one of the best parts of Christmas, and these are lovely little cookies indeed. They aren't Christmasy in the way that a gingerbread latte is. On the contrary, these are delicate and subtle. The flavors are mild but warm. Nice with a hot beverage as you watch outside your window the season's first flakes of snow intermingling with rain, and the bright yellow leaves that were part of a tree just yesterday dancing in the insane wind that has just taken over your city.

apricots and honey

There's not much else to say about these cookies. They're nothing to gush or mull over. They are just nice, simple little two-bite treats. Or one bite treats, depending on which of the two methods I describe most suits your fancy.

Exhibit A: Quick and Easy Version

ball cookie

Exhibit B: Rolled, Chilled, and Sliced Version

cookie disk

I think I preferred the quick and easy version. They were a little softer, and you could pop them into your mouth whole, which is fun, and they were ready quickly. But the more involved version definitely looks more involved, and is certainly as delicious as the former, so if you want the less rustic, more polished look, go for the rolled, chilled, and sliced version.

Or do both.

cookie comparison

I altered a recipe from David Lebovitz to make these. My alterations are as follows: I halved the recipe because I don't need 50 cookies hanging around my house (although, I think either his recipe yields way more than 50 cookies or he made much larger cookies than I did, because I already made over 20 and I have half of my own dough in the freezer still); I substituted honey for sugar, because I think honey and cornmeal go together v. nicely (e.g. cornbread + honey butter); and I, of course, used dried apricots in place of currants. My cookies look much softer than his, and I imagine it's because of the honey. Also: I've almost used the last of my dried apricots! Yay!

I have to go get a Christmas tree now. Enjoy the recipe.

Apricot Honey Cookies
Adapted from David Lebovitz
Yield: about 50 small cookies

1/2 cup finely chopped dried apricots
1 tablespoon flour

2.5 ounces butter, softened (about 5 tablespoons)
1/4 cup honey
1 egg
1/2 teaspoon vanilla
3/4 cup flour
2/3 cup stoneground, coarse cornmeal
1 teaspoon baking powder
1/2 teaspoon salt

If you plan on making the easy version, preheat oven to 325 degrees. If you make the more polished version, preheat the oven about fifteen minutes before you plan on baking them.

In a bowl, toss the dried apricots with the 1 tablespoon flour and set aside.

In a mixing bowl, cream together the butter and honey. Add the egg and vanilla and stir until well-combined and a little fluffy. In a separate bowl, whisk together flour, cornmeal, baking powder, and salt. Add dry ingredients to wet, stirring until incorporated, and then stir in the dried apricots.

To make the easy, quick version, form walnut-sized balls out of the dough (about 1 tablespoon) and place them on a parchment- or Silpat-lined cookie sheet, like so...

cookie dough balls

The dough will be quite sticky, so you might want to flour your fingers a bit.

To make the rolled, chilled, and sliced version, place a sheet of plastic wrap on the counter, then gather the dough into one large ball and place it in the center of the plastic wrap. Fold up the edges to create as much of a disk-type shape as you can. Put the disk in the refrigerator and chill for about an hour. Once the dough has chilled and is solid enough to handle, remove from the refrigerator and unwrap. Using your hands, shape the dough into a tube, about 2" in diameter. Wrap and chill again for about an hour. (Or freeze the dough for later - this is what I did.) When you are ready to bake the cookies, slice them about 1/4" thick and place them on a parchment- or Silpat-lined cookie sheet.

cookie dough disks

Regardless of which version you opt to make, bake for 10 minutes. (Even using the frozen dough, they still took only 10 minutes.) Allow to cool on cookie sheet for a few minutes. Get your hot beverage ready and enjoy.

Tuesday, October 26, 2010

Out-of-Eggs French Toast

I'm not vegan. You probably noticed that. But sometimes I do enjoy the simplicity and wholesomeness that a vegan meal offers and other times I just run out of eggs, so I find myself a few times a week looking to my vegan cookbooks for guidance, whether I'm trying to cleanse or make do. The vegan french toast recipe below falls into the latter category. My daughter, who isn't a huge fan of meat or beans yet, loves eggs. So every morning I give her either a scrambled egg or french toast for breakfast. This means we go through (and accordingly run out of) eggs rapidly in the Cameron household. I sorted out this little recipe the last time I found myself in a no-egg predicament. While it lacks the protein I prioritize in Sadie's most important meal of the day, it's nonetheless super tasty. So if you're vegan, or if you're simply out of eggs, knock yourself out.

Note: this makes a super small batch. It was enough for me and my daughter, who's not quite 16 months old. Granted, I eat a lot, so it's probably enough for two adults when you take that into consideration. At any rate, double or triple as needed.

toasting bread

french toast batter

marinating

plated french toast

Out-of-Eggs French Toast
Adapted (quite a lot) from Vegan with a Vengeance
Yield: 2 servings

4 slices of bread (note: sourdough is usually vegan)
1/2 cup soy milk
1 banana
1 teaspoon vanilla
1/2 teaspoon cinnamon
1 tablespoon corn starch
2 tablespoons coarsely ground grain or legume (e.g. cornmeal, oats or brown rice pulsed a few times in your blender, chickpea flour, purchased baby cereal; I used a mixture of ground oats, rice and lentils that I have in my refrigerator always to make Super Baby Porridge for my daughter)

Margarine and maple syrup, for serving

Toast the bread slices.

In a blender, mix the soy milk, banana, vanilla, and cinnamon until no large banana chunks remain. (You could alternatively mash the banana by hand, just make sure it's really well-smashed and then well-combined with the soy milk, so it's the consistency of, well, egg I guess.) Pour into a pie plate or something comparable in size that will allow you soak the toast. Whisk in cornstarch until fully dissolved and then stir in your ground grain of choice. A few chunks are okay. Soak the bread slices in the soy milk mixture, one at at time, for about 1 to 2 minutes on each side.

Heat a nonstick skillet over medium heat. Spray with oil or melt some margarine in the pan (about a tablespoon). Cook each slice in the oiled skillet for about 2 minutes on each side, or until browned to your liking.

Serve immediately, with margarine and pure maple syrup.

Friday, October 22, 2010

Pumpkin and Sunflower Seed Burgers

I told you you'd see some repeat ingredients. What? I'm allergic to nuts. I like seeds. There just aren't that many kinds of seeds readily available. So I eat a lot of pumpkin seeds and sunflower seeds. And so does my family.

I used to think that pumpkin seeds and sunflower seeds were just something to add a nice crunch here and there. And indeed they do just that. But first the buttermilky seed purée I incorporated into the Dreamy Creamy Vegan Cauliflower Soup and now these burgers have convinced me that there is way more to seeds than crunch. They are actually quite flavorful and filling. Kind of earthy when raw, smoky when toasted. And you know what else is great about them? They're super cheap, especially when you buy them in bulk. You should add them to your list of staples.

As I was making these burgers, I got nervous every step of the way. This is because I was making them before my epiphany about how flavorful seeds are. I feared they would end up bland or weird. But then they ended up coming together nicely, from a texture perspective, and then they baked evenly, which was affirming because I'd never baked a veggie burger before (I usually pan fry) and was delighted to find that baking doesn't result in a dry or crumbly burger. And then, finally, they were SO YUMMY. No individual ingredient took center stage. The flavors combined into something completely unique and, I guess, well, savory. That's the best word I can come up with. The earthiness of the seeds + the little spice kick from the cheese and hot sauce + the herby undertones from the cilantro and parsley = delectably savory. If I had to identify a favorite veggie burger, I am still partial to spicy black bean burgers (both generally and in my own kitchen), and I still encourage you to try out those inside-out chickpea burgers of my early blogging days if you haven't yet. But, frankly, I can't wait to make these again next week. They are so delicious and easy. They've sealed the deal: I will never eat a Gardenburger again.

Pumpkin and Sunflower Seed Burgers collage

uncooked seed burgers

Where aesthetics are concerned, however, they leave something to be desired. Veggie burgers aren't photogenic. I tried.

baked seed burger

But look how happy I look eating mine!

me eating seed burger

With my bra showing! And my cute daughter being all cute and cute for the camera!

Dinner is so wonderful when you are eating super awesome healthy delicious seed burgers next to the goofiest toddler in the world!

(Sigh)

Oh, you wanted the recipe? Here you go.

Pumpkin and Sunflower Seed Burgers
Inspired by a nut burger recipe from Edible Twin Cities, Number 22, Fall 2010

3 ounces raw sunflower seeds
4 ounces raw pumpkin seeds (pepitas)
1 egg
1/4 cup chopped fresh cilantro
2 tablespoons chopped parsley (or more cilantro)
1 teaspoon dijon mustard (optional)
1 teaspoon Tapatio or other hot sauce
1 tablespoon lemon (or lime) juice
1/2 teaspoon smoked paprika
1/2 teaspoon salt
1 tablespoon cornstarch
2 slices day-old bread, torn into small pieces
1 cup shredded chipotle cheddar (if you can find it) or pepper jack cheese
1-2 shallots or green onions, chopped (or 1/4 cup regular onion)
2 celery ribs, chopped
1 tablespoon olive oil, plus more for greasing baking dish

Preheat oven to 375 degrees.

In a large skillet, toast seeds over medium heat, stirring frequently, until starting to brown, about 3-4 minutes. Transfer to a plate and allow to cool.

In a mixing bowl, using a fork, beat together egg, herbs, mustard, hot sauce, lemon juice, paprika, salt, and cornstarch. Add torn bread, stirring to moisten. Set aside for a few minutes to allow the bread to absorb some moisture and the seeds to cool completely.

Place the shallots or onions and celery in food processor. Pulse a few times until they are finely chopped. Add toasted, cooled seeds, bread mixture, cheese, and olive oil. Pulse several times, until the ingredients are well combined but the consistency still has a bit of grittiness to it. Divide mixture into 8 equal portions, about 4 inches in diameter and 1/2 an inch thick. Shape each portion into patty, place on a greased baking dish and bake for 15-18 minutes, until lightly brown and firm to the touch (mine were done right at 15 minutes).

Serve on whatever bread you prefer with whatever vegetables and/or condiments you prefer. (These are great on English muffins with guacamole!)