Sunday, March 27, 2011

Thai Iced Tea

Have you ever had Thai iced tea? Or Malaysian iced tea? They are my favorite respective parts of my visits to Thai and Malaysian restaurants. The thing is, I don't often go to Thai and Malaysian restaurants. It's not that I don't like them. I do indeed. Um, hello, pad thai? Mango chicken? Delicious. BUT. They use a lot of tree nuts and sometimes I'm just not in the mood to grill servers on ingredient lists and/or ask for substitutions to stave off a hospital visit.

So what's a girl who loves Thai and Malaysian iced teas but only infrequently visits Thai and Malaysian restaurants to do? Why, search the interwebs of course! Sift through Food Network recipes! (There are several.) Embark on a little trial and error! Come up with the perfect homemade version of Thai iced tea to suit her own tastes and postpone experimentation with homemade versions of Malaysian iced tea for another time!

Sounds good! I'm on it. Excuse me.

---------------------------------------------

Okay. I'm back now. I am fast!

I've come up with what I like to think is pretty much the best Thai iced tea ever. You know, not being Thai and not having ever been to Thailand and only infrequently having patronized Thai restaurants (damn those pesky cashews!). But with the help of like every celebrity chef I've ever heard of and some I haven't heard of, and falling back on my resourcefulness to help me make certain decisions with respect to ingredients and proportions, I made some Thai iced tea that combines a bold, strong black tea flavor with a rich, creamy, silky-smooth mouth-feel (ew, I just said mouth-feel and I'm not wine tasting!) and an-almost-too-sweet-but-no-wait-a-minute-actually-quite-perfect-level-of sweetness.

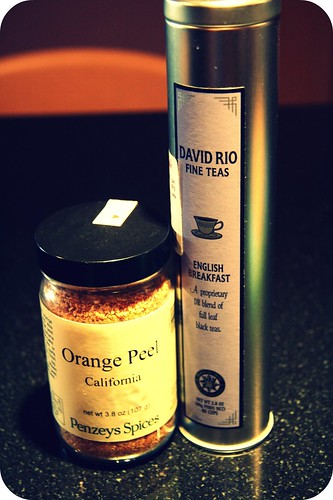
primo ingredients
glass of thai iced tea

Better yet: it's super easy to make, requires only a handful of ingredients, and keeps well in a jar in the refrigerator for at least a week.

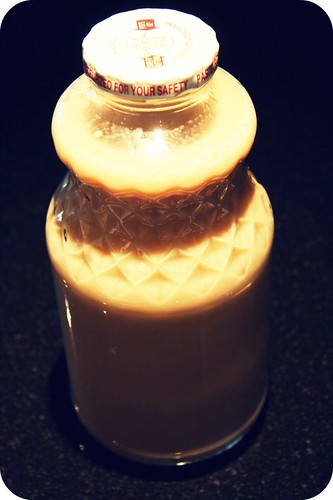
jarred iced tea

I think it's time I told you how to make it because your life will be better for having tasted this.

Thai Iced Tea
Not so much adapted from as influenced and inspired by a whole host of Food Network recipes (do a search if you want some other ideas)
Yield: 5-6 cups; about 6 servings

5 cups water
3 tablespoons loose leaf black tea (I used English breakfast)
2 tablespoons dried orange peel
1 whole star anise
1/2 cup (7 ounces) sweetened condensed milk
1/4 - 1/2 cup half-and-half or cream (optional)

Bring water to boil. Stir in tea, orange peel, and star anise. Steep for 5-10 minutes and then strain using the finest-mesh strainer you have (ideally one meant for straining tea, or maybe even a coffee filter). While the tea is still warm, add the sweetened condensed milk and whisk until smooth. Allow the sweetened tea to cool a bit before transferring it to a refrigerator-proof container (I used two old juice jars, but a large pitcher that won't stain would work well too). Chill for at least a couple of hours.

Once ready to drink it or serve it, you can either do so as is, over ice, or you can add the half-and-half or cream, in one of two ways: (1) stir in 1/4-1/2 cup of cream into the whole container of tea, or (2) add 1-2 tablespoons of cream to each serving, stirring well. I drank it without cream, with cream added in my cup and then finally with a bunch of cream mixed into what was left in the jar. It was all delicious, but my favorite was larger amount of cream mixed into the larger amount of tea, which made the beverage super creamy and homogenized and perfect.

Enjoy. With a friend. Or not.

Sunday, March 20, 2011

Chile Verde Stew

Hi. How are you? What are you doing? Is it exciting? I hope so.

I'm just waiting to have a baby and doing random things that make the time go by a little less uncomfortably. I take baths. I bake cookies. I bounce on a big blue exercise ball. I eat comfort food.

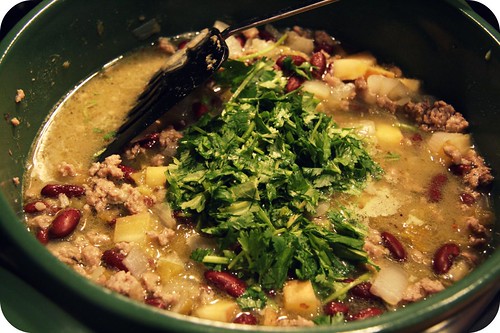
chile verde stew in pot

Tonight I made this delicious, v. aromatic stew for dinner. The smell reminded me of sancocho, a Colombian stew that my grandma and great-aunt used to make when I was young. The taste of the stew I made tonight though, while lovely, was not as much reminiscent of sancocho as of Santa Fe, where my husband and I randomly spent ten days a few years back. An odd place to randomly spend ten days, but we had a great time and ate a lot of green chile. In New Mexico I learned that I'm a green chile person more than a red chile person. If you are also a green chile person, you will like this chile verde stew. It is yummy and easy and it makes your kitchen smell like that of a Colombian grandmother. Maybe I'm summoning all that ancestral Colombian birthing energy to nourish and strengthen me in the next few days or weeks. Now bring on the buñuelos!

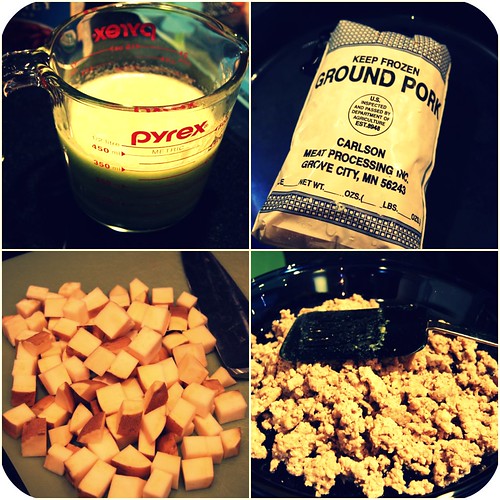
chile verde collage
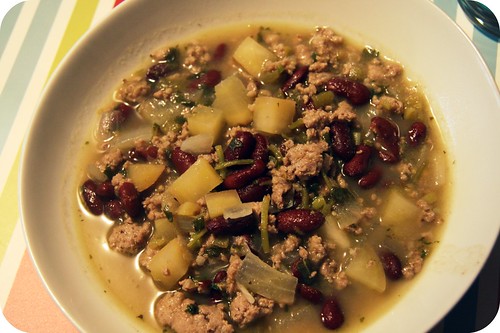
bowl of stew

Keep in mind that this is a stew - which I will boldly define as a big pot full of things you'd like to use up from your freezer, pantry, and refrigerator, simmering with some spices and thickened broth. As such, it's open to myriad substitutions and modifications. Go to town.

Chile Verde Stew
Adapted from Epicurious
Yield: 4 servings

2 medium onions (about 1 pound total)
1-2 jalapeños, stems trimmed
5 garlic cloves
2 1/2 cups vegetable or chicken broth, divided
1 tablespoon olive oil or butter
1 pound ground beef or pork
1 medium to large sweet potato (8-10 ounces), cut into 1/2" dice*
1-2 teaspoons ground cumin
1-2 teaspoons ground coriander
1/2 teaspoon dried oregano
4 ounce can green chiles
2-3 cups cooked kidney or pinto or black beans, or hominy
1 cup chopped cilantro
Juice of half a lemon or lime
Bunch of green onions, finely chopped (optional)
Salt and pepper

Cut one onion into quarters and coarsely chop the other one. Purée the quartered onion, jalapeño(s) (seeds included), and garlic cloves with 1/2 cup chicken broth in a blender until smooth.

Heat 1 tablespoon oil in a soup pot or dutch oven over medium-high heat. Add beef or pork, sprinkle generously with salt and pepper, and cook, stirring and breaking up clumps with a spatula just until no longer pink, about 4-6 minutes. Transfer meat to a bowl with a slotted spoon. Reserve the fat in the pan.

Keeping heat at medium-high, add chopped onion and sweet potato to the drippings and cook, stirring occasionally, until onions are translucent, about 5 minutes. Add the chile verde purée, cumin, coriander, and oregano, and stir well for about a minute. Lower heat a bit and cook, stirring every couple minutes, until mixture is thickened and most of liquid is evaporated, about 10 minutes.

Return the meat to the pan, along with the beans or hominy, canned green chiles, remaining 1 1/2 cups broth, and chopped cilantro. Bring to simmer, uncovered, and stir occasionally for about ten minutes.

Turn off stove, stir in lemon or lime juice, taste to see if more salt or pepper is needed, and stir in green onions, if using. Serve in large bowls with rice, corn bread, tortillas, tortilla chips, or what we happened to have on hand: some homemade whole grain bread.

It really hit the spot tonight. I bet it will be even better tomorrow. (I'll let you know.)

*Winter squash, a couple regular potatoes, or a large, firm plantain would all be great substitutions for the sweet potato.

Thursday, March 17, 2011

Smoky, Salty (and just a tad Spicy) Chocolate Chip Cookies

Does the world need another chocolate chip cookie recipe? I don't know. There are some pretty good ones out there. Rare is the person who can resist the good old-fashioned tried and true Tollhouse recipe that we were all raised with. I've heard (but not personally confirmed) that the America's Test Kitchen chocolate chip cookie recipe is comparably ab-fab. David Leite's recipe - despite being daunting, time consuming, and requiring a long list of expensive ingredients - took the internet by storm a few years back deservedly so, as it seriously produces the most seriously amazing chocolate chip cookies ever, particularly if you get your hands on some seriously amazing minimum 60% cacao bittersweet chocolate fèves or disks. (I did.) More recently, Kim Boyce's whole wheat version has been gushed about and just barely adapted on Food in Jars, Orangette, and 101 Cookbooks. (I actually have and love Good to the Grain and was v. pleased with the four things I've made from it so far (namely, quinoa porridge, kamut sand cookies, pear-buckwheat pancakes, and oatmeal sandwich bread), but haven't gotten around to trying the actual chocolate chip cookie recipe yet.)

So what are we doing here? Do I fancy myself so fancy a baker that I can really add something fancy and special to what's already out there?

close up

Well, evidently, yes. But not alone or uninfluenced. I created the smoky, salty, and just a tad spicy recipe below after being inspired by the Homesick Texan's recipe for Chocolate Chip-Pecan Cookies, in which she uses bacon grease. I'm sure her recipe is fine and good on its own, but I've never been one to leave well enough alone, and I felt like I wanted to experiment a bit if I was using bacon fat in my cookie batter: by adjusting the flour/sugar quantities, I went for a crispier, crumbier cookie than the kind that you can already get by using butter and following any of the recipes mentioned above or countless others. And I wanted to highlight the smokiness and saltiness that bacon grease had the potential to provide a cookie. Finally, I pretty much never use strictly all-purpose flour unless I am making an America's Test Kitchen recipe and want it to end up as perfect and unencumbered by my frequently-taken liberties as a recipe developed by America's Test Kitchen is most certain to be.

(Oh. And I omitted pecans because I'm allergic to them.)

both batches

Anyway, before I share the recipe, note (as pictured above) that I made two batches: one baked at 350 degrees for about 20 minutes (left), and one convection baked at 350 degrees for about 15 (right); both times I turned the baking sheet 180 degrees after 8 minutes. The first batch ended up delicious, but right out of the oven they appeared softer than I thought they should be, hence convection bake the second time around. Ultimately, both batches ended up semi-crunchy/semi-soft once they'd cooled, although the second batch was slightly crunchier and I quite liked that, so I've gone ahead and included just the regular baking instructions in the recipe. Keep an eye on them and bake them as long as you'd like. But trust me when I say - and mind you, I like a gooey cookie most of the time - a little browning and a little crunch really add to the whole smoky, salty, spicy thing in making this a unique and lovely cookie.

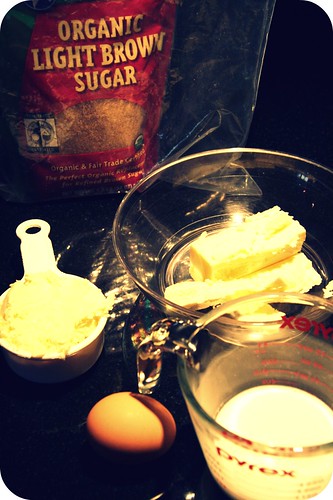
wet mix
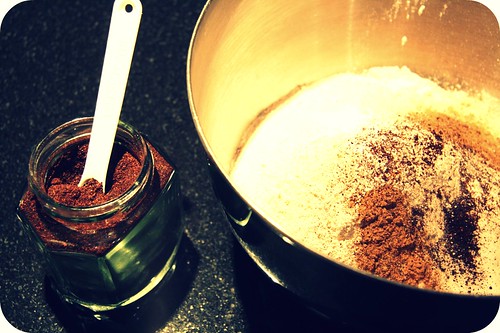
ancho and dry mix
in and out of oven

Smoky, Salty (and just a tad Spicy) Chocolate Chip Cookies
Inspired by Homesick Texan
Yield: 3 dozen cookies

1 cup brown sugar
1/2 cup butter
1/2 cup bacon grease (or margarine or more butter)
1 egg
2 tablespoons milk*
2 tablespoons plain or vanilla yogurt*
1 tablespoon vanilla
1 cup all purpose flour
1 1/2 cups spelt flour (or more all purpose flour or whole wheat flour)
1 teaspoon baking powder
1/2 teaspoon baking soda
1/2 teaspoon salt
1 teaspoon cinnamon (or more)
1/2 - 1 teaspoon ancho chili powder (or a lesser amount of cayenne or chipotle chili powder)
2 cups milk chocolate chips
Fleur de sel or other flaky salt, to finish

Preheat oven to 350 degrees. Line a baking sheet with parchment paper or a Silpat, or grease liberally with butter.

Using an electric mixer, cream brown sugar, butter and bacon grease. When fluffy, add egg, followed by milk, yogurt, and vanilla, and mix until smooth. Whisk together the flours, baking powder, baking soda, salt, cinnamon, and chili powder in a separate bowl. Add to wet ingredients and stir in until fully incorporated. Add the milk chocolate chips.

Scoop up heaping tablespoonfuls of dough and place on your prepared baking sheet, with at least two inches between each cookie (see in picture above how much they'll spread). Sprinkle each mound of cookie dough with a pinch of fleur de sel or other large-grained salt. Bake for 18-22 minutes, rotating baking sheet 180 degrees after about 10 minutes, for even browning. Once they're as brown as you want them, remove the cookies immediately from baking sheets and allow to cool on racks. Repeat with remaining dough.

I found these cookies - oddly enough - were best when completely cooled. The smokiness of the ancho and bacon grease plus the super sweetness of the milk chocolate chips were most obvious and enjoyable at that point. But, obviously, a warm, melty cookie is never a bad thing, so if you can't wait, you can't wait.

Both the cookies and the dough freeze well. Allow dough to thaw in the refrigerator over night before trying to scoop out the batter and add a minute to your baking time.

*1/4 cup buttermilk can be used for milk + yogurt combo, if you have it on hand

Sunday, March 13, 2011

Slow-and-Red-Cooked Rump Roast

Happy 100th post! I love food! (And so can you!)

I can't wait to see what kind of google search terms lead to this post. "Slow and red" seems like it could be open to a great deal of interpretation. And "rump" just makes me laugh a little. In this case, "slow" refers to the use of your trusty slow cooker, and "red" refers to a Chinese method of poaching or braising meat in a salty-sweet liquid with a bunch of delicious spices, the combination of which makes a beautiful flavorful reusable sauce. "Rump" refers to the particular cut of meat that I used when I made this meal: a big, juicy cut from "the fleshy hindquarters" of the animal.

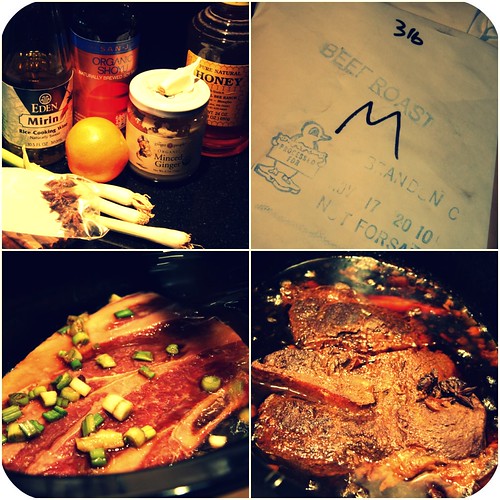
Red Roast Collage

This recipe is fantastic and easy. It involves using up most of that bottle of soy sauce in your pantry and it may require a trip to the grocery store if you don't happen to have star anise already in your spice drawer. (But you'll probably want to go to the store to get the freshest, best-looking rump roast you can find anyway.)

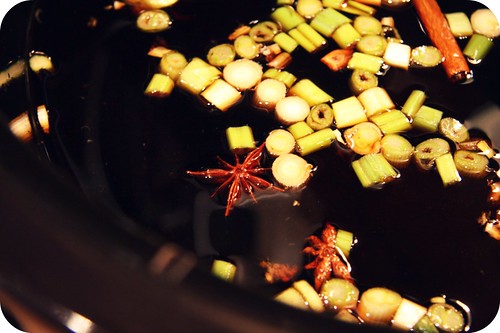
star anise close-up

Whole star anise is featured in the picture above, the delicate, flower-shaped item. Pretty, eh? I have never had a problem finding it in the regular spice section of a regular grocery store, but if you can't find it there, they sell it in bulk at co-ops (which means it will cost you like 10 cents if you just buy the two you need), and the cookbook from whence this recipe arrived suggests trying the Asian or Latin American foods sections of large grocery stores, or an Asian or Latin American market.

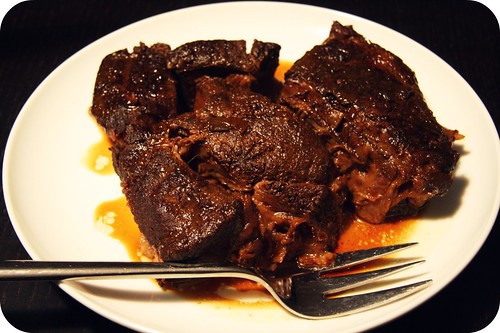
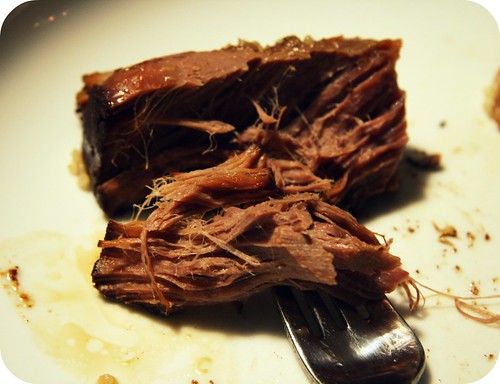
This recipe does everything to a big, juicy cut of meat that you want your slow cooker to do, AND THEN SOME. At first, when you see all the marbling (in addition to the 1" thick coating of fat) that a big, juicy rump roast has to offer, you're a little stunned and afraid. Will this give me a heart attack? you might wonder. (Probably not, but you can do your own research on that.) After slow-cooking the roast, however, the marbling produces the juiciest, tenderest roast you've ever tasted, and the thick coating can be scraped off easily with a fork (and given to your toddler, who needs it and loves it).

done!

This is the kind of slow-cooked roast that literally melts in your mouth.

perfect bite

I miss it so much.

Also: I wasn't kidding about reusable. At the end of the recipe there are instructions for how to strain, store, replenish, and reuse the sauce as many times as you'd like/feel comfortable doing.

Slow-and-Red-Cooked Rump Roast

Adapted only ever-so-slightly from Not Your Mother's Slow Cooker Cookbook (which doesn't have any pictures and might be a good cookbook to buy for your Kindle - something I'm aching to do but keep running into road blocks)
Yield: 6 servings

1 1/2 cups water
1 cup soy sauce
1/4 cup mirin (or any kind of rice wine or dry sherry or rice vinegar)
2 tablespoons honey (or sugar or something else sweet)
2 green onions, white and green parts, roughly chopped
1 tablespoon minced fresh ginger
2 cloves garlic, minced or pressed
2 whole star anises
1 stick cinnamon
1 strip orange zest, about 3" long
3-4 pound rump roast, blotted dry

Pour all the ingredients (except for the roast) into the slow cooker. Whisk together a bit, cover, and cook on HIGH for 30 minutes to an hour.

Put the roast in the slow cooker and carefully turn to coat both sides with liquid (you could just spoon or baste the liquid over the top and sides). Cover, turn the heat to LOW, and cook for 4 hours. Carefully turn over the roast, cover, and continue to cook on LOW for 3-4 hours more.

When ready to eat, remove the roast from the cooking liquid and place on a cutting board or serving plate. Allow to rest for about 10 minutes, then either carve into thin slices or shred with two forks. Drizzle with a few spoonfuls of the cooking liquid and serve. (Good with plain rice or alongside a Sweet Potato-Quinoa salad.)

To reserve and reuse the cooking liquid: Allow the remaining cooking liquid to cool a bit and then pour it through a strainer into a heavy glass jar (we use a Mason jar). Discard solids. Allow to cool completely, cover the jar, and refrigerate for 7-10 days, or freeze for up to 3 months. To reuse the red-cooking liquid, thaw if frozen, remove and discard the fat that has solidified on top, and pour the liquid into the slow cooker pot, proceeding with above recipe with fresh meat, OR making roast chicken (see below). So far the most we've used it is two times after the initial braising. We've never stored it in the freezer. I'm sure more than two times would be fine and freezing would be fine, but we don't eat meat that often and our freezer is tiny. The original recipe suggests that after every third or fourth use, you can "refresh the liquid by adding 1/2 cup soy sauce and half the seasonings". (To me, starting over seems just as well.)

To make roast chicken: You'll need a 3-4 pound whole chicken (broiler/fryer), giblets discarded. Rinse and dry the chicken well. Either stir all the ingredients together if you are starting from scratch, or pour the stored cooking liquid into the slow cooker. (You'll want about 3 cups of fluid, so add a little soy sauce and/or a little water to make up for any deficit.) Add the chicken to the red-cooking liquid in the slow cooker and turn it to coat. Leave it breast side up, cover, and cook on HIGH for 1 hour. Carefully (seriously - this is harder than is sounds like it should be, use both hands, one with large tongs and the other with a large fork inserted in the cavity) turn the chicken over, breast side down. Cover and cook on HIGH for 1-2 hours more, until an instant-read thermometer inserted into the thickest part of the thigh registers 180 degrees. Remove chicken from cooker. Either allow the chicken to cool for 10 minutes and then carve to serve immediately, drizzled with some sauce; or, to serve it cold (what we do), refrigerate the chicken, uncovered, before cutting or shredding it as you'd like. Follow above instructions to reserve sauce again.